


7
Hardware Installation
1.
Power off all devices including your HDMI source
and display.
2.
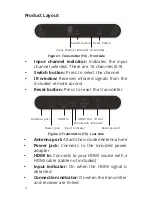
Attach the included antennas to the TX and RX.
3.
Connect your HDMI source to the Transmitter's
HDMI IN
connector.
4.
Connect your HDMI display to the transmitter's
HDMI OUT
. This connection is optional and
needed only when local moniting of the video
signal is desired.
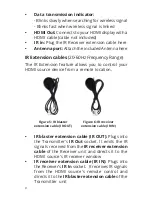
5.
Optional: Connect the
IR Blaster extension cable
to the Transmitter's
IR Out
. Face the eye towards
your HDMI device's IR window. This connection is
needed only if you need to control your HDMI
source from the remote location.
6.
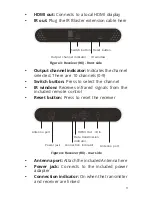
Connect your HDMI display to the Receiver's
HDMI OUT
connector with an HDMI cable (not
included).
7.
Optional: Connect the
IR Receiver extension
cable
to the Receiver's
IR In
. This connection is
needed only if you need to control your HDMI
source from the remote location.
8.
Plug the included power adapters into the
Transmitter's and Receiver's
Power Jacks
, then
plug both power adapters into reliable power
outlets.
9.
Power on your HDMI device and HDMI display.
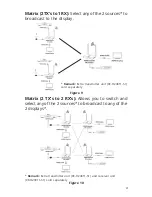
10. Use the included remote control or built-in switch
button to select the same channel for the TX and
RX (for channel pairing).
11. The
device
is ready for use.


