background image


© 2000

–2020 signotec GmbH 

signotec Delta Pen Display user manual 

Page 9 of 15 


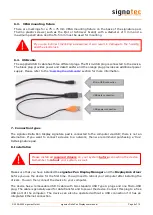
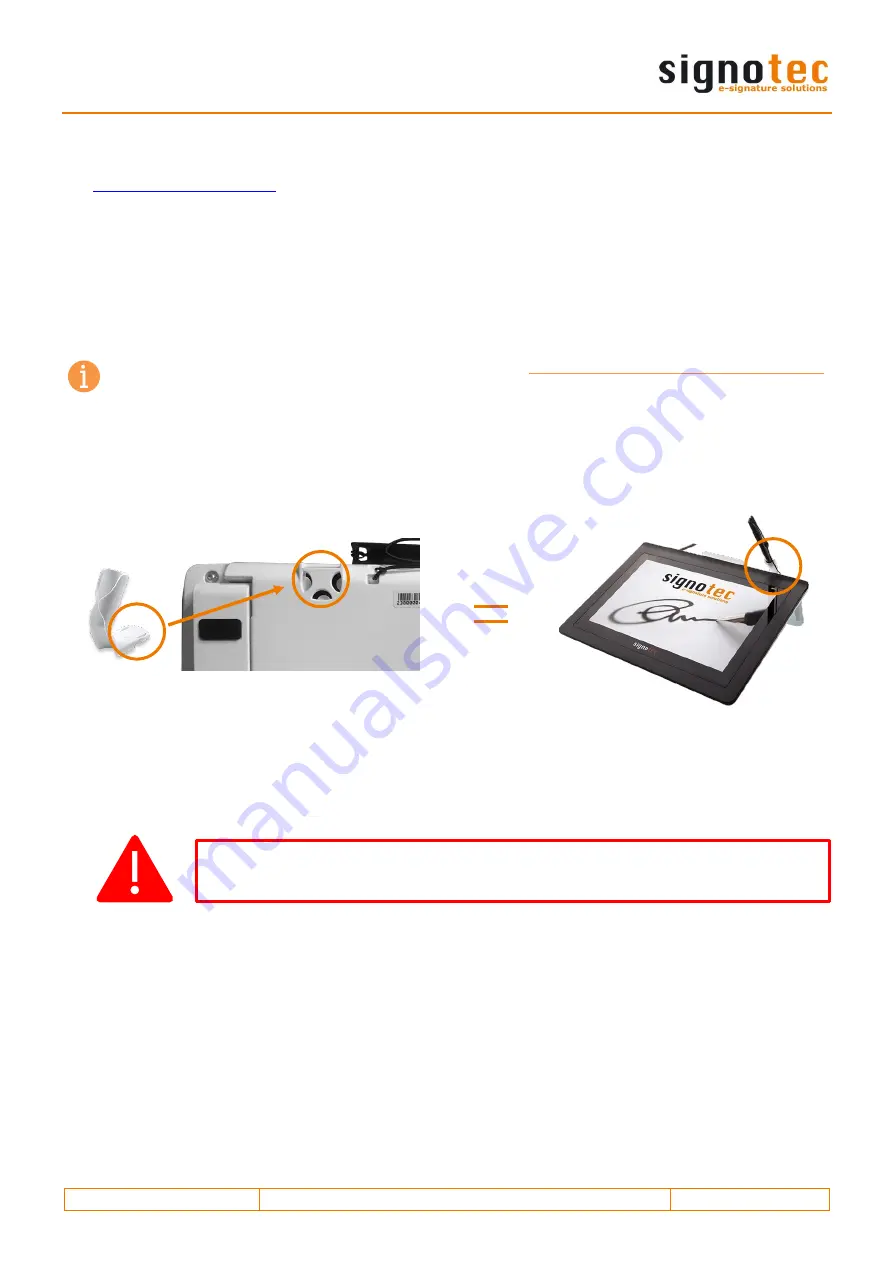
The cable is routed through a small channel on the back of the signature pad to provide tension relief. 
Attaching the cable without tension relief may damage the cable as well as the device. Please refer to 
the 

‘Inserting the USB cable’

 section for more information. 

Please connect the cable while taking all necessary safety precautions with regard to other devices 
and persons. The cable should be routed in such a way that under no circumstances is it constantly 
under tension. Do not place heavy objects on the cable, do not bend the cable repeatedly and do not 
exert strong pressure on the cable connections. Improper loading of the cable or the connector sockets 

may result in cable breakage or damage to the device’s components or your computer. Damage that 

can be attributed to these causes is not covered by warranty. 
 

Note:

 Please use only the supplied cable or appropriate spare parts from signotec to ensure 

correct functionality. The USB standard provides for a maximum cable length of three metres. 
signotec cannot guarantee functionality for longer cables.


8.1.


Assembling the pen holder 

There is a small cutout on the back of the device to attach the supplied, vertical pen holder. The 
rounded, flat  end of the pen holder needs to  be pressed into this  cutout, while applying a little 
pressure, in order to ensure that it stays in place. 


8.2.


Folding out/in the support 

The signotec Delta Pen Display features a foldout support on the back of the device. It can be easily 
folded  out  to  raise  the  device  up  at  an  angle.  In  this  manner,  the  device  can  be  conveniently 
adapted to the conditions wherever it is in use. The person signing the pad can read the contents 
easily and sign comfortably. 


When folding out the support, pay attention that it is folded out completely to 
ensure a stabile support. 

Содержание Delta

Страница 1: ...Version 2 0 as of 10 03 2020 www signotec com signotec Delta Touch Pen Display User Manual ...

Страница 2: ... THE USB CABLE 10 8 4 POWER SUPPLY VIA USB 10 8 5 USING AN EXTERNAL POWER SUPPLY UNIT 10 8 6 CONFIGURING THE DISPLAY SETTINGS 10 8 7 CONFIGURING THE PEN INPUT 11 8 8 CONFIGURING THE CAPACITIVE TOUCH 11 9 MAINTENANCE CARE AND CLEANING 12 9 1 PEN AND PEN CARTRIDGE 12 9 2 REPLACING THE CARTRIDGE 12 9 3 REPLACING THE PEN 12 9 4 CARE AND CLEANING 12 10 WARRANTY 13 10 1 DURATION AND NATURE OF THE WARRAN...

Страница 3: ...device func tions as a monitor and can be managed using the Windows settings to duplicate or extend the main display The supplied pen is used to capture writing characteristics biometrics accurately and in a high resolution 2 Symbols Special attention in this user manual is drawn to specific situations important notes and general information using a system of symbols and colours Caution Situations...

Страница 4: ...ly shaking from impacts or drops for example the device in order to prevent damage to the components The screen s surface can become damaged by pen tips that are pointy or have sharp edges Replace the pen tip or cartridge once it shows signs of use Never expose the product to high voltage electrostatic discharges or the build up of electro static charge on the LCD screen It could cause the LCD scr...

Страница 5: ... missing defective or visibly damaged component within the period of time from receipt of the product the product is considered to have been properly accepted and it remains at the sole discretion of the dealer to deliver or replace missing defective or damaged components after this period It is up to you as the customer to prove the non conformity of the delivery upon receipt of the product The s...

Страница 6: ...Delta Pen Display user manual Page 6 of 15 6 Product view 6 1 Front side 1 USB cable 4 Ergonomic pen with replaceable pen tip 2 Liquid Crystal Display LCD with a hardened glass surface 5 Cord attached to the device and pen 3 Status LED ...

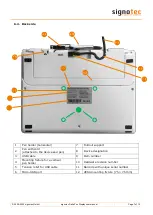
Страница 7: ...zontal 7 Foldout support 2 Pen with cord attached to the device and pen 8 Device designation 3 USB cable 9 Item number 4 Mounting fixture for a vertical pen holder 10 Hardware revision number 5 Tension relief for USB cable 11 Barcode with unique serial number 6 Micro USB port 12 VESA mounting fixture 75 75 mm ...

Страница 8: ...want to connect a device to a network then we recommend purchasing a true Delta signature pad 8 Installation Make sure that you have installed the signotec Pen Display Manager and the DisplayLink driver before you use the device for the first time You will need to reboot your computer after installing the drivers You can then connect the device to your computer The device has a removeable USB Y ca...

Страница 9: ...at can be attributed to these causes is not covered by warranty Note Please use only the supplied cable or appropriate spare parts from signotec to ensure correct functionality The USB standard provides for a maximum cable length of three metres signotec cannot guarantee functionality for longer cables 8 1 Assembling the pen holder There is a small cutout on the back of the device to attach the su...

Страница 10: ...rn on that it may turn off sporadically or that it will not react to the pen input 8 5 Using an external power supply unit Some systems do not provide the necessary 500 mA USB 2 0 or 900 mA USB 3 0 3 1 on each port as per USB specification If the device does not receive sufficient power it will not turn on or it may sporadically turn off You will need to use an optional power supply unit to provid...

Страница 11: ...t the desired monitor in the Mapping tab in order to link the pen input with the correct monitor All detected monitors are listed on the left side You can use the option Select the signotec Pen Display on the right to determine which of the connected monitors is the Pen Display The current selection has a red border The selection will determine the desired monitor for use and display of pen input ...

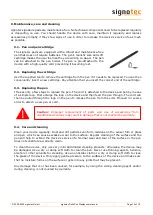
Страница 12: ...eans of a simple loop First enlarge the loop on the device and then feed the pen through The cord can then be pulled through the loop on the pen to release the pen from the cord Proceed in reverse order to attach a new pen or cord 9 4 Care and cleaning Clean your device regularly Dust and dirt particles can form residues on the sensor film or glass and pen which can cause excessive wear to the sur...

Страница 13: ...tely on request The costs and related risks of transport are not assumed by signotec c When purchasing the product it is possible to purchase an extension of the warranty period up to five years This option is a one off offer when ordering the product It is not possible to subsequently extend the warranty 10 2 Exclusion of warranty Excluded from the warranty are not an exhaustive list a Regular ma...

Страница 14: ... ticket form on our website in order to initiate a support request 11 2 Repairs In case of a defective signature pad or missing defective parts please use the appropriate RMA form on our website to send the device in for repair In addition our technology team is available at rma signotec de to answer all questions regarding repairs and spare parts Tip A repair is often possible outside the warrant...

Страница 15: ...E registration number is DE 41995888 13 Declarations of conformity The signotec pads comply with the current RoHS Directive of the European Union The signotec pads were tested to be compliant with the following standards EN 60950 1 11 2006 Information technology equipment Electrical safety EN 61000 6 1 Electromagnetic compatibility EMC Immunity EN 61000 6 3 Electromagnetic compatibility EMC Emissi...

Отзывы: