background image

SIEMENS se5880 Ethernet Security Router
User’s Guide

Chapter 7  Monitoring Router

Diagnostics

SIEMENS

77

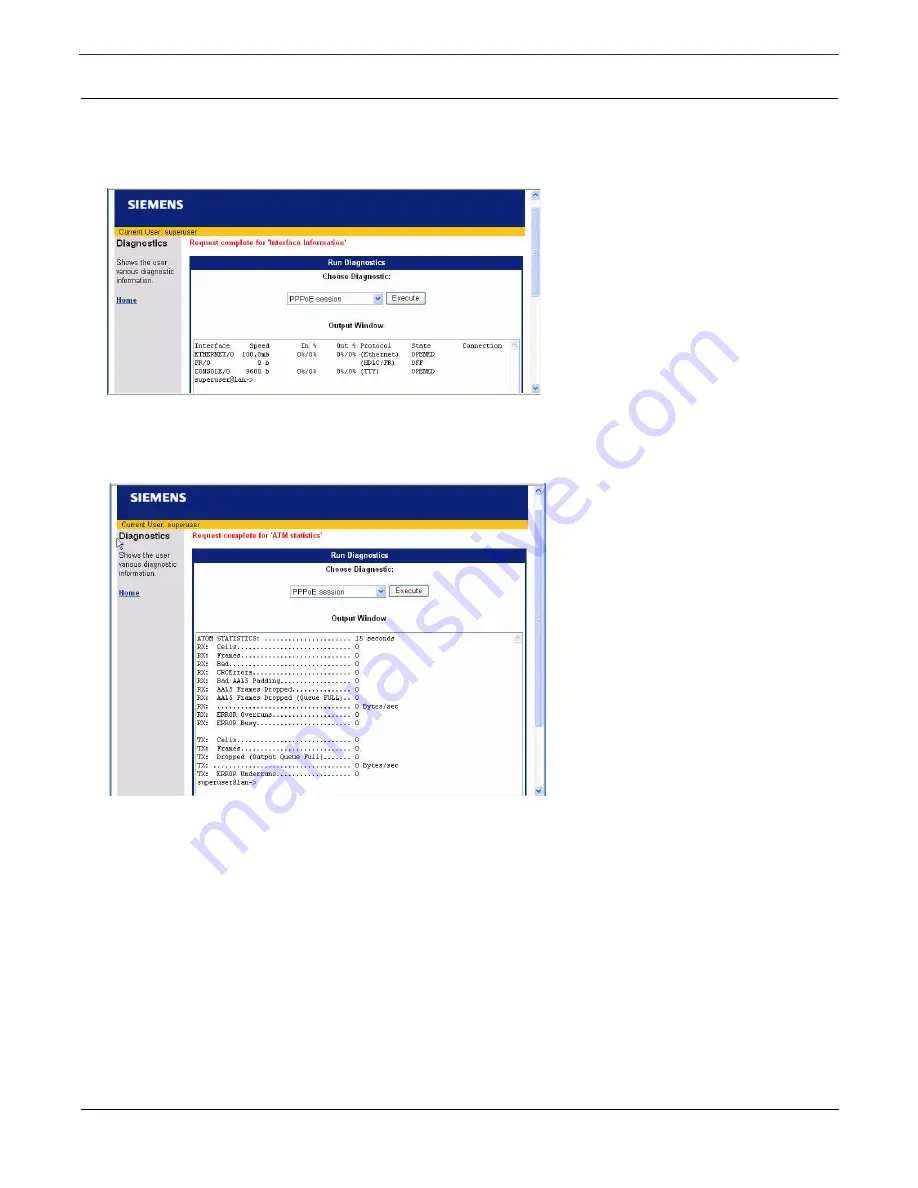
Interface Information

Select 

Interface information 

from the drop down menu and click 

Execute

 to display interface information.

ATM Statistics

Select 

ATM Statistics 

from the drop down menu and click 

Execute

 to display ATM statistics.

Содержание se5880

Страница 1: ...Part No 107 7950 001 SIEMENS Business Class se5880 Ethernet Security Router User s Guide ...

Страница 2: ...pies thereof Limited Warranty The following limited warranties provided by Siemens Subscriber Networks extend to the original end user of the Hardware licensee of the Software and are not assignable or transferable to any subsequent purchaser licensee 1 Hardware Siemens Subscriber Networks warrants that the Hardware will be free from defects in materials and workmanship and will perform substantia...

Страница 3: ... or amended except by a written instrument executed by a duly authorized officer of Siemens Subscriber Networks Siemens Subscriber Networks neither assumes nor authorizes any authorized service center or any other person or entity to assume for it any other obligation or liability beyond that which is expressly provided for in this Limited Warranty including the provider or seller of any extended ...

Страница 4: ...ing 3 Differentiated Services Quality of Service provisioning 3 IP Address Translation 3 PPP RFC 1661 3 Security 4 Chapter 2 Installation Installation Requirements 5 Package Contents 5 PC Requirements 5 Network Service Provider Requirements 5 Hardware Installation 6 PC Configuration 7 Windows 98 ME 7 Windows NT 4 8 Windows 2000 9 Windows XP 10 Mac OS 9 x 11 Mac OSX 12 Linux 13 Configuring the Rout...

Страница 5: ... Change Password 28 Access Control 29 Chapter 5 Advanced Setup DMZ 31 Router Clock 33 DHCP 34 QoS 35 Configure QoS Policy 36 Reorder QoS Policies 38 Routing Table Configuration 39 Dial Backup 40 Internal Modem 41 External Modem 42 Switch Management 43 Switch Mirror Configuration 44 Switch Age Time 45 Command Line Interface 46 File Editor 47 Chapter 6 Security Setup NAT 49 SNMP 50 SNMP IP Filter 51...

Страница 6: ...Advanced IKE IPSec Setup 65 VPN Log On 72 Chapter 7 Monitoring Router System Summary 73 Ethernet Interface Information 74 Remote Connection Information 74 IP Routing Information 75 System Information 75 Diagnostics 76 PPPoE Session 76 Interface Information 77 ATM Statistics 77 Routing Table Information 78 Files Information 78 Memory Usage 79 List All Configuration Data 79 TCP IP Statistics 80 ...

Страница 7: ... RX Green Green blinking Yellow blinking Off Ethernet link detected Receiving data on Untrusted interface Receiving data on DMZ port No current recieve traffic on Untrusted interface T TX Green Green blinking Off Ethernet link detected Transmitting data on Trusted interface No current transmit traffic on Trusted interface T RX Green Green blinking Off Ethernet link detected Receiving data on Trust...

Страница 8: ...sing Power Requirements AC Voltage 100 to 120V AC or 220 to 240V AC Frequency 50 60 Hz Consumption 10W maximum Built in power supply with on off switch Processor Motorola 64 MHz MPC857DSL 8 MB DRAM 4 MB Flash Memory 3DES DES MD5 SHA hardware assist Ethernet Interfaces Trusted Ethernet Interface Four port full duplex 10 100 BaseT Ethernet switch 8 pin RJ 45 Untrusted WAN Ethernet Interface Single f...

Страница 9: ...nterface User selectable fail restore criteria Supports L2TP and IPSec tunnel failover Optional modem connector DB9 or DB25 Routing TCP IP with RIP1 RFC 1058 RIP1 compatible and RIP2 RFC 1389 or static routing on the LAN or WAN Novell IPX with RIP SAP RFC 1552 DHCP client RFC 2132 DHCP server Automatic assignment of IP address mask default gateway and DNS server addresses to workstations RFC 2131 ...

Страница 10: ...PP RFC 1334 RFC 1994 Password control for Configuration Manager SNMP password and community name reassignment HTTP Syslog SNMP Telnet port reassignment access control list VPN support L2TP IPSec IKE DES 3DES Firewall IP filtering Stateful Firewall ICSA Compliant Secure Management Communications IPsec and SSH Radius Server support TACACS Server support VPN Hardware Acceleration support ...

Страница 11: ... from whom the equipment was purchased One Siemens se5880 Ethernet to Ethernet Router One Siemens Documentation CD ROM One AC power supply module w cord Two RJ 45 Ethernet cables One RJ 45 to DB 9 serial port adapter console One Siemens se5880 Quick Start Guide PC Requirements At a minimum your computer must be equipped with the following to successfully install the broadband Internet router CD RO...

Страница 12: ...puter 1 With the PC powered off connect your PC directly to any of the router s Ethernet ports of the back panel labeled TRUSTED using one of the RJ 45 cables provided You may also connect additional Ethernet devices to the router s Ethernet ports using additional RJ 45 cables not provided 2 Connect the other end of the Ethernet cable to the Ethernet port on the PC 3 Connect your Ethernet Interfac...

Страница 13: ...nted Select the Operating System installed on the PC connected to the router from the list below and follow the associated procedure Windows 98 ME 1 Click Start Control Panel Network This displays the Configuration tab on the Network window 2 Select TCP IP protocol for your network card 3 Click Properties This displays the TCP IP Properties window 4 Click the IP Address tab 5 Ensure that the Obtai...

Страница 14: ...the Network window 2 Click the Protocols tab 3 Select TCP IP Protocol from the Network Protocols list 4 Click Properties This displays the Microsoft TCP IP Properties window 5 Click the IP Address tab 6 On the IP Address tab select Obtain an IP address from a DHCP server 7 Click OK to close each dialog 8 Restart the PC to ensure it obtains an IP address from the router 9 Configure the router ...

Страница 15: ...w 3 Right click Local Area Connections and select Properties This displays the Local Area Connections Properties window 4 Select Internet Protocol TCP IP from the list of components 5 Click Properties This displays the Internet Protocol TCP IP Properties window 6 Ensure that the Obtain an IP address automatically and Obtain DNS server address automatically options are selected 7 Click OK to close ...

Страница 16: ... Connection window 3 Right click Local Area Connection then click Properties This displays the Local Area Connection Properties window 4 Select Internet Protocol TCP IP 5 Click Properties This displays the Internet Protocol TCP IP Properties window 6 Ensure the Obtain an IP address automatically and Obtain DNS server address automatically options are selected 7 Restart the PC to ensure it obtains ...

Страница 17: ...pple Control Panels TCP IP This displays the TCP IP Control Panel window 2 Select Ethernet from the Connect via drop down menu 3 Select Using DHCP Server from the Configure drop down menu 4 Complete the fields shown with any information supplied by your service provider 5 Close window and save changes 6 Configure the router ...

Страница 18: ...m Preferences window 2 Double click the Network icon under the Internet Network section This displays the Network window 3 Select Ethernet from the Connect via drop down menu 4 Select Using DHCP Server from the Configure drop down menu 5 Enter any information supplied by your service provider 6 Click Apply Now to save and exit the Network window 7 Configure the router ...

Страница 19: ...he Config window 2 Click the Adaptor tab 3 Enter any information specified by your service provider in the fields under the appropriate Adapter tab 4 When settings are completed click Accept This displays the Status of the system tab 5 To update the system status ensure that the Activate the changes button is highlighted then click Act Changes 6 Configure the router ...

Страница 20: ...agement Interface is accessible through most HTML browsers though Internet Explorer 4 0 or Netscape 4 0 and higher are recommended Refer to the Technical Reference Guide for details on managing the router through the CLI Establish Connection To establish a connection from your computer to the router through your Web browser 1 Open your Internet Explorer or Netscape Navigator Web browser 2 In the A...

Страница 21: ...ted interface information protocol and other network settings In the left navigation pane of this page there are configuration diagnostic and status and statistic options for the router In this document these features are grouped according to User Access Control Advanced Router Functions Security and Monitoring Health and Status Use the table below to locate detailed instructions for the desired f...

Страница 22: ... be made and you will need to begin again Untrusted Interface Configuration When you click Easy Setup in the left navigation pane of the Router Information page the Untrusted Interface Configuration page is displayed This page is used to enter information for the Untrusted WAN side Ethernet Interface that will communicate with the Internet access device for example broadband modem or similar Note ...

Страница 23: ...Translation NAT which allows multiple workstations on your LAN to share a single public IP address All outgoing traffic appears to originate from the router s IP address 5 Click Next This displays the Dynamic Host Configuration Protocol page Not Using PPPoE If you selected Not Using PPPoE from the Untrusted Interface Configuration page perform the following steps to specify how to obtain an IP add...

Страница 24: ...onfigure the Domain Name Service Obtain DNS information automatically The DNS server address will be learned when DHCP client requests are placed over the WAN link Configure DNS manually Define DNS server address manually from information you get from your service provider If you select this option provide the following information Domain Name The router s DNS domain name as assigned by your servi...

Страница 25: ...figure the Trusted Interface 1 In IP Address enter the network address of the router This address must be globally unique unless NAT has been enabled 2 In Subnet Mask enter the subnet mask to use along with the IP address to determine if specific LAN IP traffic should be forwarded to the WAN 3 Click Save and Reboot The router will reboot with the new configuration settings On completion of the reb...

Страница 26: ...figure the Radius Server and configure the Tacplus Server Click Home at anytime to return to the Router Information page To access one of these options click its link on the User Management page Use the table below to locate detailed instructions for the desired function User Management Manage user accounts Change Password Change user password Access Control Configure remote access to the router c...

Страница 27: ...ount the Password and Confirm Password values are not displayed If you leave them blank the password is not changed 3 Do one of the following to assign privileges to this user account Select one of the buttons at the top of this page to automatically assign pre set privileges to the user based on common user roles Refer to Management Classes for details on the privileges automatically assigned to ...

Страница 28: ...r Setup User Management SIEMENS 22 Deleting A User Account To delete a user account 1 Select the name of the account you want to delete in the Select User list on the User Management page then click Delete User 2 When prompted click OK to confirm the account deletion ...

Страница 29: ...ookup Config on the left navigation pane of the User Management page This displays the User Lookup Configuration page 2 Specify one of the following databases for Primary and for Secondary If the user is not found in the Primary database the Secondary database is searched Local Searches the local database for user login identification Either the primary or secondary lookup must be Local Radius Sea...

Страница 30: ...ge This displays the Secure Mode Configuration page 2 Do one of the following for Secure Mode Click the box next to Enabled so a check mark appears This enables secure mode Click the box next to Enabled so there is no check mark This disables secure mode 3 If you enabled secure mode select one of the following for LAN Interface and WAN Interface Trusted A trusted interface does not have to come ov...

Страница 31: ...e password is hidden using a method based on the RSA Message Digest Algorithm MD5 3 The access request is submitted to the RADIUS server via the network If no response is returned within a length of time the request is re sent a specified number of times The router s RADIUS client can also forward requests to a secondary server in the event that the primary server is down or unreachable Once the R...

Страница 32: ...e Tacplus Server Configuration page 2 In Timeout enter the number of seconds to between retry attempts when the Tacplus Server cannot be reached 3 In Retry enter the number of times the Tacplus Server should be contacted before attempting to connect to the secondary server 4 In CACHE Timeout enter the number of seconds that must pass before the user must be authenticated again 5 For Primary and op...

Страница 33: ... of the pre defined templates that group multiple management classes for a logically defined user type When using the template method Access privileges for WAN LAN and Console are granted by default The following table lists the privileges given to each logically defined user type Super User Mgmt Class read Network System Admin Voice Security Debug Mgmt Class write Network System Admin Voice Secur...

Страница 34: ...ds are changed from the Change Password page To change a user password 1 Click Change Password from the left navigation pane on the Router Information page This displays the Change Password page 2 Enter the new password for the Current User in Enter New Password and New Password again boxes 3 Click Apply to save the new password ...

Страница 35: ...e access A check in the box next to the method specifies enabled If disabled any access restriction specification is disregarded Telnet Web SNMP 3 For each remote access method selected specify any access restrictions This can be one of the following No access restrictions Remote access method is enabled and not restricted This setting allows access from all hosts Allowed from LAN Limits access to...

Страница 36: ... actively manages network resources to sustain service levels for priority applications Routing Table Configuration Configure multiple routing tables for a single host Dial Backup Enable a backup connection to the Internet through an internal V 90 model 5835 only or an external asynchronous modem connected to the Console port Switch Management Manage the Ethernet 10 100 switching ports located on ...

Страница 37: ...only when you require this special level of unrestricted access as it leaves your router and network exposed to the Internet with no firewall protection To configure DMZ 1 Click DMZ on the left navigation pane of the Router Information page This displays the DMZ Configuration page 2 Select enable or disable to enable or disable DMZ Port 3 If you selected enable enter the IP Address and Subnet Mask...

Страница 38: ...Note that a list of network clients that are currently leasing their IP addresses from the pool are shown in Current DHCP Leases List From left to right the following information is presented for each client Client IP The leased IP address assigned to the specific client State Whether the IP address is enabled or disabled Host Name Name of the host leasing the specific IP address Expires mm dd yy ...

Страница 39: ...set the current date and time on the router 1 Click Router Clock on the left navigation pane of the Router Information page This displays the Current Date and Time page 2 The current date and time from your PC are displayed in the field labeled Current Date and Time To synchronize the date and time on your router with the current date and time displayed click Synchronize Router Clock ...

Страница 40: ...r status select Enable or Disable from LAN DHCP Server Status Disabled the router will not act as a DHCP server 3 To change the start and ending address range of the IP address pool enter the starting address in First IP Address and the ending address in Last IP Address 4 Click Apply Note that a list of network clients that are currently leasing their IP addresses from the pool are shown in Curren...

Страница 41: ...ing from QoS Status to enable or disable QoS On QoS will forward packets and set diffserv marking based on user defined mapping rules and enabled QoS policies Off QoS will forward packets based on pre defined mapping rules and enabled QoS policies 3 To enable or disable marking of the Differentiated Services field of the IP header select one of the following from DiffServ Status On QoS will mark t...

Страница 42: ...navigation pane of the QoS Configuration page This displays the QoS Policy Setting page 2 Click Create This displays the QoS Policy Setting page To modify or delete an existing policy select the policy in the IP Policy List drop down menu and click Modify or Delete 3 In Policy Name enter a unique name to identify the policy 4 In Status select Enable or Disable to enable or disable the QoS policy D...

Страница 43: ...Disables source port checking 9 In Destination Port select one of the following From To Enter the destination port or range of destination ports to match in the destination port check Drop down menu Select the application to match in the destination port check Do not care Disables destination port checking 10 Select the priority to place on this policy if match criteria is met This can be Normal L...

Страница 44: ...y List drop down menu and click Move This expands the QoS Policy Setting page 2 To specify the new location select one of the following to the end Moves the policy to the end of the policy list before policy Select the name of the policy where you want to move the Policy in the policy name drop down menu The policy will be moved to the location immediately preceding the policy specified in before ...

Страница 45: ...ives a packet whose source address is 192 168 254 10 it checks if that address is within the address range defined for a virtual routing table If it is the virtual routing table is used to route the packet If it is not the default routing table is used instead To configure additional routing tables 1 Click Routing Table Configuration on the left navigation pane of the Router Information page This ...

Страница 46: ...on page This displays the Dial Backup page 2 Click Enable Dial Backup 3 Enter the User name and Password to use for the dial up connection This information is provided by your ISP 4 In Phone number enter the ISP s dial up phone number 5 Optionally in Alternate Phone number enter an alternate phone number to use in the event the first number is unavailable 6 Next to Using select one of the followin...

Страница 47: ...the backup port The default minutes is 3 2 In Retry WAN Timer enter the number of minutes that must pass before checking to see if the Wan line has been restored 3 IP Addresses lists the addresses the router uses to ping via the WAN link If the ping tests fail the router switches data traffic to the backup port until the retry period expires again 4 In Ping Success Rate enter the ping success rate...

Страница 48: ...the router uses to ping via the DSL link If the ping tests fail the router switches data traffic to the backup port until the retry period expires again 4 In Ping Success Rate enter the ping success rate that must be met As soon as the success rate falls below this number DSL Link failure is assumed and switch over to backup is performed This success rate applies to all addresses in the IP Address...

Страница 49: ...ivity Labeling is provided for port identification To manage the switches using the web interface click Switch Management on the left navigation pane of the Router Information page This displays the Switch Status page The Switch Status page provides a graphical representation of the switch port information including connection speed mode and port status and provides links to switch management page...

Страница 50: ...facilitates the unobtrusive monitoring of source port activity To configure port traffic mirroring 1 Click Mirror Capture Configuration from the left navigation pane of the Switch Status page This displays the Switch Mirror Configuration page 2 Under Mirror Port select one or more of the mapped ports or source ports you want to mirror 3 Under Capture Port select the port to receive the Ethernet tr...

Страница 51: ...C address entry is removed from the table containing this information To configure Switch Age Time 1 Click Aging Time Configuration from the left navigation pane of the Switch Status page This displays the Switch Aging Time Configuration page 2 In Ageing Time enter the number of seconds that must pass before the port MAC address entry is removed from the table This can be a number between 10 and 1...

Страница 52: ...face to enter CLI commands Refer to the Command Line Interface Guide for available commands To execute a CLI command from the web interface 1 Click Command Line Interface on the left navigation pane of the Router Information window This displays the Execute a CLI command page 2 In the field provided enter the desired command 3 Click Execute The response will be displayed in the Output Window ...

Страница 53: ...File Editor on the left navigation pane of the Router Information window This displays the File Editor page with a list of stored files in the left navigation pane 2 Do one of the following To create a new file enter file text in the editing window and the name of the file in File name in filename txt format then click Save To edit an existing file click the file you want to edit on the left navig...

Страница 54: ...nt and a management agent Secure Shell Secure Shell SSH secures network services over an insecure network such as the public Internet Firewall Scripts Secures network and data communications with built in firewall capabilities A firewall is any combination of hardware and software that secures a network and traffic on the network to prevent interception or intrusion Stateful Firewall An IP filteri...

Страница 55: ... section of this page select Enable or Disable to specify whether or not multiple VPN clients are allowed Enabled multiple VPN clients are allowed disabled only a single VPN client is allowed 5 Click Apply 6 On the Wan side of the Inbound NAT Setting section on this page do one of the following Select the network service you are configuring from the Service drop down menu for Easy Setup This confi...

Страница 56: ...ests The community setting allows the SNMP manager to request information from a community rather than each node agent individually 3 In Port Number select one of the following Port Number Enter the desired number in the field next to Port Number Disable Disables the SNMP port Default Sets the port to the default port of 161 4 In Trusted Interfaces select one or both of the following LAN designate...

Страница 57: ...ge The current IP filter ranges are displayed in the IP Addresses 2 In Start IP Range enter the first IP address in the range to be filtered 3 In End IP Range enter the last IP address in the range to be filtered 4 Optionally click LAN 5 Click Add IP Range SNMP Password An SNMP password is used to authenticate an SNMP Manager Once authenticated SNMP set requests will be performed To set the SNMP P...

Страница 58: ...of traffic to and from the system including passwords SSH also provides secure FTP type file transfers To access the Secure Shell configuration pages click Secure Shell from the left navigation pane on the Router Information page This displays the Secure Shell SSH Configuration List page This page displays the current SSH configuration settings as well as provides links to the other SSH configurat...

Страница 59: ...ption type is realized and the client adheres to the server encryption mode If the encryption method is not supported on the client side the connection will fail 4 For MAC select the type of Message Authentication Code to use for the SSH connection 5 For Port select one of the following to specify the port that the SSH server listens on Default Sets the SSH port to the default port of 22 Disable D...

Страница 60: ...urce file Refer to the section title Key Generator for details on generating the key pair on the router To load the key pair from a source file 1 Click Load Keys on the left navigation pane of the Secure Shell SSH Configuration List page This displays the Load Private and Public Keys from file page 2 Do one of the following Select Public key to load a public key from a file Select Private key to l...

Страница 61: ...our to complete When started the user will be redirected to a status page that is refreshed every 60 seconds The status page indicates whether the task is running When the task is no longer running results are displayed Once the task is started you can close this page and the Keygen function will continue You can reopen it anytime by clicking Key Generator Status on the left navigation pane of the...

Страница 62: ...rchitecture and requirements of their network Siemens Subscriber Networks cannot be liable for security violations due to inadequate or incorrect firewall configurations To load a firewall script perform the following 1 Click Firewall Scripts on the left navigation pane of the Secure Shell SSH Configuration List page This displays the Run a Firewall Script page 2 Select the desired Firewall Streng...

Страница 63: ... packet is accepted Stateful firewall intercepts outgoing packets and gathers information from them for example IP address information port number to create state information for that session When an incoming packet is received the Stateful Firewall checks the packet against the state information it has maintained and accepts the packet if the packet belongs to the session This section describes h...

Страница 64: ...ust be dropped before a message is logged to the console The default value is 200 packets per second 5 In UDP Packet Threshold Setting specify the number of UDP Packets per second that can be received When this number is exceeded the firewall blocks any subsequent UDP packets The default value is 1000 UDP packets per second 6 In ICMP Ping Packet Threshold Setting specify the number of ICMP Ping Pa...

Страница 65: ...ation pane of the Stateful Firewall Configuration page This displays the Firewall Dropped Packet List page 2 Do one of the following Specify the number of dropped packets to view from 1 to 200 Netscape 4 users may have to wait a very long time to get the complete list of 200 displayed Select a smaller value for viewing if this is the case Click Default to view the most recent 200 dropped packets 3...

Страница 66: ...en a packet is evaluated the Deny rules are applied first then the Allow rules 2 From the Allow Rule List drop down menu optionally select the list of protocols where the rule is allowed If you do not select an Allow Rule List you must select a Deny Rule List 3 From the Deny Rule List drop down menu optionally select the list of protocols where the rule is denied If you do not select a Deny Rule L...

Страница 67: ...CMP Type for matching the packet source and ICMP Code for matching the packet destination Application Select the application that must match from the Application drop down menu 6 For Source and Destination under Address optionally specify the First IP and Last IP addresses to define the source and destination IP address boundaries to apply to the firewall rule The packet must have a source destina...

Страница 68: ...of the Stateful Firewall Configuration page This displays the Firewall Rule Configuration page 2 Click Delete This expands the Firewall Rule Configuration page 3 Select the rule list s or range of rules you want to delete To delete a single rule only enter a number in the from field When entering a range of rules to be deleted the rule range specified is inclusive of the first and last rules 4 Cli...

Страница 69: ...ons IPSec sessions are established through Security Associations SAs that enable secure devices to negotiate a level of security attributes needed for a Virtual Private Network VPN To configure IKE IPSec 1 Click IKE IPSec Configuration from the left navigation pane of the Router Information window This displays the IKE IPSec Information page 2 Select one of the following from the left navigation p...

Страница 70: ...r a logical name for an IKE Peer This name is of no importance to the remote IKE peer Choose a name that is meaningful to you 3 In Pre shared Secret enter a case sensitive character string used for authentication This secret can be up to 256 characters with no spaces or non printable characters The pre shared secret must be mutually agreed upon by both parties to the IKE connection 4 In Peer Gatew...

Страница 71: ...cludes a Create button for each category to create new IKE and IPSec definitions This section describes how to perform the following tasks IKE Peers Create IKE peers IKE peers are those devices known to your ADSL Internal Modem as capable of participating in IKE connections IKE Proposals Create IKE proposals IKE I proposals specify how packets will be encrypted authenticated for Phase I IKE IPSec ...

Страница 72: ...In Pre shared Secret enter a case sensitive character string used for authentication This secret can be up to 256 characters with no spaces or non printable characters The pre shared secret must be mutually agreed upon by both parties to the IKE connection 4 In Peer Gateway IP Address enter the IP address of the gateway at the remote end of the IKE connection If the remote IKE peer does not have a...

Страница 73: ...I exchange MD5 Performs message authentication using Message Digest 5 SHA1 Performs message authentication using Secure Hashing Algorithm 1 default 4 From the Diffie Hellman Oakley Group drop down menu select one of the following Diffie Hellman key generation groups to use during IKE Phase I exchange Group 1 Uses Diffie Hellman Group 1 768 bits Group 2 Uses Diffie Hellman Group 2 1024 bits 5 From ...

Страница 74: ...ortance to the remote IKE peer 3 From the AH Authentication Scheme drop down menu select one of the following to use as the hashing algorithm for Authentication Header AH IPSec NONE Requests no AH encapsulation MD5 Requests AH encapsulation and authenticate using Message Digest 5 SHA1 Requests AH encapsulation and authenticate using Secure Hashing Algorithm 1 4 From the ESP Authentication Scheme d...

Страница 75: ...6 From the IP Compression Method drop down menu select one of the following to specify the algorithm to to use to compress IPSec packets LZS IP compression or None 7 In Phase II Proposal Lifetime enter the number of seconds after the IPSec SA expires The default is 1800 seconds Once this time is elapsed the system will renegotiate the IKE connection 8 In Phase II Proposal Life Data enter the amoun...

Страница 76: ...IPSec proposal to be used with this policy The IKE IPSec proposal must be already defined as an IKE IPSec Proposal 5 From the PFS Group drop down menu select one of the following the Diffie Hellman group to use for Perfect Forward Secrecy Perfect Forward Secrecy enhances the security of the key exchange In the event of a key becoming compromised only the data protected by that compromised key beco...

Страница 77: ...ill connect using this policy 11 In Source Port enter the port that will be the source of TCP UDP traffic under this policy You can specify All ports a port number or an IP application associated with a particular port Because port numbers are TCP and UDP specific a port filter is effective only when the protocol filter is TCP or UDP 12 In Destination Port enter the port that will be the destinati...

Страница 78: ... of IP packets providing the level of security required by Virtual Private Networks VPNs To start an IPSec session 1 Click VPN Log On on the left navigation pane of the Router Information page This displays the VPN Log On page 2 For Feature click enable 3 For Available IPSEC tunnels select the tunnel you wish to use for the IPSec session 4 Click log on corresponding to the tunnel you selected You ...

Страница 79: ...ew system summary information click System Summary on the left navigation pane of the Router Information page This displays the System Summary page From the System Summary page you can view information for the following Ethernet interface Remote connections IP Routing System System Summary View status and statistical information Diagnostics Run diagnostic programs to determine potential problems ...

Страница 80: ...rmation Click Ethernet Info on the left navigation pane of the System Summary page to display information about the Ethernet interface Remote Connection Information Click Remote Info on the left navigation pane of the System Summary page to display information about remote connections for all entries in the Remote Router database ...

Страница 81: ...ng Information Click IP Routing Info on the left navigation pane of the System Summary page to display information about the active interfaces in the IP routing table System Information Click System Info on the left navigation pane of the System Summary page to display general information for select system settings ...

Страница 82: ...vigation pane of the Router Information page This displays the Run Diagnostics page From the Run Diagnostics page you can view information for the following PPPoE session Interface information ATM statistics Routing Table information Files information Memory usage List all configuration data TCP IP statistics PPPoE Session Select PPPoE session from the drop down menu and click Execute to display P...

Страница 83: ...itoring Router Diagnostics SIEMENS 77 Interface Information Select Interface information from the drop down menu and click Execute to display interface information ATM Statistics Select ATM Statistics from the drop down menu and click Execute to display ATM statistics ...

Страница 84: ... SIEMENS 78 Routing Table Information Select Routing Table information from the drop down menu and click Execute to display information about the configured routing tables Files Information Select Files information from the drop down menu and click Execute to display files store on the router ...

Страница 85: ...ter Diagnostics SIEMENS 79 Memory Usage Select Memory usage from the drop down menu and click Execute to display memory usage information List All Configuration Data Select List all configuration data from the drop down menu and click Execute to display configuration information ...

Страница 86: ...se5880 Ethernet Security Router User s Guide Chapter 7 Monitoring Router Diagnostics SIEMENS 80 TCP IP Statistics Select TCP IP statistics from the drop down menu and click Execute to display TCP IP information ...

Отзывы: