Configuring the Climatix touch panel
Configure the network
6
A6V11521026_en--_b
23 | 31
6.3
Configure the network
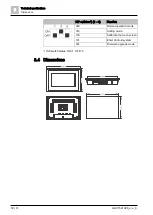
To configure the network setting of the Climatix touch panel:
1.
Press Network.
2.
Choose either automatic address assignment via DHCP, or a Static IP for the
Climatix touch panel.
–
If DHCP is chosen, the Climatix touch panel obtains an automatic IP from a
DHCP server on the Ethernet.
–
If Static IP is chosen, enter valid values in the IP address, Subnet Mask,
Gateway, and DNS address text box.
3.
Press Ok to confirm.
The button
is not functional in the current release.
Port is only for application downloading.
6.4
Test the serial ports
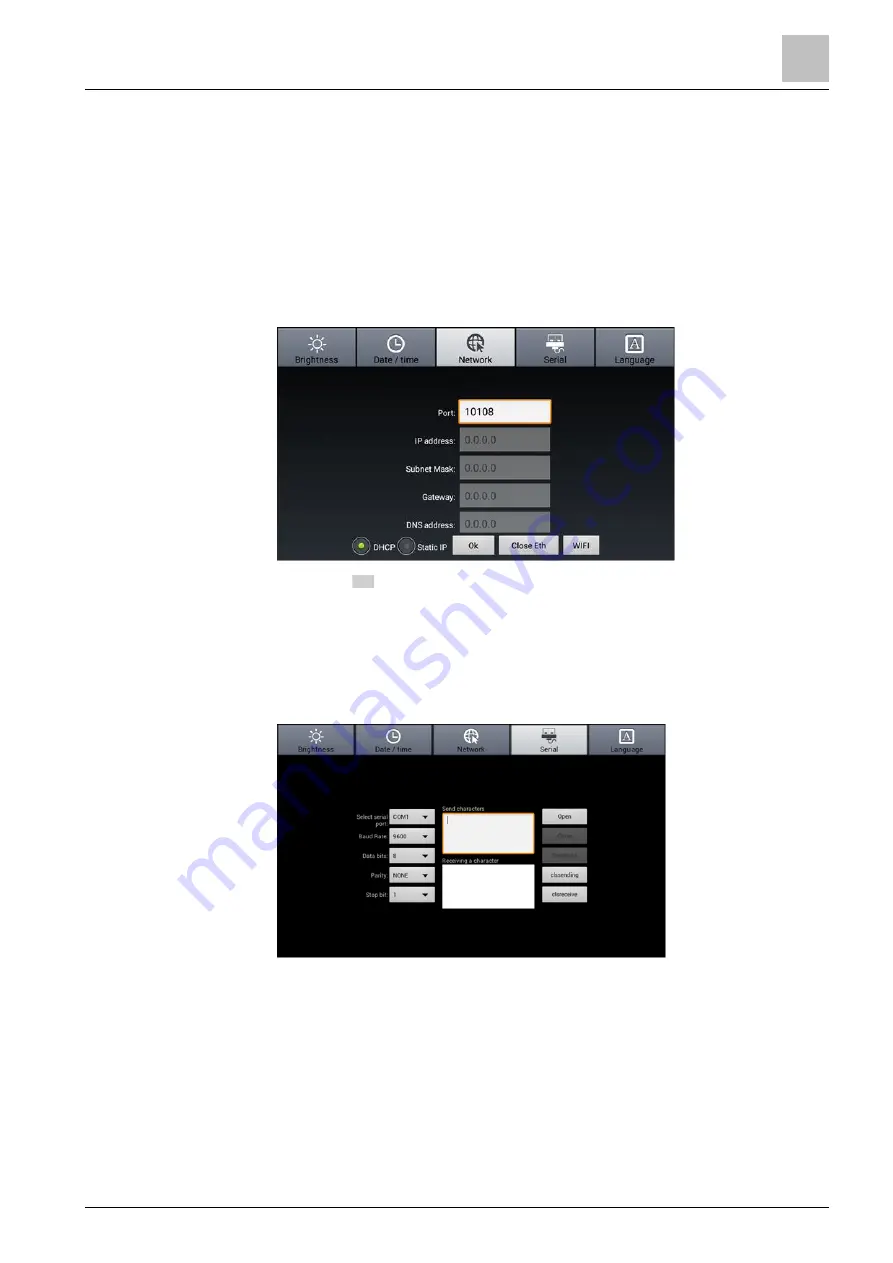
To test the serial ports:
1.
Press Serial.
2.
Connect the desired serial port (for example, COM) on the Climatix touch panel
to a PC with serial port monitor software running.
3.
Configure the parameters in both HMI setting and the monitor software as the
same. Below is an example of the parameter settings:
–
Select serial port: COM
–
Baud rate: 9600
–
Data bits: 8
–
Parity: None
–
Stop bit: 1
4.
Press Open in both setting mode and monitor software to open the serial port.
WIFI
Note:
Содержание Climatix POL8T2.70/STD
Страница 4: ......


