background image

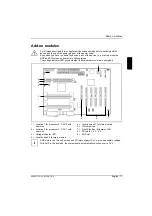
Add-on modules

14 - English

A26361-D1160-Z120-4-7419

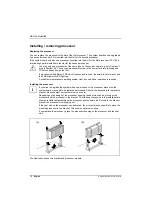
Removing C-RIMM or memory module

1

1

2

Ê 

Flip the holders to the right and left of the location outwards (1).

Ê 

Slide the module out of its slot (2).

Installing C-RIMM module or memory module

!

Note the coding of the module!

2

2

Ê 

Flip the holders on each side of the relevant location outwards.

Ê 

Insert the module in the slot (1) while folding the side holders up until the module engages (2).

Содержание Fujitsu D1160

Страница 1: ... S Y S T E M B A U G R U P P E D 1 1 6 0 S Y S T E M B O A R D D 1 1 6 0 S Y S T E M B O A R D D 1 1 6 0 S Y S T E M B O A R D D 1 1 6 0 S Y S T E M B O A R D D 1 1 6 0 TECHNISCHES HANDBUCH TECHNISCHES HANDBUCH TECHNISCHES HANDBUCH TECHNISCHES HANDBUCH TECHNICAL MANUAL TECHNICAL MANUAL TECHNICAL MANUAL TECHNICAL MANUAL ...

Страница 2: ...mationen zu unseren Produkten Tipps Updates usw finden Sie im Internet http www fujitsu siemens com Is there any technical problem or other question you need clarified Please contact one of our service partners your sales partner your sales outlet The latest information on our products tips updates etc can be found on the Internet under http www fujitsu siemens com ...

Страница 3: ......

Страница 4: ...ciclaggio Denna handbok är tryckt på recyclingpapper Dit handboek werd op recycling papier gedrukt Herausgegeben von Published by Fujitsu Siemens Computers GmbH Bestell Nr Order No A26361 D1160 Z120 1 7419 A26361 D1160 Z120 1 7419 A26361 D1160 Z120 1 7419 A26361 D1160 Z120 1 7419 Printed in the Federal Republic of Germany AG 0100 01 00 A26361 D1160 Z120 1 7419 SYSTEMBAUGRUPPE D1160 SYSTEM BOARD D1...

Страница 5: ...Systembaugruppe D1160 System Board D1160 Technisches Handbuch Technical Manual Deutsch E li h English Ausgabe Januar 2000 January 2000 edition ...

Страница 6: ...dere auch auszugsweise die der Übersetzung des Nachdrucks der Wiedergabe durch Kopieren oder ähnliche Verfahren Zuwiderhandlungen verpflichten zu Schadenersatz Alle Rechte vorbehalten insbesondere für den Fall der Patenterteilung oder GM Eintragung Liefermöglichkeiten und technische Änderungen vorbehalten Intel Pentium and Celeron are registered trademarks and MMX and OverDrive are trademarks of I...

Страница 7: ... system monitoring 7 Hard disk connection 8 LAN port 8 PCI bus interrupts 8 Settings 9 Processor s clock speed 9 Setting USB power jumper 10 Recovering System BIOS switch 2 10 Write protection for floppy disks switch 3 10 Add on modules 11 Installing removing processor 12 Upgrading main memory 13 Installing network board with WOL 15 Replacing the lithium battery 15 Glossary 16 ...

Страница 8: ......

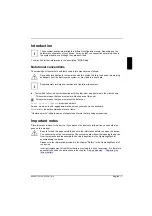
Страница 9: ...is point Ú Ú Ú Ú This symbol means that you must press the Enter key Texts in this typeface are screen outputs Texts in this bold typeface are the entries you make via the keyboard Texts in italics indicate commands or menu items Quotation marks indicate names of chapters and terms that are being emphasized Important notes Store this manual close to the device If you pass on the device to third pa...

Страница 10: ...ds To prevent damage to the system board or the components and conductors on it please take great care when you insert or remove boards Take care above all to ensure that extension boards are slotted in straight without damaging components or conductors on the system board or any other components for example EMI spring contacts Be especially careful with the locking mechanisms catches centering pi...

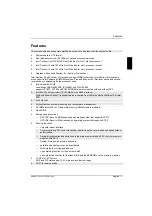
Страница 11: ...ithout ECC Intel 82559 LAN controller 10 100 Mbit s with RJ45 interface WOL with Magic Packetä is supported as is booting from LAN with Bootix LAN BootP or Intel PXE Alert On LAN Fujitsu Siemens system monitoring and temperature management 2 RIMM slots for 64 to 1 Gbyte main memory RIMM memory modules Flash BIOS Energy saving functions ACPI S3 Save to RAM requires an operating system that supports...

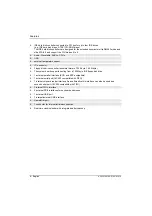
Страница 12: ...ler possible formats 720 Kbyte 1 44 Mbyte The system board supports booting from a 120 Mbyte IDE floppy disk drive 1 external parallel interface ECP and EPP compatible 1 external serial port 16C550 compatible with FIFO 1 internal chipcard reader interface As an alternative this interface can also be used as a second serial port 16C550 compatible with FIFO 1 internal WOL interface 2 external PS 2 i...

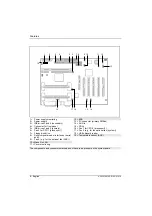
Страница 13: ...AGP PCI 5 PCI 2 PCI 1 PCI 3 PCI 4 1 PS 2 keyboard port 2 PS 2 mouse port 3 Parallel port 4 Serial port 1 5 USB port B 6 USB port A 7 LAN port 8 Game Midi port 9a Audio Line Out 9b Audio Line In 9c Audio Micro In The components and connectors marked do not have to be present on the system board ...

Страница 14: ... 2 primary 6 Fan 2 for CPU 1 processor 1 7 Floppy disk drive 8 Serial chipcard reader interface or serial port 2 9 Fan 4 e g for the optional fan AUX 10 Wake On LAN 11 Cover monitoring 12 IrDA 13 I C connector primary SMBus 14 AUX In 15 CD In 16 Fan 1 for CPU 0 processor 0 17 Fan 3 e g for the optional fan system 18 USB chipcard reader 19 Temperature sensor AUX The components and connectors marked...

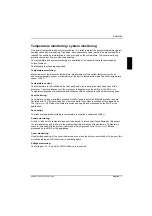
Страница 15: ...ocessor is dependent on the setting in the BIOS setup Temperature dependent processor speed control enables a reduced fan speed decreasing noise Fan monitoring Fans that are no longer available blocked or sticky fans are detected Blocked or sticky fans are operated with 12 V pulse voltage Fans removed while the system is switched off are signaled by the Display news LED when the system is switched...

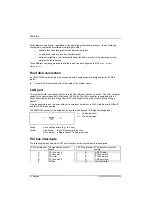
Страница 16: ...ller as an option This LAN controller supports the transfer speeds 10 Mbit s and 100 Mbit s The LAN controller is equipped with a 3 Kbyte transmission and receiving buffer FIFO and supports the WOL function through Magic Packetä It is also possible to boot a device without its own boot hard disk via LAN Here Bootix LAN BootP and Intel PXE are supported The LAN RJ45 connector is equipped with a yel...

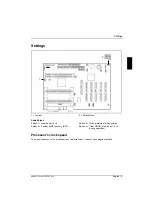
Страница 17: ...Jumper 2 Switch block Switch block Switch 1 must be set to off Switch 2 System BIOS recovery RCV Switch 3 Write protection for floppy disk Switch 4 Clear CMOS must be set to off during operation Processor s clock speed The clock frequency of the processor is set automatically It cannot be changed manually ...

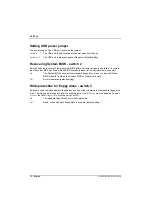
Страница 18: ...iskette please call our customer service center On The System BIOS executes from standard floppy drive A and the inserted Flash BIOS Diskette restores the System BIOS on the system board Off Normal operation default setting Write protection for floppy disks switch 3 Switch 3 is used to define whether floppy disks can be written or deleted in the standard floppy disk drive To write and delete flopp...

Страница 19: ...ndicator LED shows whether the main memory slots are energized AGP PCI 5 PCI 2 PCI 1 PCI 3 PCI 4 1 2 3 6 7 4 5 8 9 1 Location 1 for processor 0 CPU 0 with heat sink 2 Location 2 for processor 1 CPU 1 with heat sink 3 Voltage indicator LED 4 Location bank 0 for main memory 5 Location bank 1 for main memory 6 Lithium battery 7 Front Side Bus Mismatch LED 8 PCI slots 1 2 3 4 5 9 AGP slot i AGP slots ...

Страница 20: ...ights up A suitable multiprocessor operating system must be used if dual operation is required Installing the processor i If you wish to upgrade the system with a new processor the processor bracket on the system board may need to be replaced beforehand Should it be necessary to replace the bracket please contact our customer service center Depending on the design of the processor housing the heat...

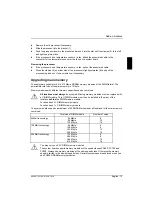
Страница 21: ... memory is 1 Gbyte Memory modules with different memory capacities can be combined All locations must always be occupied Missing memory modules must be replaced with a C RIMM module This C RIMM module must then be installed in the order of the locations behind the RIMM memory module Location bank 0 RIMM memory module Location bank 1 C RIMM memory module The system board supports a maximum of 32 RD...

Страница 22: ... right and left of the location outwards 1 Ê Slide the module out of its slot 2 Installing C RIMM module or memory module Note the coding of the module 2 2 Ê Flip the holders on each side of the relevant location outwards Ê Insert the module in the slot 1 while folding the side holders up until the module engages 2 ...

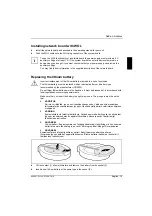
Страница 23: ...e disposed of in accordance with local regulations concerning special waste Make sure that you insert the battery the right way round The plus pole must be on the top VAROITUS Paristo voi räjähtää jos se on virheellisesti asennettu Vaihda paristo ainoastaan laitevalmistajan suosittelemaan tyyppiin Hävitä käytetty paristo valmistajan ohjeiden mukaisesti VARNING Explosionsfara vid felaktigt batterib...

Страница 24: ...ontroller FIFO First In First Out FSB Front Side Bus FWH Firmware Hub GMCH Graphics and Memory Controller Hub I2 C Inter Integrated Circuit IAPC Instantly Available Power Managed Desktop PC Design ICH I O Controller Hub IDE Intelligent Drive Electronics IPSEC Internet Protocol Security ISA Industrial Standard Architecture LAN Local Area Network LSA LAN Desk Service Agent MCH Memory Controller Hub ...

Отзывы: