8
Last update: 01.08.2013
GENIUS
Assembly instructions
Fitting the door contact
Important
: Do not allow the magnet to come directly into contact with the face plate as this can permanently magnetise
the face plate or the drive rod behind it.
•
The GENIUS door lock uses an integrated door contact (reed sensor) to detect whether the door is open or shut.
•
The reed sensor is triggered by a counter part (magnet) that must be fitted on the frame side. This magnet is vital to
the correct functioning of the GENIUS door lock.
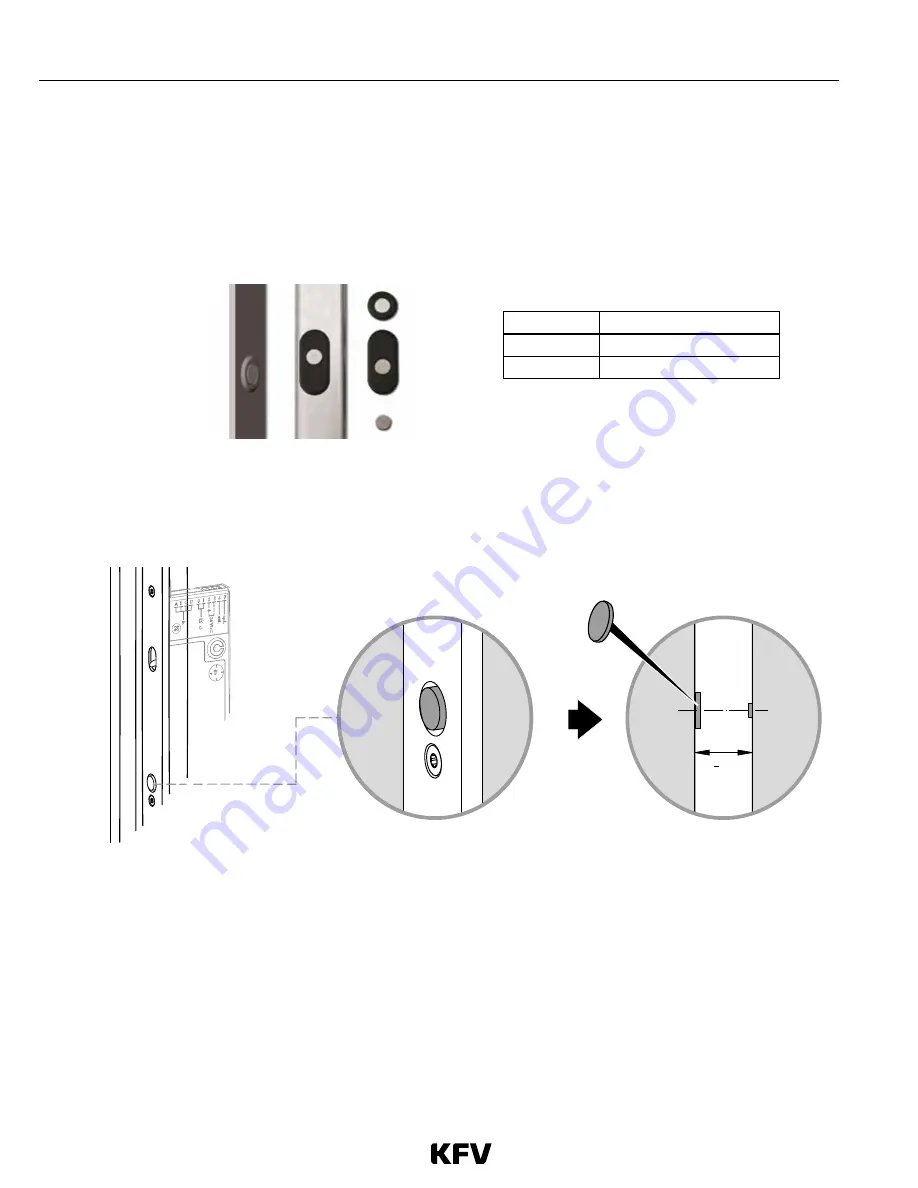
Fig. 14: Available magnet bushes
1
Round magnet bush
2
Oval magnet bush
3
Adhesive magnet bush
•
The magnet must be positioned centrally in relation to the reed sensor (vertical tolerance: ±1 mm).
•
The distance (airgap) between the locking rail/face plate must be 4 mm (tolerance ±3 mm).
min. 4
3
+
Fig. 15: Position of reed sensor in relation to magnet
•
If using striker plates for timber doors, the magnet and holder can be fitted directly in the frame.
•
If using striker plates for PVC or aluminium doors, a single AS23xx striker plate (without backing) must be fitted in the
area of the reed sensor together with a plastic component, with magnet, suitably sized to fit the hole.
•
If the GENIUS door lock is used in conjunction with inactive leaf hardware, 1 mm-thick magnets must be bonded in
place exactly opposite the reed sensor, because no holes may be made in the inactive leaf hardware.
› Degrease the rail on the inactive leaf hardware in the area where the magnets are to be applied.
› Determine the necessary positions and number of magnets. If necessary, used several magnets one on top of
the other.
› Mark the desired magnet position, remove the backing film from the magnet, and stick it in place.
Содержание KVF Genius
Страница 2: ......
Страница 15: ...13 Last update 01 08 2013 Assembly instructions GENIUS ...


