background image

4

AEROMAT 100 

Installation and operating instructions

03.2020

Installation

Prerequisites for installation

•  The position from which the outdoor air is drawn in must be selected in such way that any nearby emission sources have 

as little impact as possible on the quality of the air being drawn in.

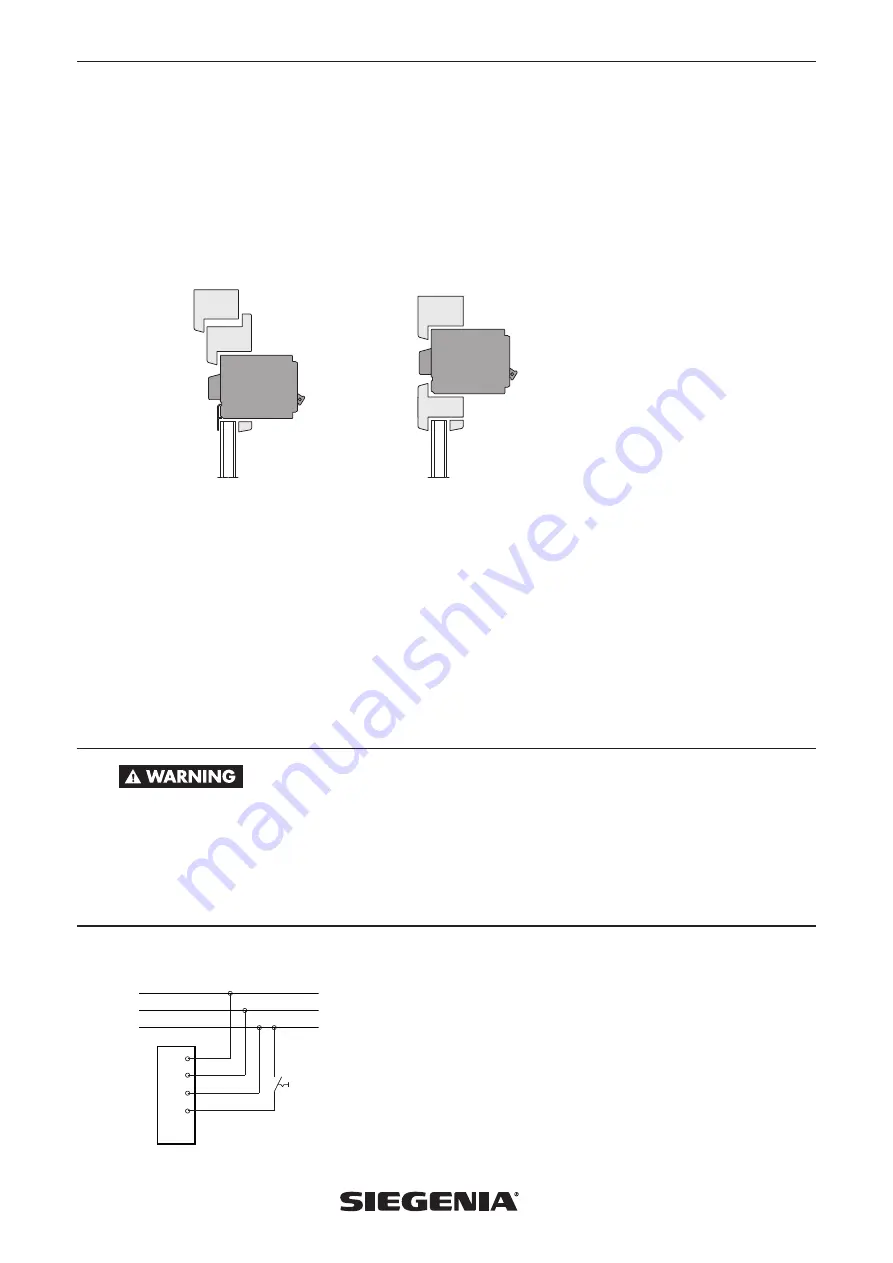
•  Installation options:

Installation in glazing rebate

AEROMAT

100

Installation in impost

AEROMAT

100

Installation sequence

1.   Carefully remove AEROMAT 100 from the packaging. We recommend placing the unit on a soft surface 

(e.g. cardboard or blanket) during installation.

2.  Close the fan flap to prevent contamination (e.g. dust) from entering the unit during installation. 
3.   Install the AEROMAT 100 in its intended installation position and seal it in accordance with the installation directives 

applicable on site.

4.  Check AEROMAT 100 for cleanliness prior to starting it up. If necessary, thoroughly clean the unit as described in our 

operating instructions.

Mains supply

The AEROMAT 100 Type DK is connected to the 230 V AC mains power supply using an external switch.

Exposed electrical components. 

Risk of fatal injury from electric shock or fire.

› 

 Work on a 230 V AC mains power supply may only be performed by a qualified electrician.

› 

 All work on the 230 V AC mains power supply must be carried out in compliance with the current German VDE 
regulations (e.g. VDE 0100) and any relevant country-specific requirements.

› 

 Switch off or unscrew the fuses.

Important:

 If the AEROMAT 100 Type DK is connected directly to the 230 V AC mains power supply, a mains isolator 

must be installed by the customer.

PE

1

2

3

4

S1

PE

N

L1

blue
brown
black

(ventilator open)

Содержание AERO

Страница 1: ...AERO Sound absorbing ventilator AEROMAT 100 Window systems Door systems Comfort systems ASSEMBLY AND OPERATING INSTRUCTIONS ...

Страница 2: ...s 03 2020 Contents Target group of this documentation 3 Correct use 3 Safety notices 3 Installation 4 Mains supply 4 Unit function 5 Operation 6 Maintenance 7 Cleaning 7 Accessories 9 Technical specifications 10 Dimensions 10 Feedback on documentation 10 ...

Страница 3: ...hich the express consent of SIEGENIA has not been obtained is strictly prohibited SIEGENIA accepts no liability whatsoever for any material losses or injury to people caused by failure to comply with this stipulation Safety notices Type DK This unit can be used by children aged 8 and above as well as by people with physical sensory or mental difficulties or with a lack of experience and knowledge ...

Страница 4: ...position and seal it in accordance with the installation directives applicable on site 4 Check AEROMAT 100 for cleanliness prior to starting it up If necessary thoroughly clean the unit as described in our operating instructions Mains supply The AEROMAT 100 Type DK is connected to the 230 V AC mains power supply using an external switch Exposed electrical components Risk of fatal injury from elect...

Страница 5: ...ories chapter Operating lever Item 3 The airflow can be continuously set using the operating lever Attention Units with electric fan flaps cannot be operated manually via the operating lever Pressure differential operation The room is ventilated as the indoor and outdoor air pressures are equalised Normally air flows from outside into the room Depending on the weather conditions the wind pressure ...

Страница 6: ...ructions 03 2020 Operation AEROMAT 100 Type D 1 Open the fan flap 2 Close the fan flap 1 2 AEROMAT 100 Type DK 1 Open the fan flap operating lever opens automatically 2 Close the fan flap operating lever closes automatically Öffnen Schliessen 2 1 ...

Страница 7: ...trength decrease the compression strength Besides cleaning it the AEROMAT 100 does not need any further maintenance If any malfunctions arise please contact SIEGENIA Cleaning Cleaning the unit Switch off all poles of the mains cable If required clean the outer parts of the AEROMAT 100 s casing using a suitable cloth which has been moistened with a mild soap sud or washing up liquid Never use clean...

Страница 8: ...r 2 1 3 Lift front panel using a flathead screwdriver 4 Pull out front panel and sealing plate from behind and pull off of the operating lever 3 4 5 Lift off sealing plate and front panel to clean 6 Remove foamed lining if necessary 7 Make sure that the operating rod a does not slip out not of the sealing plate s profile 8 After cleaning reassemble in the reverse order 5 6 a ...

Страница 9: ...in which the ventilator is mounted If the ventilator is mounted in a moveable window sash for example it is essential to also attach the rod to the same sash profile Assembling the rod in three steps Note Depending on the assembly situation the pin b and the clip c must be shortened 1 Insert pin Open the fan flap of the AEROMAT 100 thus moving the operating lever into the upper position Insert the...

Страница 10: ... h 13 m h 14 m h 17 m h 18 m h 20 m h 35 m h 13 m h 18 m h 21 m h 25 m h 27 m h 30 m h 43 m h Electrical connection 230 V max 0 01 A Type DK only Protection class I Type DK only U value calculated in accordance with ISO 6946 1 68 W m K Cable outlet on the operating side of the ventilator unit cable approx 1 5 m Surface EV1 silver or RAL 9016 white coated RAL special colours on request Dimensions S...

Страница 11: ......

Страница 12: ... 85 4861080 China Phone 86 316 5998198 France Phone 33 3 89618131 Germany Phone 49 271 39310 Great Britain Phone 44 2476 622000 Hungary Phone 36 76 500810 Italy Phone 39 02 9353601 Poland Phone 48 77 4477700 Russia Phone 7 495 7211762 South Korea Phone 82 31 7985590 Switzerland Phone 41 33 3461010 Turkey Phone 90 216 5934151 Ukraine Phone 38 044 4054969 You can find address details for our interna...

Отзывы: