


3. Power on the transmitter.
4. Press the
SYNC
button on the receiver.
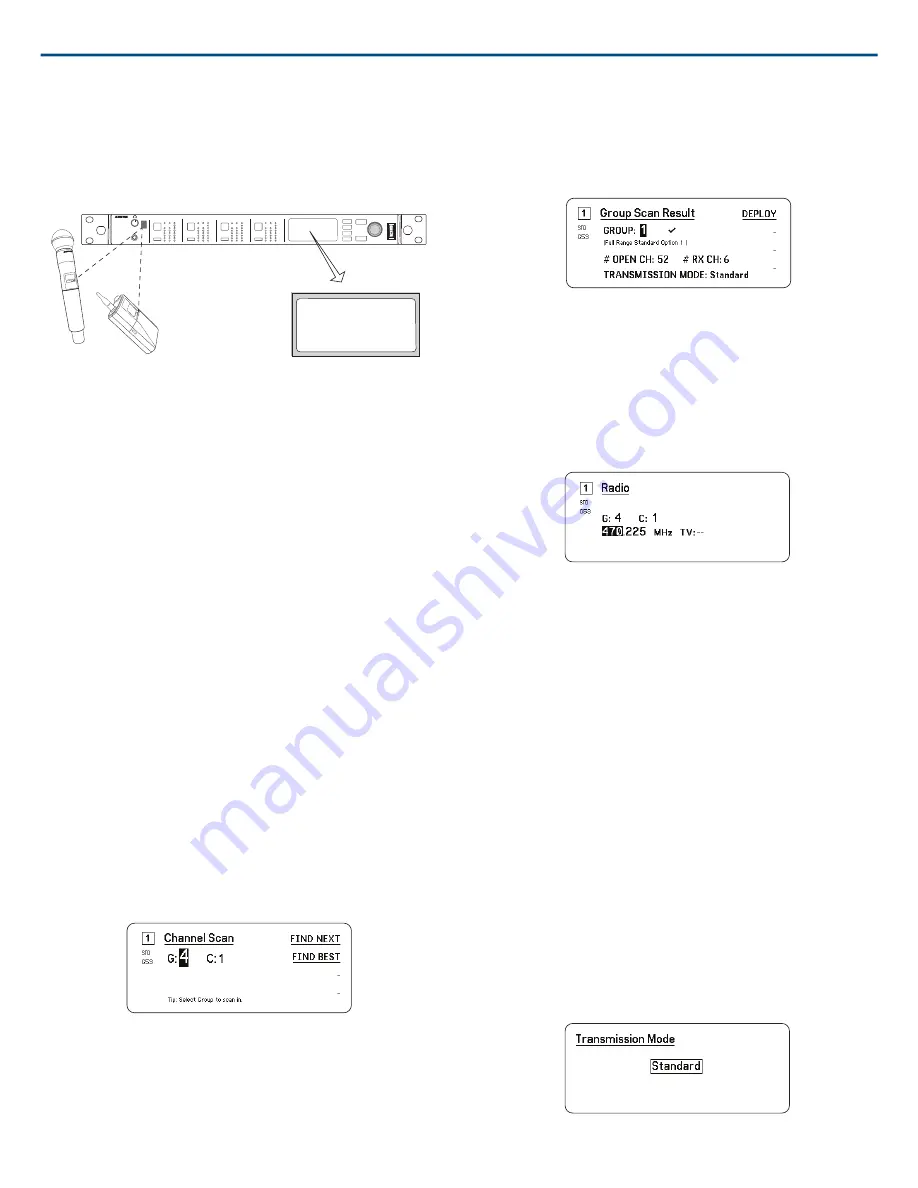
5. Align the IR windows until the receiver IR sync LED illuminates red. When
complete,
Sync Success!
appears. The transmitter and receiver are now
tuned to the same frequency.
<15 cm (6 in.)
AD4Q
Axient Digital
Wireless Receiver
POWER
PUSH
CONTROL
NAVIGATE
IR
RF
A
B
OL
AUDIO
SYNC
4
RX 4
RF
A
B
OL
AUDIO
SYNC
3
RX 3
RF
A
B
OL
AUDIO
SYNC
2
RX 2
RF
A
B
OL
AUDIO
SYNC
1
RX 1
ULXD4
Digital Wireless Receiver
sync
Sync Success!
Note:
Any change to the encryption status on the receiver such as enabling/ dis-
abling encryption or requesting a new encryption key, requires a sync to send
the settings to the transmitter.
Channel Scan and Group Scan
The receiver can scan individual channels to find available frequencies or
scan an entire group to find the most available frequencies.
Important!
Before you begin:
Turn off
all transmitters for the systems you are setting up. (This prevents
them from interfering with the frequency scan.)
Turn on
the following potential sources of interference so they are operating
as they would be during the presentation or performance (the scan will detect
and avoid any interference they generate).
•
Other wireless systems or devices
•
Computers
•
CD players
•
Large LED panels
•
Effects processors
Channel Scan
Channel scan automatically scans a group to find available frequencies.
1. From a selected channel menu:
Channel Scan
2. To begin, use the control wheel to choose the group you'd like to scan.
3. Choose one of the following options:
⁃
Find Next
: Finds the next available frequency within the group
⁃
Find Best
: Finds the best available frequency based on RSSI
4. Press
ENTER
to confirm your frequency selection.
Group Scan
Group scan automatically finds all available frequencies within a group.
Available frequencies can be automatically deployed to receiver channels
and other networked components.
1. From a selected channel:
Group Scan
.
2. Press
Start
to scan the group.
3. When the scan is complete, the number of frequencies found are shown
on the display.
4. Select
Deploy
to assign frequencies to components on the network.
Setting the Frequency Manually
Frequencies can be set manually for each channel if you need to select
specific values.
1. Select a channel and navigate to the
Radio
menu.
2. Use the control wheel to select the
FREQ (MHz)
parameter.
3. Press the control wheel to enable editing and rotate to change the value.
4. Press
ENTER
to save changes.
Transmission Modes
The receiver offers two transmission modes to efficiently manage the available
spectrum used by the transmitters:
Standard Mode
Standard mode employs channel spacing that allows for the operation of
transmitters at various power levels.
Standard mode is ideal for situations where spectrum is not limited or when
you need to operate transmitters at higher power levels to increase range.
High Density Mode
High Density mode creates additional bandwidth for more channels in
crowded RF environments by transmitting at 2 mW RF power and narrowing
the modulation bandwidth.
High Density mode is ideal for applications where many channels are needed
in a confined area, transmission distances are short, and the number of
available frequencies is limited.
Note: Operation mode varies according to region. In Brazil, High Density
mode is used.
Selecting a Transmission Mode
1. From the
Device Configuration
menu: Device RF>Transmission Mode
2. Press the control wheel to enable editing. Rotate the wheel to select a
mode.
3. Press
ENTER
to save.
Shure Incorporated
AD4Q
Digital Quad Receiver
11/21
2017/10/25


