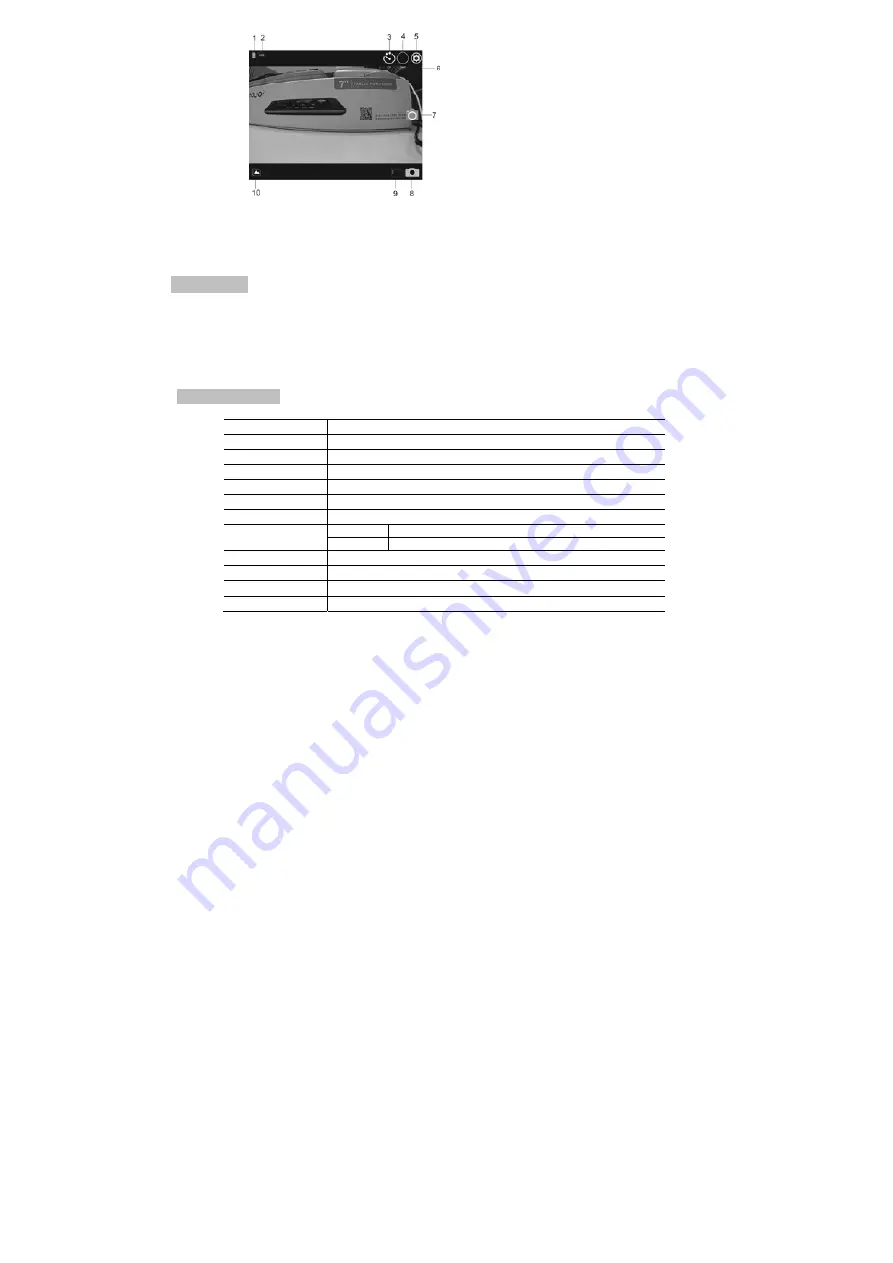
background image


1. Battery level of the DV 

                                                                                                                                    2. White balance 


    3. Time-lapse selfie                 

                                                                                                                                    4. 

Photo size


                                                                                                                                    5. 

Setting (enter setting menu)


6. Counter, indicating photo numbers left. 

                                                                                                                                    7. 

Photo button


8. Photo mode 

                                                                                                                                    9. Video mode 


10. Playback mode


Note: 1 You need to insert a TF card into the DV to take or download picture via your phone or tablet;   

2.After successful connection between your phone/tablet and the DV, the Wi-Fi indicator will remain on. 


A

A

p

p

p

p

l

l

i

i

c

c

a

a

t

t

i

i

o

o

n

n


o

o

n

n


P

P

C

C


The DV supports plug-and-play function. After power on, the mobile hard disk mode is activated automatically when the DV is 

connected to PC via USB cable.   

The icon of the mobile hard disk will display in “My computer”. The photos taken will be saved in I:\jpg folder (I is the volume label 

of your mobile hard disk which varies); the car files will be saved in I:\CAR folder.   

Note: 

driver is not required to use mobile hard disk function on Windows 2000 or above.   


T

T

e

e

c

c

h

h

n

n

i

i

c

c

a

a

l

l


p

p

a

a

r

r

a

a

m

m

e

e

t

t

e

e

r

r

s

s


Image sensor 

5m pixels (CMOS) 

Function mode 

Video recording

photo taking

Driving mode

Playback mode, 

Lens 

F=2.4


f=3.1mm  

LCD  

1.77 

’’

LCD  

Photo resolution


12M

10M

8M

5M 

3M 

Video resolution


1920x1080(FHD/30fps

1280x720

HD/60fps

 1280x720

HD/30fps


White balance


Auto/Daylight/Cloudy/Tungsten/Fluorescent 

Video 

H.264(MOV) 

File format


Photo


JPG 

Storage 

TF card (up to 32GB) 

USB port 

High speed USB 2.0/3.0 port 

Power Supply 

Powered by external 1100mah battery 

Dimensions  

59*41*23.5mm


Label Statement: 

This device complies with part 15 of the FCC Rules. Operation is subject to the following two conditions: (1) This device may not cause 

harmful interference, and (2) this device must accept any interference received, including interference that may cause undesired operation.


FCC Statement 

This equipment has been tested and found to comply with the limits for a Class B digital device, pursuant to part 15 of the FCC rules. These 

limits are designed to provide reasonable protection against harmful interference in a residential installation. This equipment generates, uses, 

and can radiate radio frequency energy and, if not installed and used in accordance with the instructions, 

may cause harmful interference to radio communications. However, there is no guarantee that interference will not occur in a particular 

installation. 


Содержание Archos

Страница 1: ...ystem requirement Before using and operating your DV please know the minimum system requirement to operate it and we strongly recommend you to use a better PC to operate the product for best performance of the DV The minimum system requirement to operate the product is as below System Requirements Operating System Microsoft system Microsoft Window 2000 XP Vista 7 8 Apple system Mac OS X ver 10 0 0...

Страница 2: ...wer off when the camera is in idle state press the power button for about 2 seconds for power off Auto power off when the camera s idling time reaches power saving mode 1 minute in default the camera screen will be automatically turned off for energy saving When in power saving mode the work indicating lamp will be on normally In case no operation is made for 3 minutes after in power saving mode i...

Страница 3: ...con indicate recording mode 2 Recording frame rate 3 Indicate video size FHD 1080P 30FPS HD 720P 60FPS HD 720P 30FPS available 4 Indicate video quality 5 Recording time indicate minutes left for recording 6 Battery icon indicate current battery volume 7 REC icon flash when recording 8 Recording length Video mode Recording mode 2 Driving Mode Operation After power on shortly press power button for ...

Страница 4: ...n in the image below Choose CAR indicates playing back car recording file mode Choose VIDEO indicates playing back normal recording file mode Choose JPG indicates photo file mode Play Image Introduction Recording file imgae 1 Playback mode icon 2 Indicate current file sequence number total files number 3 Indicate dater of the recording day 4 Indicate recording time parameter 5 Play timer 6 Operati...

Страница 5: ...te control allows you to power on off the DV and to take photo or video at 30M away without operating on DV directly just press a button to achieve the said functions Remark press any button the two indicator lamps at both sides will light in red at the same time 3 Power on off the DV by remote control Power on press and hold the button until the indicator goes off the DV will turn on and the buzz...

Страница 6: ... be output into the HDTV automatically and you can browse HD videos and photos that are recorded or taken in the HDTV APP support Android and iOS I Installing the APP 1 For Android search for SYMAGIX2 at Play Store and install the APP according to the prompt or scan the QR code on the package to install Signal transmission Diagram of connection ...

Страница 7: ... on your phone or tablet then you can operate the DV 1 Battery level of the DV 2 WIFI signal icon 3 White balance 4 Enter playback mode 5 Video resolution 6 Setting enter setting menu 7 Rest recording time 8 Video button 9 Video mode 10 Photo mode III iOS APP 1 Install SYMAGIX2 APP obtained from your vendor or internet on your iPhone or iPad the icon will display on the screen 2 Insert card and po...

Страница 8: ...ing Driving mode Playback mode Lens F 2 4 f 3 1mm LCD 1 77 LCD Photo resolution 12M 10M 8M 5M 3M Video resolution 1920x1080 FHD 30fps 1280x720 HD 60fps 1280x720 HD 30fps White balance Auto Daylight Cloudy Tungsten Fluorescent Video H 264 MOV File format Photo JPG Storage TF card up to 32GB USB port High speed USB 2 0 3 0 port Power Supply Powered by external 1100mah battery Dimensions 59 41 23 5mm...

Страница 9: ...ent or relocate the receiving antenna Increase the separation between the equipment and receiver Connect the equipment into an outlet on a circuit different from that to which the receiver is connected Consult the dealer or an experienced radio TV technician for help To assure continued compliance any changes or modifications not expressly approved by the party responsible for compliance could voi...

Отзывы: