8
Ordercode: 50058
Quick DMX Rack 1024
08)
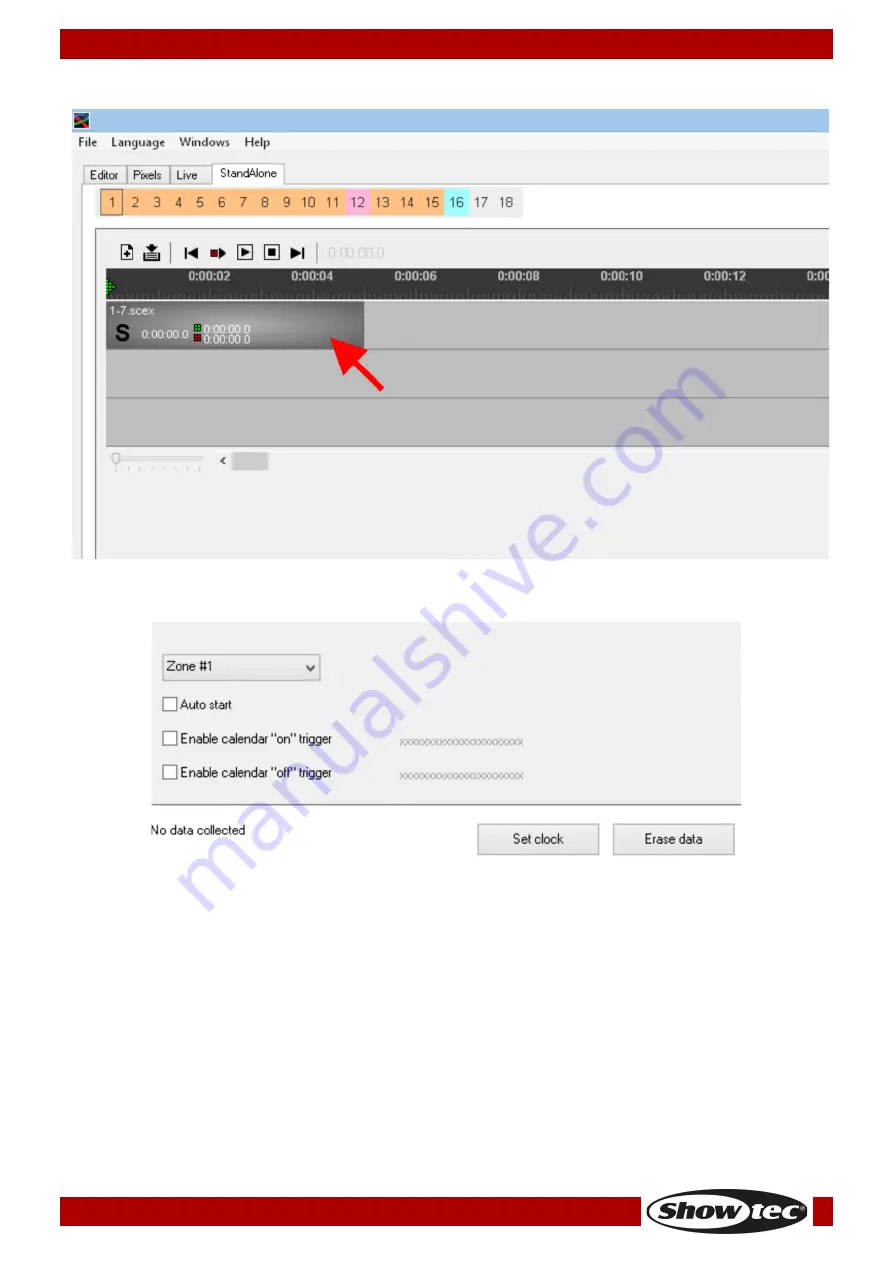
Select the previously created DMX file. It will now appear on the timeline:
09)
Use drag-and-drop method to move the scene/chase/pixel/generator across the timeline.
10)
Edit the following options:
Zones: The Quick DMX Rack 1024 handles the programmed DMX files using the LTP principle
(Latest Takes Priority). This means that only one DMX file can be played at a time. In order to be
able to play multiple DMX files at the same time, assign them to different zones. The Quick DMX
Rack 1024 offers 4 zones to choose from. Once you have assigned the zones to the desired
memory buttons, the memory buttons in the software will light in one of the following colors: zone
#1 (orange), zone #2 (blue), zone #3 (pink) and zone #4 (yellow).
Auto start: When this option is checked, the scene/chase will start automatically upon start-up of
the Quick DMX Rack 1024, without triggering.
Enable calendar “on” trigger: Click on “Edit” to set the starting time of the scene/chase.
Enable calendar “off” trigger: Click on “Edit” to set the stopping time of the scene/chase.
11)
Repeat steps 3-9 in order to assign DMX files to the remaining memory buttons.
12)
Once you have assigned all the scenes/chases to the desired buttons, click on “Upload Data,” in
order to export data to the Quick DMX Rack 1024 and wait until the process is finished.


