INSTALLATION INSTRUCTIONS:
Cow Model:
1.
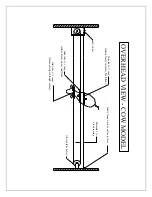
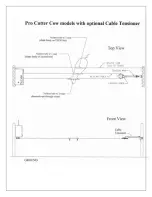
Mount control box: Securely attach control box on one side of arena. It
should be mounted so pulley on bottom of box is approximately 45 inches
from the ground.
2.
Mount return pulley: Mount off-side return pulley on opposite side of
arena in horizontal position. It should also be mounted approximately 45
inches from the ground. See attached instructions for machines using a
cable tensioner.
3.
Install kevlar cable: Have an assistant hold cable in center of arena. Take
end of cable attached to slide tube around idler pulley, across arena, around
both pulleys on bottom of control box, and back to center.
Be sure the
straight slide tube slides freely on the back part of the loop.
Tie
opposite end of cable to slide tube and tighten removing as much slack as
possible. Tie s knot and cut off extra cable. Keep in mind that the objective
is to form a loop with the cable. The slide tube with two snaps supports
the cow’s head, and the slide tube with one snap (slides freely on back part
of loop) supports the cow’s shoulder.
4.
Install "TECH" line: The tech line is static and supports the cow’s hip. A
slide tube is pre-installed on this line. Tie one end of tech line to fence as
close to control box as possible. There should be no more than 2 – 3
inches between the back part of the loop and the tech line. Tie to fence on
opposite side of arena and tighten. Installing tech line close to shoulder
line causes the cow to travel flat, stop flat, and turn around smoothly.
5.
Install antenna: Remove protective cap from antenna connecter on top of
control box. Insert whip antenna into connecter, push down, and twist
clockwise approximately ¼ turn. You should feel antenna lock into
position.
(To remove antenna, squeeze base and twist counter-clockwise)
6.
Apply power: Plug Pro Cutter into grounded 120VAC, 3-prong outlet.
Waiting a few minutes before operating allows the climate control system
to stabilize temperatures and remove condensation. Always unplug unit
when not in use.
*EURO MODELS: 240VAC/50Hz
Содержание Pro Cutter 009
Страница 5: ......
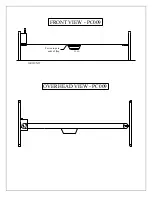
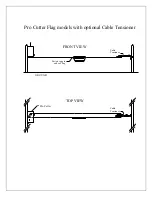
Страница 7: ...OVERHEAD VIEW PC009 Fasten rope to ends of flag GROUND FRONT VIEW PC009 FLAG...

