


WRIST SENSOR
To power on your wrist sensor, hold down the power button for 3 seconds.
The LED light should blink green every few seconds if the wrist sensor is
powered on.
POWER ON
WRISTBAND
In your ShotTracker App, go to
Settings >> Wrist Sensor
and select your
wrist sensor from the list. The sensor you select will blink consecutively
for 5 seconds.
***Both the net and wrist sensor must be connected with the app in order to track shots.
***If you switch between your wristband and shooting sleeve, we reccommend you re-train
your ShotTracker. Go to Settings >> Training Profiles.
***If you switch between your wristband and shooting sleeve, we reccommend you re-train
your ShotTracker. Go to Settings >> Training Profiles.
PAIR SENSOR TO APP
Inside your wristband, there is a pocket.
Slide your wrist sensor, blue side up, LED
lights first, in to the wristband pocket.
1
Before you put your wrist sensor in to the sleeve or wrist band, make
sure your wrist sensor is powered on and conencted to the app. Your
wrist sensor should be double-blinking every few seconds.
2
Slide your wristband on to your shooting arm. The
ShotTracker logo should be facing away from you.
3
(SELECT TO VIEW A VIDEO)
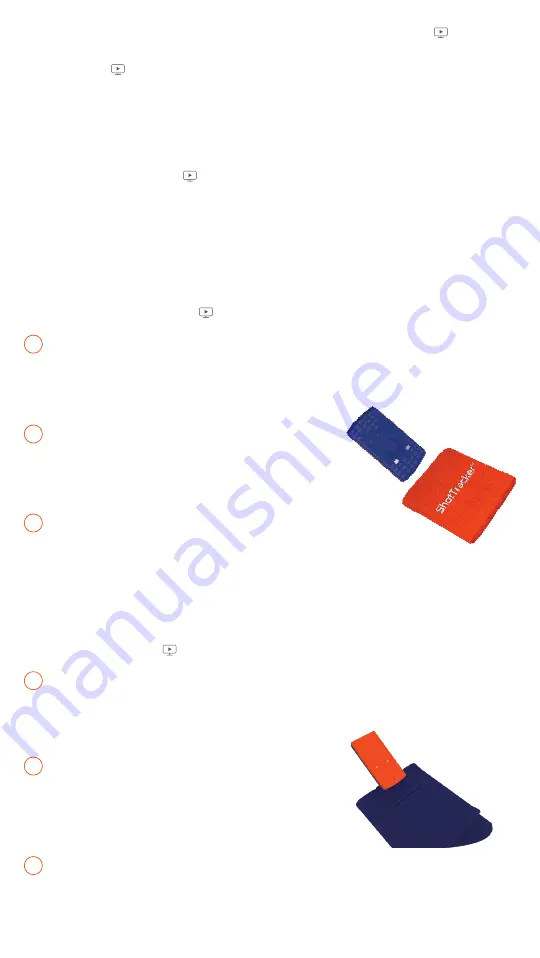
Flip your sleeve inside out. Inside your
sleeve is a pocket. Slide the wrist sensor,
orange side up, arrow facing down, in to
the shooting sleeve pocket.
1
Before you put your wrist sensor in to the sleeve or wrist band, make
sure your wrist sensor is powered on and conencted to the app. Your
wrist sensor should be double-blinking every few seconds.
2
Flip your shooting sleeve back to normal and slide it on to your
shooting arm. The ShotTracker logo should be facing away from you.
3


