
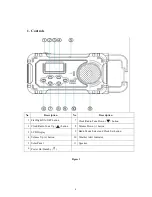


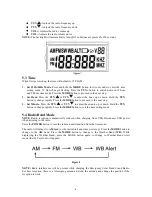

•
TUN
:
Adjusts the radio frequency up
•
TUN
:
Adjusts the radio frequency down
•
VOL+:
Adjusts the radio volume up
•
VOL
-
:
Adjusts the radio volume down
NOTE:
The backlight will automatically turn off if no buttons are pressed for 20 seconds.
Figure
7
5.3
Time
When first powered up, the time will default to 12:00 AM.
1.
Set
12Hr/24Hr
Mode.
Press and hold the
MODE
button for two seconds to enter the time
setting mode. 12 Hr will begin flashing. Press the
TUN+
button to switch between 12 hour
and 24 hour time mode. Press the
MODE
button to proceed to the next step.
2.
Set
Hour.
Press the
TUN
or
TUN
to adjust the hour up or down. Hold the
TUN
button to change rapidly. Press the
MODE
button to proceed to the next step.
3.
Set
Minute.
Press the
TUN
or
TUN
to adjust the minute up or down. Hold the
TUN
button to change rapidly. Press the
MODE
button to exit the time setting mode.
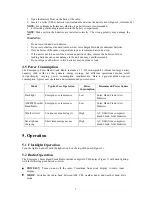
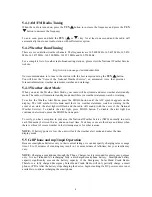
5.4
Radio
Band
Mode
NOTE
: Radio reception is dramatically reduced when charging from USB. Disconnect USB power
when listening to the radio.
Press the
POWER
button to turn the radio on and transition from the time mode.
The radio will default to
AM
band (or the last radio band since power up). Press the
MODE
button to
change to the
AM
band. Press the
MODE
button to change to the Weather Band (
WB
).
While
displaying the
W
eather
B
and, press the MODE button again to change to Weather Band Alert
mode (the ALT symbol will appear).
Figure
8
NOTE:
Radio interference will be present while charging the Emergency Solar Hand Crank Radio.
For best reception, there is a telescoping antenna. Extend the antenna and change the position if the
reception is weak.
8