- 4 -
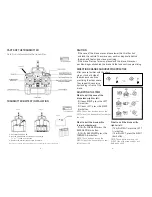
PARTS OF THE TRANSMITTER
TRANSMITTER BATTERY INSTALLATION
Note: Do not disassemble the transmitter.
1. Unscrew the battery lid.
2. Insert 6 AA batteries, according to the polarity
(“+” or “-”) shown on the case.
3. Replace the battery lid and screw into place.
NOTE: Do not mix old and new batteries. Do not mix different types of batteries.
Step 1
Step 2
Step 3
CAUTION
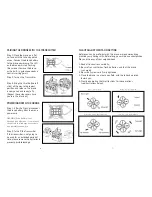
DIRECTION CHANGE AND HOVERING PRACTICE
ADJUSTING THE TRIM
• If the nose of the drone moves, please lower the throttle stick
and land the vehicle. Then move your position diagonally behind
the drone 16 feet and continue practicing.
• If the drone flies too far away, please land the drone. Move your
position diagonally behind the drone 16 feet and continue practicing.
After you are familiar with the above
steps, stand at a side of
the drone and continue
practicing the steps above.
Then repeat this exercise
by standing in front of the
drone.
What to do if the nose of the
drone leans right or left:
• If it leans RIGHT: press the LEFT
trim button.
• If it leans LEFT: press the RIGHT
trim button.
NOTE: These trim buttons are on the
LEFT side of the transmitter, just below
the stick.
What to do if the drone drifts
forward or backward:
• If it drifts FORWARD: press the
BACKWARD trim button.
• If it drifts BACKWARD: press the
FORWARD trim button.
NOTE: These buttons are on the
RIGHT side of the transmitter, to the
left of the stick.
What to do if the drone drifts
right or left:
• If it drifts RIGHT: press the LEFT
trim button.
• If it drifts LEFT: press the RIGHT
trim button.
NOTE: These buttons are on the
RIGHT side of the transmitter, just
below the stick.
- 9 -
Video Camera
ON/OFF


