background image

18

4. Use 

k

 or 

m

 to display the calorie value

and other information.
• Tap 

C•CE

 to return to the initial

screen.

5. To edit the selected item, tap 

EDIT

. Move between the entry fields

using 

k

 or 

m

 as you enter food names, calorie, and other values.

6. Press 

ENTER

 to register the entries.

Note:

• The displayed calorie value is rounded off to three decimal places.

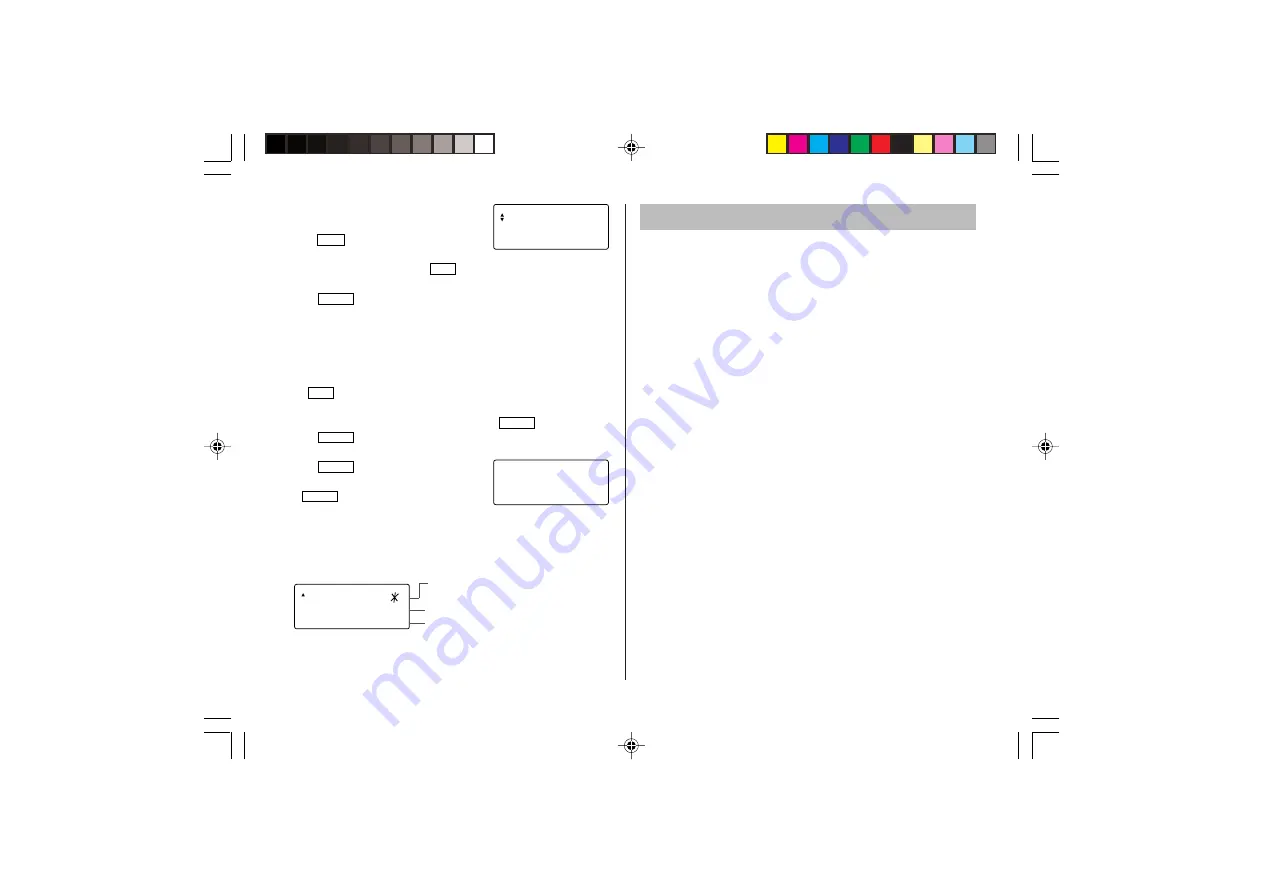
Report Mode

The intake/consumption report for a specified period can be viewed.
1. Tap 

DIET

 once, twice, or three times to enter the Diet Function

Mode.

2. Select “REPORT” using 

k

 or 

m

, and press 

ENTER

.

3. Press 

ENTER

, and use 

k

 or 

m

 to select “INTAKEREPORT” or

“CONSUMPTION”.

4. Press 

ENTER

, and input values for

START DATE and END DATE, followed
by 

ENTER

.

5. A report is displayed.

• INTAKEREPORT : Use 

k

 and 

m

 to switch between the total

calorie display and total carbohydrate display.

• CONSUMPTION : The total calorie consumption value is

displayed.

Note:

• The displayed calorie value is rounded off to three decimal places.

Backlight function

T

he Backlight allows you to view the display and use the Organizer

even in low-light conditions. Pressing 

z

 once illuminates the

display for as long as you continue to use the Organizer, or until no
key is pressed for 10 seconds.

• To turn the Backlight off, press 

z

 again.

• The Backlight may remain on for less than the preset interval or

it may not function if the battery level is low.

• The Backlight does not function in the PC Link mode.

Do not use the Backlight unnecessarily

• Since the Backlight drains power from the backlight battery,

excessive use of the Backlight will significantly reduce the life of
your battery.

– REPOR –

F 0 3 – 2 0 – 2 0 0 5

T

E 0 3 – 2 0 – 2 0 0 5

CARB .

g

2 0 0

S

2 0 0

0

.

.

The icon is displayed when a result
exceeds the target value.
The present carbohydrate
A comparison against the day’s target
(more/less) is indicated.

1 3

0

8 .2

CA LOR I E

c

K

l

a

< REVISED >

YO-P20H(En).pm65

04.3.31, 8:50 PM

18

Содержание YO-P20H

Страница 1: ...alling entries 9 Recalling entries 9 Editing or deleting entries 10 Calculator Mode 10 Currency Unit Conversion Mode 11 Game Mode 12 Word Translator Mode 13 Spell Checker Mode 14 Diet Function Mode 14 Backlight function 18 Memory Storage 19 Managing the Organizer s Memory 19 Adjusting the LCD contrast 20 Secret Function 20 Using the Included PC Software 21 Battery Replacement 25 Specifications 27 ...

Страница 2: ...and any of its functions such as stolen credit card numbers the loss of or alteration of stored data etc The information provided in this manual is subject to change without notice CAUTIONS Do not carry the Organizer in the back pocket of slacks or trousers Do not drop the Organizer or apply excessive force to it Do not subject the Organizer to extreme temperatures Since this product is not waterp...

Страница 3: ... mode key SCHEDULE Schedule mode key MEMO Memo mode key TO DO To Do mode key CLOCK Home Clock World Clock mode key CALC CONV Calculation Conversion mode key In this manual these Mode keys are represented with icons in parentheses Option port Stylus Display RESET switch on the back of the unit Touch Keyboard section Mode keys ENTER key Backlight key Power ON OFF key Cursor keys Search keys Part Nam...

Страница 4: ...ze battery consumption the Organizer is designed to automatically turn off when no key has been pressed for approxi mately 5 minutes Using the Organizer for the First Time Entering Characters Touch Keyboard Alphabet entry mode Number entry mode Each time f is tapped the touch keyboard switches between the Alphabet entry mode and the Number entry mode To tap the touch keys use the attached stylus T...

Страница 5: ... OFF Clock Mode Each time CLOCK is tapped the clock switches between the Home clock and the World clock mode For World clock is not displayed 1 Before setting the clock The default setting for the date is MM DD YYYY month day year To change the setting to YYYY MM DD year month day or DD MM YYYY day month year 1 Tap CLOCK once or twice to display the Home clock with 2 Tap MENU select DATE SET using...

Страница 6: ...ter an invalid date or time ERROR appears briefly Enter the correct date and time and press ENTER Display City Display City LON LONDON TYO TOKYO LIS LISBON ADL ADELAIDE PAR PARIS SYD SYDNEY BER BERLIN GUM GUAM ROM ROME NOU NOUMEA AMS AMSTERDAM WLG WELLINGTON BCN BARCELONA AKL AUCKLAND HEL HELSINKI TNG TONGA CAI CAIRO MID MIDWAY MOW MOSCOW HNL HONOLULU RUH RIYADH ANC ANCHORAGE THR TEHRAN LAX LOS AN...

Страница 7: ... at the alarm time for 1 minute when is turned on Up to three daily alarms can be set ALARM1 ALARM2 and ALARM3 2 Hourly alarm beeps every hour when minutes reach 00 when is turned on 3 Schedule alarm beeps at the time for all the schedule entries for 1 minute when is turned on Refer to Schedule Mode Tap any key to stop the alarm beeping Setting Changing the daily alarm time 1 Tap CLOCK once or twi...

Страница 8: ...f name address E mail address web address URL and number fields Storing telephone entries 1 Tap TEL once or twice to display the Telephone mode screen 2 Enter name e g SMITH SPACE ROBERT and tap 3 Enter address e g f 18 SPACE f EAST SPACE ROAD and tap 4 Enter E mail address e g SROB SMBL l to enter SHARPSEC COM and tap The E mail address is automatically entered in lowercase letters To enter simpl...

Страница 9: ...nth day hour and minute In the 1st line the same characters are allowable as in Telephone mode 1 Storing schedule entries 1 Tap to display the Schedule mode screen 2 Enter the details and tap 3 Enter the date and time The types of date and time are the same as the types set for the clock To enter a single digit date or time enter 0 and the digit e g O2 4 Press ENTER to store in the memory Notes Sc...

Страница 10: ...mode 2 Press or to select the To Do items 3 Tap e to enter the status field 4 Tap to select D Done then press ENTER P stands for pending Memo Mode Notes or other information irrelevant to the Telephone mode or the Schedule mode can be entered conveniently in this Memo mode In the 1st line the same characters are allowable as in Telephone mode In the 2nd and the 3rd lines you can enter numbers and ...

Страница 11: ...ward order Recalls entries in reverse order Sequential search Press or in each mode Direct search Enter the first characters 12 characters or under of the person s name schedule details To Do item or memo item and press or Press or then to continue performing a direct search Sorting order Telephone and memo entries are stored by the first character of the person s name or memo item in the followin...

Страница 12: ... to delete the entry Calculator Mode The Organizer can calculate numbers of up to 10 digits Tap CALC CONV several times to display the Calculator mode screen Calculator Currency conversion Unit conversion Calculator Calculation Be sure to tap C CE C CE and CM to clear the display and memory before performing a calculation Note When or is tapped the respective symbol or is displayed In the examples...

Страница 13: ... 1 Tap CALC CONV several times to display the currency conversion mode screen refer to Calculator mode Example 1 CAD Canada dollars 0 66 USD US dollars 2 Press to change the display and tap f e The initial character of CAD starts to flash You can change each currency name by entering characters up to 4 in each and using if needed 3 Press ENTER 0 starts to flash 4 Enter the rate up to 10 digits 0 6...

Страница 14: ... Each time SPACE is tapped a new card is dealt J Q and K are counted as 10 A can be counted as 1 or 11 When the first 2 cards are A and a face card J Q or K your hand is BLACKJACK 5 Press ENTER to stop being dealt and hold your hand The dealer s hand and the results are displayed When you win your total flashes and your bet is doubled When you win with BLACKJACK your bet is tripled 6 Press ENTER a...

Страница 15: ... 2 Enter the desired source word and press ENTER English or Spanish is displayed while conducting search The matching English or Spanish word will then be displayed When the symbol appears on more letters exist To view remaining letters of long words that cannot be accommodated on the screen use to scroll right If there is no matching word NOT FOUND is displayed The word next in alphabetical order...

Страница 16: ...ted The Diet Function can organize your daily calories burned by walking as well as managing your daily caloric intake Tap DIET several times to display the Diet Function mode screen and the Game mode screen Diet Function BLACKJACK ALPHA ATTACK Diet Function The Diet Function calculates the estimated calories burned by using the built in pedometer and compares the value with the entered target val...

Страница 17: ...ld with your stride length value obtained from the above method and tap m 4 Enter your body weight value in the WEIGHT field and tap m 5 Enter the target calorie value for your daily intake I T CAL and tap m 6 Enter the target carbohydrate value for your daily intake I T CARBS and tap m 7 Enter the target calorie value of your daily consumption C T CAL then press ENTER to store the setting Note It...

Страница 18: ...p count and calorie values 1 Tap the DIET once twice or three times to enter the Diet Function Mode 2 Select PEDOMETER using k or m and press ENTER twice to display the interim report of calories burned and total step count Use k or m to switch the two displays Tap C CE to return to the previous screen Step count of the day will be registered automatically when the time is at 23 59 59 This unit ca...

Страница 19: ...d the Food Database from the CD ROM see page 25 1 Tap DIET once twice or three times to enter the Diet Function Mode 2 Select INTAKE using k or m and press ENTER 3 Tap EDIT then use and to select FOOD in the selection field You can enter the first few letters of the desired food name then browse the items using or When no match is found then a message NOT FOUND is displayed 4 Use k and m to select...

Страница 20: ...al calorie consumption value is displayed Note The displayed calorie value is rounded off to three decimal places Backlight function The Backlight allows you to view the display and use the Organizer even in low light conditions Pressing z once illuminates the display for as long as you continue to use the Organizer or until no key is pressed for 10 seconds To turn the Backlight off press z again ...

Страница 21: ...e Organizer s memory more efficiently Note Before performing memory management back up your data While the memory management is in progress do not press the RESET switch Doing so may result in losing all the data stored in the Organizer 1 Tap TEL or TODO to display NAME SCHEDULE TO DO or MEMO 2 Tap f MENU select MANAGE MEM using k or m 3 When x is tapped a message PERFORM appears to indicate that ...

Страница 22: ...and press ENTER The display returns to the Home clock The secret function turns on automatically If you enter the wrong password ERROR appears briefly and display returns to the Home clock Follow the above steps again to register a password 2 Turning Secret function off When the Secret function is on it is necessary to turn off to perform the Telephone Schedule To Do and Memo modes 1 Tap TEL TODO ...

Страница 23: ...nchronize Microsoft Outlook data such as Contacts Calendar Tasks and Notes with the Organizer Desktop Utilities Can be used to backup restore data in the Organizer and export import data to different file formats Minimum System Requirements IBM PC or 100 compatible Microsoft Windows 98 98SE 2000 Professional Me XP Home XP Professional Pentium 300MHz or higher 50MB free hard disk space 64MB RAM for...

Страница 24: ... adapter Commercially available 3 Connect the other end of the PC Link cable to the Organizer s option port 4 Turn on the PC and the Organizer Installing Precautions Prior to installing the Synchronization Software make sure that Microsoft Outlook is installed and set up If not install and set up the Outlook first then install the Synchronization Software 1 Insert the PC software CD ROM into your ...

Страница 25: ... Settings window will appear To bring up the Settings window manually right click on the Synchronization icon on the Windows system tray then select Settings in the menu General tab This tab allows you to select the application that you want to synchronize with the PC Click on the checkbox for each application to enable synchroni zation Use the Option button or double click the desired settings ro...

Страница 26: ...nly data of WORK addresses Today forward Downloads or synchronizes only data of today and forward All Downloads or synchronizes all schedule data The Connection tab This tab allows you to change settings for the serial port and the password Serial port Specify the serial port to connect the unit to the PC Auto Detect Click to allow the PC to detect the appropriate serial port Desktop Utilities Lau...

Страница 27: ...ny important information stored in the memory before replacing the batteries Precautions Since improper use of the batteries may cause leakage or explosion strictly observe the following instructions If fluid from a leaking battery accidentally gets into your eyes it may result in serious injury Should this occur flush your eyes with clean water and consult a physician immediately Should fluid fro...

Страница 28: ... backlight and operation battery holder is indicated as For BACKLIGHT OPERATION in the battery compartment Replacing the batteries Make sure the power is turned off before replacing the batteries Do not press o until the battery replacement procedure is completed Do not remove all of the batteries at once Remove and replace batteries one by one 1 Press o to turn the power off 2 Loosen the screw tu...

Страница 29: ...er Mode Approx 10000 English words can be referred to as suggested entries Diet Function Mode Step count precision within 10 by vibration testing machine Food Database 200 foods Value entry 2 fields Calorie Carbohydrate Power consumption 0 13 W Operating temperature 0 C to 40 C 32 F to 104 F Power supply 3 0V DC Lithium battery CR2032 x 2 Auto Power Off Function Approx 5 minutes Battery life at 25...

Страница 30: ... digital device pursuant to Part 15 of the FCC Rules These limits are designed to provide reasonable protection against harmful interference in a residential installation This equipment generates uses and can radiate radio frequency energy and if not installed and used in accordance with the instructions may cause harmful interference to radio communications However there is no guarantee that inte...

Страница 31: ...et forth below nor to any Product the exterior of which has been damaged or defaced which has been subjected to improper voltage or other misuse abnormal service or handling or which has been altered or modified in design or construction In order to enforce the rights under this limited warranty the purchaser should follow the steps set forth below and provide proof of purchase to the servicer The...

Страница 32: ...SHARP ELECTRONICS CORPORATION Sharp Plaza Mahwah New Jersey 07430 1163 PRINTED IN CHINA IMPRESO EN CHINA 04CT TINSE0748EHZZ YO P20H En Cover 04 3 3 10 37 AM 4 ...

Отзывы:

Похожие инструкции для YO-P20H