background image

8

7

6

5

4

3

2

1

E-16

ENGLISH

XL-MP333H
XL-MP444H

04/5/26

XL-MP333H_MP444H_E.fm

TINSZA022SJZZ

CD or 

MP3 dis

c

 Pla

y

bac

k


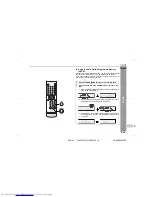
!

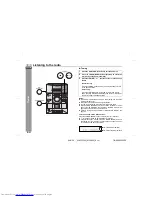
Various disc functions

Notes:

Caution:

"

Do not place two discs in one disc tray.

"

Do not play discs with special shapes (heart or octagon shaped)
as it may cause malfunctions.

"

Do not push the disc compartment whilst it is moving.

"

If the power fails whilst the disc compartment is open, wait until
the power is restored.

"

If the disc compartment is stopped with force, the unit will not
function. If this occurs, press the ON/STAND-BY button to enter
the power stand-by mode and then turn the power on again.

"

If TV or radio interference occurs during CD operation, move the
unit away from the TV or radio.

"

If a disc is damaged, dirty, or loaded upside down, the disc will
skip or not play.

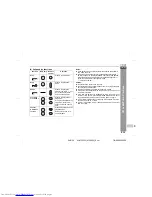
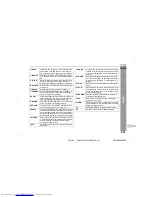
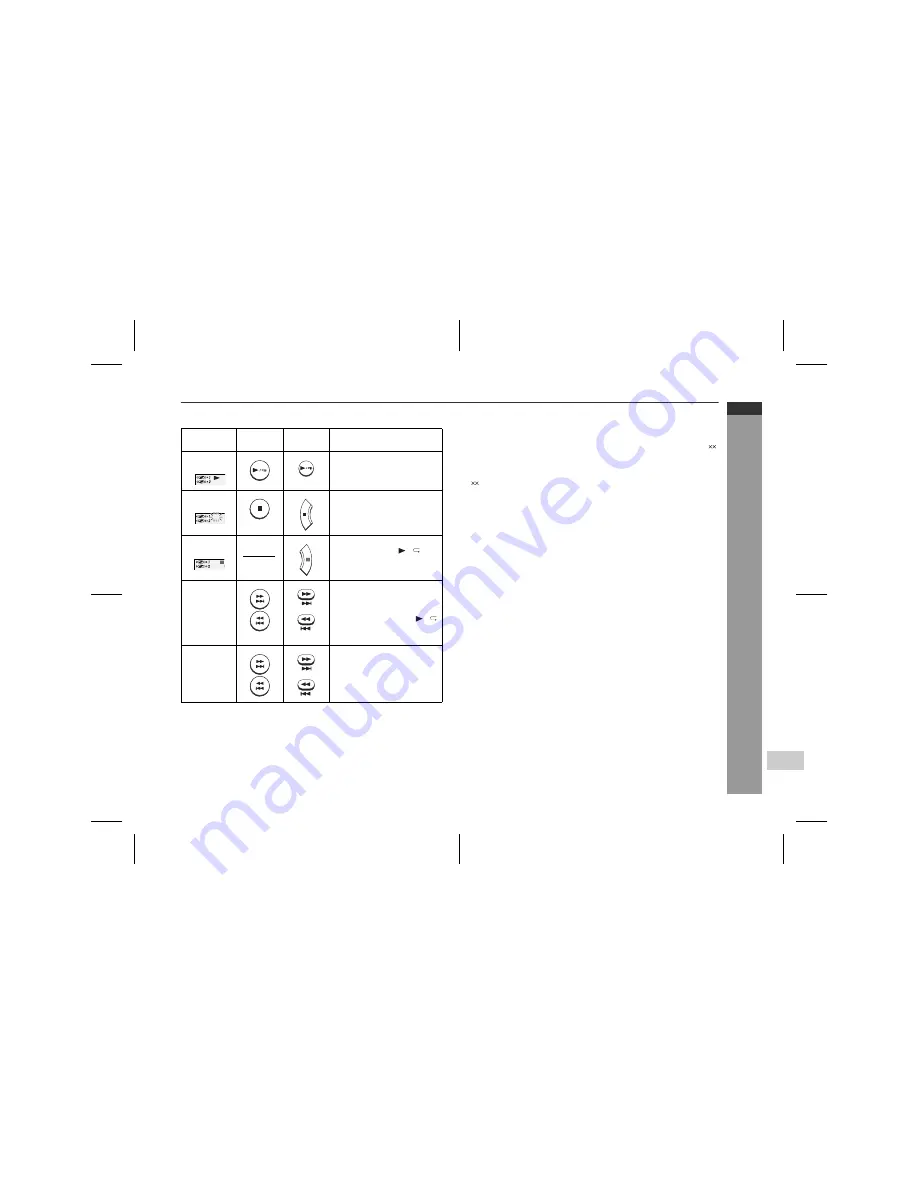
Function

Main unit

Remote 

control

Operation

Play

Press in the stop mode.

Stop

Press in the playback 
mode.

Pause

Press in the playback 
mode. Press the   /   but-
ton to resume playback 
from the paused point.

Track up/
Track down

Press in the playback or 
stop mode.

If you press the button in the 
stop mode, press the   /   
button to start the desired 
track.

Fast for-
ward/Fast 
reverse  

Press and hold down in the 
playback mode.

Release the button to re-
sume playback.

"

Track up/track down and fast forward/fast reverse are possible 
only within one disc.

"

When the end of the last track is reached during fast forward, "  
END" will appear on the display and CD operation will be paused. 
When the beginning of the first track is reached during fast re-
verse, the unit will enter the playback mode.
( : Last track number)

Содержание XL-MP333H

Страница 1: ...a i till vi och V 1 till V 40 Leggere le pagine i a vi e I 1 a I 40 Raadpleeg de bladzijden i t m vi en N 1 t m N 40 Favor consultar as páginas i a vi e P 1 a P 40 Please refer to pages i to vi and E 1 to E 40 XL MP444H Die Abbildungen in dieser Bedienungsanleitung sind für das Modell XL MP444H Les illustrations utilisées dans ce mode d emploi sont pour le modèle XL MP444H Las ilustraciones impres...

Страница 2: ...commande Avertissement Cet appareil contient des pièces non réparables par l utilisateur Personne non qualifiée n enlèvera jamais les couvercles L appareil contenant des organes portés à haute tension débrancher l appareil avant toute réparation ou en période de non utilisation Dieses Gerät entspricht den Anforderungen der EG Richtlinien 89 336 EWG und 73 23 EWG mit Änderung 93 68 EWG Ce matériel ...

Страница 3: ...ains plug from the socket be fore any service operation and when not in use for a long period Cuando el botón ON STAND BY está puesto en la posición STAND BY todavía hay tensión dentro del aparato Cuando el botón ON STAND BY está puesto en la posición STAND BY el aparato puede ponerse en funcionamiento utilizando el modo del temporizador o el controlador remoto Advertencia Tenga en cuenta que dent...

Страница 4: ...appareil à l abri de l eau éclaboussure goutte Ne pas poser sur l appareil un récipient contenant du liquide Advertencia Para evitar incendios y descargas eléctricas no exponga el aparato a goteo o salpicadura de líquidos No deberán ponerse encima del aparato objetos que estén llenos de líquido como por ejemplo un florero Varning Utsätt inte enheten för dropp eller stänk för att förhindra brand el...

Страница 5: ...parat Advarsel For å unngå brann eller kortslutning utsett ikke produktet for vann eller fuktighet Gjenstander som inneholder vaeske feks en blomstervase må ikke plasseres oppå apparatet Varoitus Älä vie laitetta sateeseen tai kosteisiin tiloihin Jos laite on kostunut anna sen kuivua ennen kuin käytät sitä verkkovirralla Nestettä sisältäviä astioita kuten esim kukkamaljakoita ei saa asettaa laitte...

Страница 6: ...bestrålning Försök inte ta isär höljet eftersom enhetens laserstråle är skadlig för ögonen Överlåt service endast till kvalificerad personal ATTENZIONE L uso dei comandi e l effettuazione di regolazioni e procedimenti diversi da quelli specificati nel manuale possono provocare una pericolosa esposizione alle radiazioni Poiché il raggio laser usato in questo apparecchio può danneggiare gli occhi no...

Страница 7: ... INSTRUMENT Eigenschaften der Laserdiode Material GaAIAs Wellenlänge 780 nm Emissionsdauer kontinuierlich Laser Ausgang max 0 6 mW Caractéristiques de la diode laser Matière GaAIAs Longueur d onde 780 nm Durée d émission ininterrompue Puissance de sortie laser maximale 0 6 mW Características del diodo láser Material GaAIAs Longitud de onda 780 nm Duración de emisión continua Salida de láser máx 0 ...

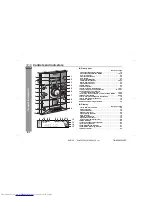
Страница 8: ...uded Note Only the above accessories are included Contents Page General Information Precautions 2 Controls and indicators 3 6 Preparation for Use System connections 7 10 Remote control 11 Basic Operation General control 12 Setting the clock 13 CD or MP3 disc Playback Listening to a CD or MP3 disc 14 16 Advanced CD or MP3 disc playback 17 20 Radio Listening to the radio 21 22 Using the Radio Data S...

Страница 9: ...damage SHARP will not be held responsible for any damage resulting from use of this unit with a voltage other than that which is specified Volume control The sound level at a given volume setting depends on speaker effi ciency location and various other factors It is advisable to avoid exposure to high volume levels Do not turn the volume on to full at switch on and listen to music at moderate lev...

Страница 10: ...Down Button 16 22 15 Track Up or Fast Forward Tuner Preset Up Button 16 22 16 Memory Set Button 20 22 17 Disc Compartment Open Close Button 14 18 Disc Number Select Buttons 18 19 Volume Control 12 20 Video and Audio Input Sockets 33 Display Reference page 1 Disc Number Indicators 18 2 Play Indicator 15 3 Pause Indicator 16 4 Memory Indicator 20 5 Repeat Play Indicator 19 6 CD Indicator 15 7 MP3 Di...

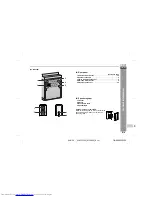
Страница 11: ...ge 1 AC Power Input Socket 10 2 Speaker Terminals 9 3 FM 75 Ohms Aerial Socket 9 4 AM Loop Aerial Socket 9 5 Video Output Socket 33 Speaker system 1 Tweeter 2 Woofer 3 Bass Reflex Duct 4 Speaker Wire 1 4 3 5 2 3 4 2 1 Speaker grilles are removable Make sure nothing comes into contact with the speaker diaphragm when you remove the speaker grilles ...

Страница 12: ...minals 9 3 Subwoofer Terminals 9 4 FM 75 Ohms Aerial Socket 9 5 AM Loop Aerial Socket 9 6 Video Output Socket 33 7 Cooling Fan 10 Front speaker 1 Tweeter 2 Woofer 3 Bass Reflex Duct 4 Speaker Wire Subwoofer 1 Sub Duct Pipe 2 Subwoofer 3 Speaker Wire 3 2 1 1 5 4 6 7 2 3 3 4 2 1 Front speaker grilles are removable Make sure nothing comes into contact with the speaker diaphragm when you remove the sp...

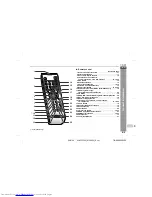
Страница 13: ...ory Set Button 13 20 22 10 Subwoofer Level Shift Button XL MP444H only 12 11 RDS Programme Type Traffic Information Search Button 26 12 CD Button 14 13 RDS ASPM Auto Station Programme Memory Button 24 14 Disc Number Select Buttons 18 15 MP3 Disc Display Button 17 16 Track Up or Fast Forward Tuner Preset Up Time Up Button 13 16 22 17 Pause Button 16 18 Equaliser Mode Select Button 12 19 Random Butt...

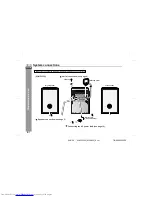
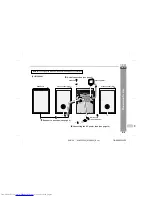
Страница 14: ...on for Use System connections Left speaker Right speaker Wall socket AC 230 V 50 Hz Speaker connection see page 9 FM aerial Make sure to unplug the AC power lead before making any connections Aerial connection see page 9 XL MP333H Connecting the AC power lead see page 10 AM loop aerial ...

Страница 15: ...eparation for Use Front speaker left Front speaker right Subwoofer Wall socket AC 230 V 50 Hz Speaker connection see page 9 FM aerial Make sure to unplug the AC power lead before making any connections Aerial connection see page 9 XL MP444H Connecting the AC power lead see page 10 AM loop aerial ...

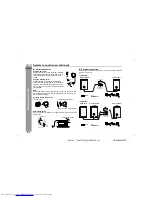
Страница 16: ...ct the black wire to the minus terminal and the red wire to the plus terminal Supplied FM aerial Connect the FM aerial wire to the FM 75 OHMS socket and position the FM aerial wire in the di rection where the strongest signal can be re ceived Supplied AM loop aerial Connect the AM loop aerial to the AM LOOP socket Position the AM loop aerial for optimum reception Place the AM loop aerial on a shel...

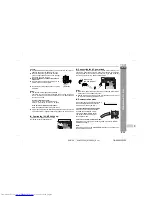
Страница 17: ...ss reflex ducts Do not stand or sit on the speakers You may be injured Incorrect Notes The speakers are magnetically shielded Therefore they do not affect the display even you use them near the TV However some colour variation may occur depending on the type of TV used If colour variation occurs Turn off the TV from the power switch After 15 30 minutes turn the TV on again If the colour variation ...

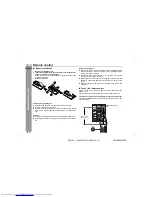
Страница 18: ...HP 7 or similar Periodically clean the transmitter on the remote control and the sensor on the unit with a soft cloth Exposing the sensor on the unit to strong light may interfere with operation Change the lighting or the direction of the unit if this occurs Keep the remote control away from moisture heat shock and vibrations Test of the remote control Check the remote control after checking all t...

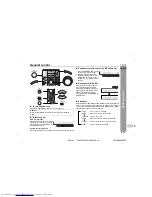
Страница 19: ...urned clockwise the volume will increase When it is turned anti clockwise the volume will decrease Remote control operation Press the VOLUME or button to increase or decrease the volume 30 MAXIMUM 29 0 1 Press the SUBWOOFER LEVEL button on the remote control 2 Within 5 seconds adjust the subwoofer volume with the VOL UME control main unit or the VOLUME or button remote control When the power is fi...

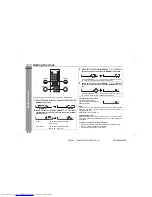
Страница 20: ... button 2 Within 30 seconds press the PRESET or button to select 24 hour or 12 hour display and then press the MEM ORY SET button 0 00 The 24 hour display will appear 0 00 23 59 AM 12 00 The 12 hour display will appear AM 12 00 PM 11 59 3 Within 30 seconds press the PRESET or button to adjust the hour and then press the MEMORY SET button Press the PRESET or button once to advance the time by 1 hou...

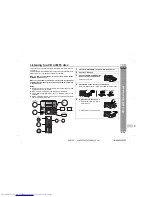
Страница 21: ...le loss in sound quality Notes Due to the structure of its disc information it takes longer to read an MP3 disc than a normal CD MP3 indicator will light up if an MP3 disc is initialised This system supports MPEG 1 Layer 3 MPEG 2 Layer 3 and VBR files During VBR file playback time counter in the display may differ from its actual playback time 1 Press the ON STAND BY button to turn the power on 2 ...

Страница 22: ...use does not open To remove the discs To specify a tray to open 6 Press the OPEN CLOSE button to close the disc compart ment CD Indicator Total number of tracks on the CD whose number is flashing Total playing time of the CD whose number is flashing MP3 Disc Indica tor Total number of tracks on the MP3 disc whose number is flash ing 7 Press the button to start playback Play indicator CD MP3 1 In t...

Страница 23: ...ay from the TV or radio If a disc is damaged dirty or loaded upside down the disc will skip or not play Function Main unit Remote control Operation Play Press in the stop mode Stop Press in the playback mode Pause Press in the playback mode Press the but ton to resume playback from the paused point Track up Track down Press in the playback or stop mode If you press the button in the stop mode pres...

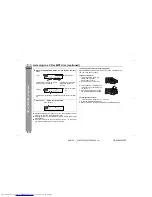
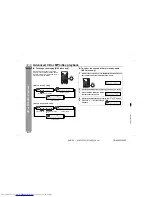
Страница 24: ... press the MP3 DISPLAY button Each time the button is pressed the dis play will change as follows Folder name Track name Total number of tracks Track number Elapsed playback time Folder name Track name 1 Whilst in the stop mode press the MP3 DISPLAY button on the remote control to display the folder name 2 Select the desired folder by pressing the or button 3 Press the MP3 DISPLAY button to displa...

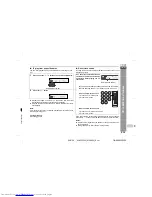
Страница 25: ...cks on the current disc can be played If the direct search buttons are pressed whilst the disc is stopped press the button to start the desired track on the current disc Notes A track number higher than the number of tracks on the disc can not be selected During random play direct search is not possible 1 Press one of the 1 5 buttons to select the desired disc Selected disc number 2 Press the butt...

Страница 26: ...tically when all tracks are played once The same track will not be played back twice If you press the button during random play you can move to the next track by the random operation On the other hand the button does not allow you to move to the previous track The beginning of the track being played will be located In random play the CD player will select and play tracks automat ically You cannot ...

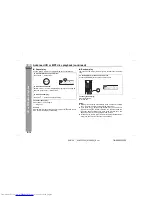
Страница 27: ...y mode or change the function from CD to another the pro grammed selections will not be cleared During the programme operation random play is not possible 1 Whilst in the stop mode press one of the 1 5 buttons to select the desired disc Selected disc number 2 Press the direct search buttons on the remote control to select the desired track You can also select a track by pressing the or button Sele...

Страница 28: ...ess the TUNER BAND button to display the ST indicator will appear when an FM broadcast is in stereo If the FM reception is weak press the TUNER BAND button to extinguish the ST indicator The reception changes to monau ral and the sound becomes clearer 1 Press the ON STAND BY button to turn the power on 2 Press the TUNER BAND button repeatedly to select the desired frequency band FM or AM 3 Press t...

Страница 29: ...umber Store the stations in memory in order starting with preset channel 1 4 Within 30 seconds press the MEMORY SET button to store that station in memory If the MEMORY and preset number indicators go out before the station is memorised repeat the operation from step 2 5 Repeat steps 1 4 to set other stations or to change a pre set station When a new station is stored in memory the station previou...

Страница 30: ... and the station name will be displayed TP Traffic Programme will appear on the display when the received broadcast carries traffic information and TA Traffic Announcement will appear whilst a traffic information is on air You can control the RDS by using the remote control only Information provided by RDS Each time the DISPLAY button is pressed the display will switch as follows When you are tuni...

Страница 31: ...stations in memory the number of new stations you can store will be less 1 Press the TUNER BAND button to select the FM band 2 Press and hold down the ASPM button for at least 3 sec onds 1 After ASPM has flashed for about 4 seconds scanning will start 87 50 108 00 MHz 2 When an RDS station is found RDS will appear for a short time and the station will be stored in memory 3 After scanning the numbe...

Страница 32: ...s of noise or if the signal is too weak In this case perform as follows Notes The same station name can be stored in different channels In a certain area or during certain time periods the station names may temporarily be different Notes for RDS operation If any of the following events occur it does not mean that the unit is faulty PS NO PS and a station name appear alternately and the unit does n...

Страница 33: ... BAND button to select the FM 2 Press the PTY TI button PTY TI will flash for about 4 seconds 3 Within 4 seconds press the PRESET or button to se lect the programme type Each time the button is pressed the programme type will ap pear If the button is held down for more than 0 5 seconds the programme type will appear continuously 4 Whilst the selected programme type is flashing within 4 seconds pre...

Страница 34: ...AND button to select the FM band 2 Press the PRESET or button to select a desired station 3 The station name will be displayed for 6 seconds Then the dis play will change NEWS Short accounts of facts events and publicly ex pressed views reportage and actuality AFFAIRS Topical programme expanding or enlarging upon the news generally in different presentation style or concept including debate or ana...

Страница 35: ...d far destinations package tours and travel ideas and opportunities Not for use for announce ments about problems delays or roadworks affect ing immediate travel where TP TA should be used LEISURE Programmes concerned with recreational activities in which the listener might participate Examples in clude Gardening Fishing Antique collecting Cooking Food Wine etc JAZZ Polyphonic syncopated music cha...

Страница 36: ...of Microsoft Corporation in the United States and or other countries The names of other systems and products in this manual are trademarks or registered trademarks of the corresponding com panies Symbols and are omitted Installing a driver If this is your first time connecting to a PC follow the on screen instructions to install a driver included with the OS Once installed you do not need to repea...

Страница 37: ...detected For a Macintosh computer with a USB port a driver is already installed you do not need to install it Sharp does not guarantee proper operation when you connect a PC using a USB hub or USB extension cable When multiple USB ports are available use a root hub port for details refer to the operation manual for the PC The unit is detected and a driver included with the OS is installed Follow t...

Страница 38: ...Control Panel opens select the System icon and double click it 3 Click the Device Manager tab Make sure View devices by type is selected 4 Check that the unit is recognised Make sure USB Audio Device is under Sound video and game controllers and USB Composite Device is under Uni versal Serial Bus controllers OS Windows Millennium Edition 1 Select Setting Control Panel from the Start menu and click...

Страница 39: ...d music software When using a Macintosh computer with the unit connected and turned off and the operation is unstable disconnect the USB cable When playing back on a PC with the unit connected other sounds clicks etc are produced from the speakers During playback on a Windows PC you cannot listen to the sound on the unit by simply connecting a USB cable Stop and resume playback not necessary on a ...

Страница 40: ... ohms impedance The recom mended impedance is 32 ohms Plugging in the headphones disconnects the speakers automati cally Adjust the volume using the VOLUME control VCR DVD etc Red White Yellow Yellow To the line output sockets To video input socket RCA lead not supplied Video cable not supplied Video cable not supplied Yellow TV Red White Yellow 1 Connect a VCR DVD etc to the front INPUT VIDEO AU ...

Страница 41: ...that the clock is set to the cor rect time Refer to page 13 2 Load the discs to be played 1 Press the ON STAND BY button to turn the power on 2 Press the CD or TUNER BAND button to select the de sired function When you select the TUNER BAND tune into the desired sta tion 3 Adjust the volume using the VOLUME buttons Do not turn the volume up too high 4 Press the TIMER SLEEP button repeatedly until ...

Страница 42: ...he ON STAND BY button to turn the power on 7 When the preset time is reached playback will start The volume will increase gradually until it reaches the volume you were listening to before your system entered the timer stand by mode 8 The unit will enter the power stand by mode one hour after the timer playback starts Note When performing timer playback using an other unit connected to the video a...

Страница 43: ...red sound source 2 Press the TIMER SLEEP button repeatedly until SLEEP is displayed and then within 8 seconds press the MEMORY SET button To change the sleep time Whilst the sleep time is displayed press the PRESET or button Maximum 3 hours Minimum 5 minutes 3 Within 30 seconds press the MEMORY SET button 4 The unit will enter the power stand by mode automatically after the preset time has elapsed...

Страница 44: ...the stan dards Is the disc distorted or scratched Playback sounds are skipped or stopped in the middle of a track Is the unit located near excessive vibrations Is the disc very dirty Has condensation formed inside the unit Symptom Possible cause The radio makes unusual noises continuously Is the unit placed near the TV or computer Is the FM aerial or AM loop aerial placed properly Move the aerial ...

Страница 45: ...porting the unit Remove all discs from the unit Make sure there is no disc in the disc tray Then set the unit to the power stand by mode Carrying the unit with discs left inside can damage the unit Maintenance Cleaning the cabinet Periodically wipe the cabinet with a soft cloth and a diluted soap solution then with a dry cloth Caution Do not use chemicals for cleaning petrol paint thinner etc It m...

Страница 46: ...300 mm 11 13 16 Weight XL MP333H 4 8 kg 10 6 lbs XL MP444H 5 9 kg 13 0 lbs This power consumption value is obtained when the demonstra tion mode is cancelled in the power stand by mode Refer to page 10 to cancel the demonstration mode Output power XL MP333H PMPO 120 W MPO 60 W 30 W 30 W DIN 45 324 RMS 40 W 20 W 20 W DIN 45 324 RMS 30 W 15 W 15 W DIN 45 500 XL MP444H Front speakers PMPO 180 W MPO 9...

Страница 47: ...em magnetic shield 4 cm 1 5 tweeter 10 cm 4 woofer Maximum input power 40 W Rated input power 20 W Impedance 6 ohms Dimensions Width 165 mm 6 1 2 Height 240 mm 9 7 16 Depth 210 mm 8 1 4 Weight 2 4 kg 5 3 lbs each Type 2 way type speaker system magnetic shield 4 cm 1 5 tweeter 10 cm 4 woofer Maximum input power 60 W Rated input power 30 W Impedance 6 ohms Dimensions Width 165 mm 6 1 2 Height 240 mm...

Страница 48: ...XL MP333H_MP444H_BACK fm TINSZA022SJZZ 04 5 31 TINSZA022SJZZ 04F N HK 1 SHARP CORPORATION 0401_A5 ...

Страница 49: ...XL MP333H XL MP444H MICRO COMPONENT SYSTEM U P DOWN XL MP333H_MP444H_SPINE fm TINSZA022SJZZ 04 5 31 ...

Отзывы: