


Preparation
16
10
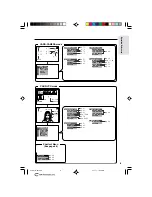
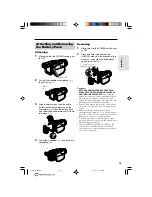
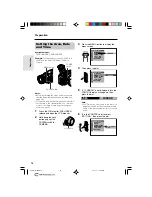
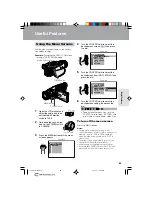
Turn the CONTROL dial to select “10 ”
(hour), then press the dial.
11
Turn the CONTROL dial to select “30”
(minute), then press the dial.
• The internal clock now starts operating.
12
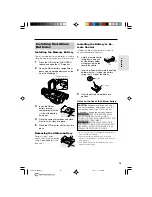
Press the MENU button to turn off the
menu screen.
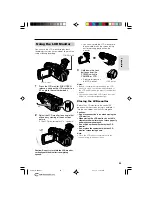
Note:
• If the date and time have been set, the MANUAL
SET screen (
T
) appears in step 3. Select
“AREA” in the CLOCK SET screen (
P
) using the
CONTROL dial.
1 0
0 0
:
SE T T I NG
6 2 0 0 3
.
2.
1 0 3 0
:
SE T T I NG
6 2 0 0 3
.
2.
C L O C K S E T
D I S P L A Y
S UMR
A R E A
T I ME
R E T U R N
S E T T I N G
1 2 H 2 4 H
/
2 4 H
1 2 H
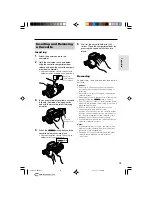
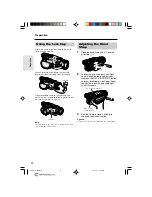
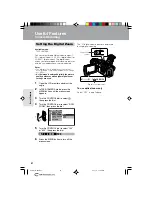
Changing to the 12-hour Time
Mode
1
After performing step 11 above, turn the
CONTROL dial to select “12H/24H”,
then press the dial.
2
Turn the CONTROL dial to select “12H”,
then press the dial.
3
Press the MENU button to turn off the
menu screen.
Notes:
• The date and time, once set, are internally
recorded even when not displayed on the
screen.
• The menu screen automatically turns off if no
settings are made within five minutes.
1 2 H
2
1 H 2 4 H
0 0 0
:
1
2 0 0 2
.
2.
SE T T I NG
0 0 0
:
6
2 0 0 2
.
2.
SE T T I NG
0
0 0
:
SE T T I NG
6 2 0 0 3
.
2.
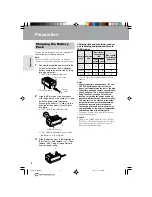
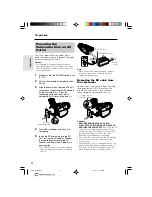
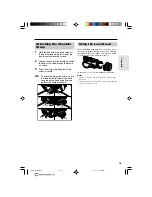
7
Turn the CONTROL dial to select “2”
(day), then press the dial.
8
Turn the CONTROL dial to select “6”
(month), then press the dial.
9
Turn the CONTROL dial to select “2003”
(year), then press the dial.
VL-AX1H-009-021
01.11.1, 11:00 AM
16


