background image

Blocking Unwanted Faxes

40

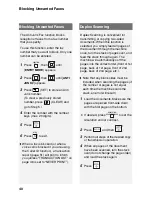
The Anti Junk Fax function blocks 
reception of faxes from a fax number 
that you specify.

To use this function, enter the fax 
number that you want to block. Only one 
number can be entered.

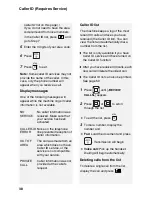
1

Press 

, then 

 until 

[

ENTRY MODE

] appears

.

2

Press , 

then  

until 

[

ANTI 

JUNK #

] appears.

3

Press 

 (SET) to store an Anti 

Junk number. 
(To clear a previously stored 

number, press 

 (CLEAR) and 

go to Step 5.)

4

Enter the number with the number 
keys (max. 20 digits).

5

Press .

6

Press  

to 

exit.

When a fax is blocked (or when a 
voice call is blocked if you are using 
the Caller ID function), a transaction 
report (page 51) will print to inform 
you (unless “TRANSACTION LIST” on 
page 46 is set to “NEVER PRINT”).

FUNCTION

STOP

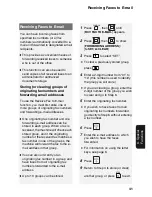
Duplex Scanning is convenient for 
transmitting or copying two-sided 
documents. When this function is 
selected, you simply feed all pages of 
the document through the machine 
once, turn the stack of pages over, and 
feed the stack through again. The 
machine will automatically sort the 
pages into the correct order (front of 1st 
page, back of 1st page, front of 2nd 
page, back of 2nd page, etc.). 

Note that any blank sides must be 
included when scanning the pages (if 
the number of pages is not equal 
each time the machine scans the 
stack, an error will result).

1

Load the documents. Make sure the 
pages are placed front-side down, 
with the first page on the bottom.

If desired, press 

 to set the 

resolution and/or contrast.

2

Press  

and 

then .

3

Perform all steps of the desired copy 
or transmission operation.

4

When all pages of the document 
have been scanned, turn the stack 
over (do not change the page order) 
and load the stack again.

5

Press .

RESOLUTION/

RECEPTION MODE

DUPLEX

Blocking Unwanted Faxes

Duplex Scanning

Содержание UX-B800SE - B/W Inkjet - Fax

Страница 1: ...FACSIMILE OPERATION MANUAL MODEL UX B800SE ...

Страница 2: ...chnician for help ABOUT THE TELEPHONE CONSUMER PROTECTION ACT OF 1991 The Telephone Consumer Protection Act of 1991 makes it unlawful for any person to use a computer or other electronic device to send any message via a telephone facsimile machine unless such message clearly contains in a margin at the top or bottom of each transmitted page or on the first page of the transmission the following in...

Страница 3: ...ormal Dialing 26 Sending a Fax Auto Dialing 27 Batch Page Numbering 31 Sending a Fax From Memory 31 4 Receiving Faxes 32 Using AUTO Mode 32 Using MANUAL Mode 32 TEL FAX Mode 33 Reception to Memory 33 5 Making Copies 34 6 Special Functions 35 Broadcasting 35 Caller ID Requires Service 37 Distinctive Ring Requires Service 39 Blocking Unwanted Faxes 40 Duplex Scanning 40 Receiving Faxes to E mail 41 ...

Страница 4: ...e tray Legal 100 sheets Recommended paper weight 20 lb Copy Bond Recording system Thermal inkjet Print resolution 600 600 dpi Effective printing width 8 0 203 mm max Fax to E mail Yes requires an Internet connection and a router switch or hub to connect the machine LAN cable 10Base T 100Base TX straight through cable must be purchased separately File formats Tiff G4 PDF G4 Memory capacity Approxim...

Страница 5: ...ent size Automatic feeding Width 5 8 to 8 5 148 to 216 mm Length 20 sheets 5 5 to 11 140 to 279 mm Length 5 sheets 5 5 to 14 140 to 356 mm Manual feeding Width 2 75 to 8 5 70 to 216 mm Length 5 5 to 14 140 to 356 mm Scanning Resolution Standard 203 x 98 dpi Fine 203 x 196 dpi Super fine 203 x 391 dpi Halftone 203 x 196 dpi Halftone grayscale 64 levels Contrast control Automatic Dark selectable Cop...

Страница 6: ...t allow anything to rest on the power cord and do not install the machine where people may walk on the power cord This machine must only be connected to a 120 V 60 Hz grounded 3 prong outlet Connecting it to any other kind of outlet will damage the machine and invalidate the warranty Never insert objects of any kind into slots or openings on the machine This could create a risk of fire or electric...

Страница 7: ...ons can be stored in each key for one touch selection p 36 Rapid Keys letter keys A fax number or e mail address can be stored in each of these keys for one touch selection attach the Rapid Key labels When entering text the keys are used as letter keys BROADCAST key Press to send to multiple fax or e mail destinations p 35 SECURE key Press to use the fax secure receive function p 43 DUPLEX key Use...

Страница 8: ...ress to enter a symbol the character appearing on the right side of each letter key Press again to return to normal letter entry mode Caps Lock key Press to enter upper case letters Press again to return to lower case letter entry SHIFT key Hold down to temporarily change case Letter keys Use to enter letters key com key Press to conveniently enter and com when entering an e mail address DEL key P...

Страница 9: ...orm on the scanning glass preventing proper document scanning To remove the condensation turn on the power and wait approximately two hours before using the machine 1 Installation Unpacking Checklist Manual Print cartridge Paper tray Document exit tray Remove the packing tape 1 Open the cover and remove the tape Do not install the print cartridge yet Setup Connect the handset Handset cord Rapid Ke...

Страница 10: ...tray and flip out the extension Attach the paper tray The stack must not be higher than this line If paper remains in the tray take it out and combine it into a single stack with the new paper Printing on the reverse side of the paper may result in poor print quality Do not use paper that has already been printed on or is curled Remove received faxes and other printed output before about 50 sheets...

Страница 11: ...ode OFF Approx 480 letter pages Ink Save mode ON Approx 800 letter pages The initial cartridge has the same yield as the replacement cartridge Ink Save mode is initially turned off To turn on Ink Save mode see pages 45 and 49 Installing the Print Cartridge Caution Do not open the cover while the machine is printing Note Keep print cartridges sealed in their packages until you are ready to install ...

Страница 12: ...e it clicks into place CAUTION DO NOT touch the gold contact area or pull on the cable If you are replacing the cartridge remove the old cartridge If you are going to use the old cartridge again place it in an air tight container containers for this purpose can be purchased at most office supply stores 1 2 5 Close the cover pressing firmly on both front corners Display CHANGE CARTRIDGE 1 NEW 2 OLD...

Страница 13: ...line 9 Enter the number of the straightest line with the number keys To clear a mistake press 10 Press Name and Fax Number Enter your name and fax number Your entered name and fax number will be printed automatically at the top of all fax pages you send This is required by FCC regulations 1 Press then until ENTRY MODE appears 2 Press Display OWN NUMBER SET 3 Press ENTER FAX FUNCTION When the resol...

Страница 14: ...ning and end of daylight saving time turn on the DAY LIGHT SAVING setting pp 45 and 47 Do this before you set the date and time 1 Press then until ENTRY MODE appears 2 Press then until DATE TIME SET appears 3 Press The currently set date appears example DATE 08 15 2006 4 Enter a two digit number for the month 01 for January 02 for February 12 for December etc Example January DATE 01 15 2006 To cor...

Страница 15: ...ption automatically To set the reception mode make sure a document is not loaded in the document feeder and then press until the desired mode appears in the display For more information on receiving faxes see Chapter 4 RESOLUTION RECEPTION MODE Volume Adjustment Speaker volume 1 Press 2 Press or to select HIGH MIDDLE or LOW Press again to turn off the speaker SPEAKER SPEAKER Handset receiver volum...

Страница 16: ...chine to the Internet the router is usually connected to a cable modem or DSL modem A typical setup is shown below The machine is connected using an Ethernet cable not included Please purchase a 10Base T 100Base TX straight through regular cable Connect one end of the cable to the LAN port on the machine Connect the other end to a LAN port on your router switch or hub If you are uncertain which po...

Страница 17: ...SETTING appears 2 Press then to show NETWORK INFORMATION FUNCTION 3 Press If the machine has automatically received an IP address and is able to communicate IP ADDRESS DHCP ON will appear on the top line of the display followed by the IP address on the bottom line To show the machine s host name press If a static IP address has been entered in the machine and the machine is able to communicate IP ...

Страница 18: ...ee the manual for the router If IP ADDRESS DHCP FAIL appears remove and then reinsert the Ethernet cable plug and repeat Steps 1 to 3 above If the same message appears check the device that acts as the DHCP server on your network try removing and restoring the power If your router is your DHCP server make sure that DHCP is enabled in the router settings If your network does not have a DHCP server ...

Страница 19: ...host name or IP address follow the procedure in Checking your IP address and the connection page 15 or print the Network Settings List page 50 E mail Settings Type in the host name or IP address of the machine in the Address bar of the Web browser on your computer The Web page menu will appear Select E mail Setup and configure the settings For explanations of the settings click Help in the Web pag...

Страница 20: ... mail message max of 50 characters When finished press SENDER ADDRESS Enter your sender e mail address max of 128 characters When finished press Note Be sure to enter your actual e mail address Return e mail and undelivered mail reports will be sent to this address In addition some SMTP servers reject outgoing e mail if a valid sender e mail address is not entered E MAIL SUBJECT Enter a default su...

Страница 21: ...r C key press the desired key and go directly to Step 4 To store an e mail address in a Rapid Key press the desired Rapid Key To store an e mail address in a Speed Dial number press SPEED DIAL FUNCTION SPEED DIAL and enter the desired 2 digit number 01 to 63 If you prefer to have the machine suggest an available Rapid Key Speed Dial number at the end of the procedure press 3 Press to select E MAIL...

Страница 22: ...nges to the address Press or to move the cursor to the character s you wish to change and then press the appropriate letter or number key The new character will replace the old character STOP FUNCTION SPEED DIAL If you do not wish to change the address go directly to Step 5 5 Press 6 Make the desired changes to the name If you do not wish to change the name go directly to Step 7 7 Press 8 Return t...

Страница 23: ...d fax numbers from the search press or until the name RESOLUTION RECEPTION MODE SPEED DIAL or address appears and press Note If CHECK E MAIL SETTING appears your SMTP server or sender address has not been entered in the e mail settings p 17 4 If you need to select or change any of the e mail options press and follow Steps 5 and 6 below Note that settings selected here are temporary To make permane...

Страница 24: ...re securely inserted in the LAN ports Make sure that the correct cable is being used and that the cable is good Make sure that your router or hub is powered on SERVER ERROR This appears when the machine cannot connect to your mail server or there is no response from the mail server Make sure the SMTP server setting is correct p 18 If you have configured POP before SMTP settings in the Web pages ma...

Страница 25: ...ted settings 1 Press then until NETWORK SETTING appears 2 Press twice then to show INITIALIZE SETTINGS 3 Press twice FUNCTION If your network requires that you assign a static permanent IP address to the machine follow the steps below to disable DHCP automatic IP address assigment and configure the network settings Consult your network administrator for the information that must be entered After D...

Страница 26: ...tom 0 16 4 mm of a document cannot be scanned Up to 20 letter size sheets 5 legal size sheets can be placed in the feeder at once If the sheets do not feed or double feeds occur reduce the number of sheets The sheets will feed automatically starting from the bottom sheet To send or copy more than the maximum number of sheets place the additional sheets gently in the feeder just before the last she...

Страница 27: ...ument The default resolution setting is STANDARD The default contrast setting is AUTO Adjust the settings each time you don t want to use the default settings Note The resolution and contrast settings are only effective for sending not for receiving Resolution settings Contrast settings STANDARD Use STANDARD for ordinary documents This provides the fastest transmission FINE Use FINE for documents ...

Страница 28: ... person answers you can talk with them through the handset before sending the fax SPEAKER Normal Dialing allows you to listen to the line and make sure the other fax machine is responding 1 Load the document s If desired press to set the resolution and or contrast 2 Pick up the handset or press Listen for the dial tone 3 Dial the fax number of the receiving machine press the number keys 4 Wait for...

Страница 29: ...To store a number in a Rapid Key press the desired Rapid Key To store a number in a Speed Dial number press and enter the SPEED DIAL FUNCTION SPEED DIAL desired 2 digit number 01 to 63 Display SELECT DEST TYPE If you prefer to have the machine suggest an available Rapid Key Speed Dial number at the end of the procedure press 3 Press to select FAX Display FAX MODE 4 Enter the fax or phone number wi...

Страница 30: ...can also press or until the number appears and press Display 1 EDIT 2 CLEAR 3 Press for EDIT or for CLEAR SPEED DIAL STOP FUNCTION SPEED DIAL If you selected CLEAR go to Step 7 4 If you selected EDIT make the desired changes to the number Press or to move the cursor to the digit or digits you wish to change and then enter the new digit The new digit will replace the old digit If you do not wish to...

Страница 31: ...he other party appears in the display and press 3 Dialing and transmission will take place automatically To cancel transmission press If the transmission is completed successfully the machine will beep once RESOLUTION RECEPTION MODE SPEED DIAL STOP STOP If an error occurs the machine will beep three times and print a Transaction Report to inform you of the problem p 51 Making a voice call with an ...

Страница 32: ...esired press to set the resolution and or contrast RESOLUTION RECEPTION MODE FUNCTION STOP RESOLUTION RECEPTION MODE 2 Press once Make sure the display shows the number you wish to dial 3 If you are sending a fax press Dialing begins If you are making a phone call lift the handset Dialing begins Note If the transmission is unsuccessful and DOCUMENT JAMMED appears in the display remove the document...

Страница 33: ...OUNT ERROR will appear in the display PAGE E will also appear in the NOTE column of the Transaction Report if printed FUNCTION RESOLUTION RECEPTION MODE STOP Batch Page Numbering Sending a Fax From Memory To increase transmission speed you can send a fax through the machine s memory After transmission the fax is automatically cleared from memory Note If a power failure occurs while sending a fax f...

Страница 34: ...Fax Signal Receive setting to NO pp 45 47 press to begin reception 3 If the other party first speaks with you and then wants to send a fax press after speaking Press before the sender presses their Start key When RECEIVING appears in the display hang up The machine automatically reduces received faxes as needed to fit the paper If you prefer to have all faxes printed at full size change the RECEIV...

Страница 35: ... MODE If your machine doesn t detect a fax tone this means that the call is a voice call or manually dialed fax it will make a special ringing sound for 15 seconds to alert you to pick up the machine s handset to change the number of seconds see p 45 and PSEUDO RING DURATION on p 46 If you don t answer within this time the machine will send a fax tone to the other machine to allow the calling part...

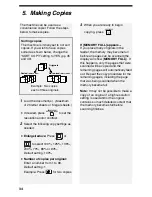
Страница 36: ...itially set to not sort copies If you wish to have copies sorted as shown below change the SORT COPY setting to YES pp 45 and 49 The machine can be used as a convenience copier Follow the steps below to make copies If MEMORY FULL appears If you place many originals in the feeder the memory may become full before all pages can be scanned the display will show MEMORY FULL If this happens only the pa...

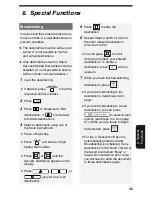
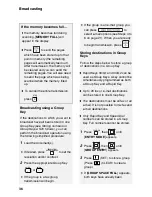
Страница 37: ... until the desired destination appears in the display Press or only for an e mail destination RESOLUTION RECEPTION MODE B CAST SPEED DIAL 5 Press to enter the destination 6 Repeat Steps 4 and 5 for each of the other desired destinations maximum of 20 You can press to scroll through and check your entered destinations To delete a destination press when it appears 7 When you have finished selecting ...

Страница 38: ...cannot be simultaneously programmed as both a Group Key and a Rapid Key Up to 20 fax or e mail destinations can be stored in one Group Key The destinations must be all fax or all e mail It is not possible to mix fax and e mail destinations Only Rapid Key and Speed Dial numbers can be stored in a Group Key Full numbers cannot be stored 1 Press then until ENTRY MODE appears 2 Press then until GROUP ...

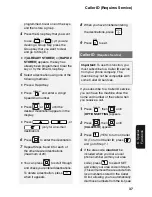
Страница 39: ...entered destinations To delete a destination press when it appears 33 G1 34 G2 SPEED DIAL 8 When you have finished entering the destinations press 9 Press to exit STOP Important To use this function you must subscribe to a Caller ID service from your phone company The machine may not be compatible with some Caller ID services Caller ID Requires Service If you subscribe to a Caller ID service you c...

Страница 40: ...does not have Caller ID service or the service is not compatible with your service PRIVATE CALL Caller information was not provided at the caller s request STOP Caller ID list The machine keeps a log of the most recent 30 calls and faxes you have received the Caller ID list You can view the list and automatically dial a number from the list The list is only available if you have Caller ID service ...

Страница 41: ...can set the machine to automatically answer when your second number is called This allows you to use the second number as an exclusive fax number 1 Press then until OPTION SETTING appears 2 Press then until DISTINCTIVE RING appears FUNCTION 3 Select the ring pattern below that matches the ring pattern of your second number To use your first number as a fax number select STANDARD RING 4 Press to ex...

Страница 42: ... copying two sided documents When this function is selected you simply feed all pages of the document through the machine once turn the stack of pages over and feed the stack through again The machine will automatically sort the pages into the correct order front of 1st page back of 1st page front of 2nd page back of 2nd page etc Note that any blank sides must be included when scanning the pages i...

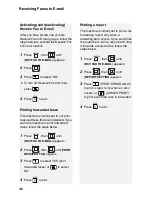
Страница 43: ...g number of the received fax matches a fax number in one of the groups the machine will forward the fax to the e mail address in that group You can also omit entry of an originating fax number in a group and have faxes from all originating fax numbers forwarded to the e mail address Up to 10 groups can be stored 1 Press then until RCV FAX TO E MAIL appears 2 Press then to show FORWARDING ADDRESS 1...

Страница 44: ... faxes follow the steps below 1 Press then until RCV FAX TO E MAIL appears 2 Press then until PRINT RECEIVED FAX appears 3 Press to select YES print forwarded faxes or to select NO 4 Press to exit FUNCTION STOP FUNCTION STOP Printing a report The machine is initially set to print a fax forwarding report only when a fowarding error occurs If you would like the machine to print a report each time it...

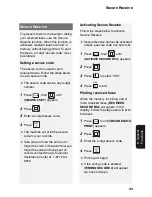
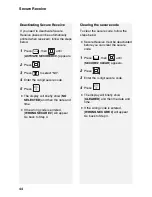
Страница 45: ...Take care not lose the print out or forget the code In the event that you forget the code and have kept no record contact Sharp s Customer Assistance Center at 1 877 794 8675 SECURE Activating Secure Receive Follow the steps below to activate Secure Receive Secure Receive cannot be activated unless a secure code has been set 1 Press then until ACTIVATE SECURE RCV appears 2 Press 3 Press to select ...

Страница 46: ...y show NO SELECTED and then the date and time If the wrong code is entered WRONG SECURE will appear Go back to Step 4 SECURE Clearing the secure code To clear the secure code follow the steps below Secure Receive must be deactivated before you can clear the secure code 1 Press then until SECURE CLEAR appears 2 Press 3 Enter the 4 digit secure code 4 Press The display will briefly show CLEARED and ...

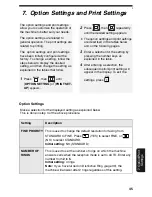
Страница 47: ...e described in the tables below and on the following pages 3 Enter a selection for the setting by pressing the number keys as explained in the table 4 After entering a selection the subsequent option print setting will appear in the display To exit the settings press STOP Option Settings Make a selection for the displayed setting as explained below This is done in step 3 of the above procedure Set...

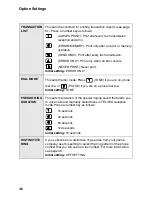
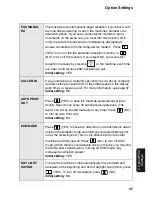
Страница 48: ...the dial mode Press TONE if you are on a tone dial line or PULSE if you are on a pulse dial line Initial setting TONE PSEUDO RING DURATION This sets the duration of the special ringing sound that alerts you to voice calls and manually dialed faxes in TEL FAX reception mode Press a number key as follows 15 seconds 30 seconds 60 seconds 120 seconds Initial setting 15 seconds DISTINCTIVE RING If you ...

Страница 49: ...e ID of the caller appear in the display each time you receive a call For more information see page 37 Initial setting NO AUTO PRINT OUT Press YES to have the machine automatically print an Activity Report once every 30 send receive operations The report can still be printed manually at any time Press NO to turn off Auto Print Out Initial setting NO ECM MODE Press YES to have any distortions in a ...

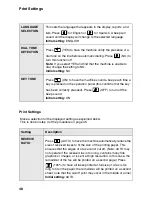
Страница 50: ...has been correctly pressed Press OFF to turn off the beep sound Initial setting ON Print Settings Make a selection for the displayed setting as explained below This is done in step 3 of the procedure on page 45 Setting Description RECEIVE RATIO Press AUTO to have the machine automatically reduce the size of received faxes to fit the size of the printing paper This ensures that the edges of a fax a...

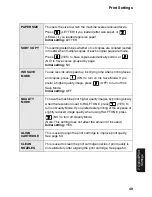
Страница 51: ...nd copies press ON to turn on Ink Save Mode If you prefer a higher quality image press OFF to turn off Ink Save Mode Initial setting OFF QUALITY MODE To have the machine print higher quality images by printing slowly when the resolution is set to HALF TONE press YES to turn on Quality Mode If you prefer faster printing at the expense of slightly reduced image quality when using HALF TONE press NO ...

Страница 52: ...ations that have been stored in Rapid Key and Speed Dial numbers pp 19 and 27 FUNCTION GROUP LIST This shows the destinations that are stored in the Group Keys p 36 SETUP LIST This shows your currently entered sender s name sender s number and anti junk fax number your current selections for the option settings print setup and receive faxes to e mail and a sample of the header printed at the top o...

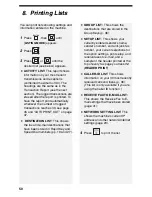
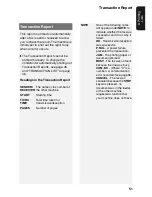
Страница 53: ...essed no document was in the feeder or the other machine requested a function that your machine does not have This report is printed out automatically after a fax is sent or received to allow you to check the result The machine is initially set to print out the report only when an error occurs The Transaction Report cannot be printed manually To change the condition for automatically printing out ...

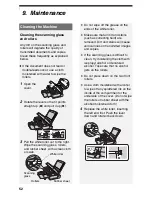
Страница 54: ... the ends of the white roller Make sure that all dirt and stains such as correcting fluid are removed Dirt and stains will cause vertical lines on transmitted images and copies If the scanning glass is difficult to clean try moistening the cloth with isopropyl alcohol or denatured alcohol Take care that no alcohol gets on the rollers Do not press down on the two front rollers Use a cloth moistened...

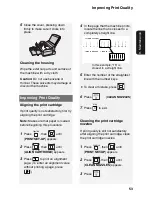
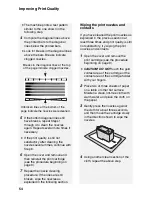
Страница 55: ...ine prints locate the line that is closest to a completely straight line Cleaning the print cartridge nozzles If print quality is still not satisfactory after aligning the print cartridge clean the print cartridge nozzles 1 Press then until PRINT SET UP appears 2 Press then until CLEAN NOZZLES appears 3 Press FUNCTION Cleaning the housing Wipe the external parts and surface of the machine with a d...

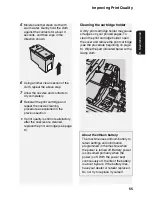
Страница 56: ...revious section at least three times and print quality is still not satisfactory try wiping the print nozzles and contacts 1 Open the cover and remove the print cartridge see the procedure beginning on page 9 CAUTION DO NOT touch the gold contact area of the cartridge or the contact area of the cartridge holder with your fingers 2 Place two or three sheets of paper on a table or other flat surface...

Страница 57: ... primarily when the power is off With the power kept continuously off the life of the battery is about 5 years If the battery dies have your dealer or retailer replace it Do not try to replace it yourself 5 Moisten another clean cloth with warm water Gently hold the cloth against the contacts for about 3 seconds and then wipe in the direction shown 6 Using another clean section of the cloth repeat...

Страница 58: ...ecked for line noise Try connecting the machine to a different phone line If the error persists the machine may need service 10 Troubleshooting Problems and Solutions If you have any problems with the machine first refer to the following troubleshooting guide If you cannot solve the problem call Sharp s Customer Assistance Center at 1 877 794 8675 For network connection problems Fax to E mail see ...

Страница 59: ...l the receiving machine manually and make sure that it is responding you should hear a fax tone Nothing is printed at the receiving end Make sure that the document for transmission is placed face down in the feeder A distorted image is received at the other end Noise on the telephone line may cause distortion Try sending the document again Make a copy of the document on your machine If the copy is...

Страница 60: ...again Make a copy or print a report on your machine If the copy or report is also distorted your machine may need service The quality of copies is poor and or dark vertical lines appear Any dirt or material on the scanning glass will cause spots to appear on copies and transmitted faxes Clean the scanning glass as explained on page 52 General problems Problem Solution Nothing appears in the displa...

Страница 61: ...s usually due to a problem with the cable connections Make sure that the cable ends are securely inserted in the LAN ports Make sure that the correct cable is being used and that the cable is good Make sure that your router or hub is powered on CHECK E MAIL SETTING Fax to E mail transmission is not possible because the SMTP server or the sender address has not been specified in the e mail settings...

Страница 62: ...from memory see If the memory becomes full on page 36 If you are copying see If MEMORY FULL appears on page 34 OUT OF INK The cartridge is out of ink and must be replaced Faxes will be received to memory PAPER JAMMED The printing paper is jammed See page 62 PRINTER ERROR A printer error has occurred Open the cover make sure the print cartridge is installed correctly and then close the cover PRINTE...

Страница 63: ...R NOT FOUND CABLE DISCONNECTED See CONNECTION ERROR on page 59 SERVER NOT FOUND DHCP A Fax to E mail transmission was not successful because the machine was unable to automatically obtain an IP address Restart your router or other device that acts as your DHCP server SERVER NOT FOUND SMTP A Fax to E mail transmission was not successful because an incorrect host name is entered for your SMTP server...

Страница 64: ...the feeder mechanism 1 Open the cover Rotate the lever so that points straight up and pull it up Pull the roller out to the right and remove the document Clearing Paper Jams Clearing jammed printing paper 1 Open the cover Pull the jammed paper forward or backward out of the machine as appropriate taking care not to tear it 3 2 4 1 2 1 2 Replace the white roller inserting the left end first Push th...

Страница 65: ... LPLTP3442XHSA Rapid Key labels TLABH415KXHSA Part distribution centers Tritronics Inc 1306 Continental Drive Abingdon MD 21009 Tel 1 800 638 3328 Fax 1 800 888 FAXD Tritronics Inc 1015 NW 52nd Street Ft Lauderdale FL 33309 Tel 1 800 365 8030 Fax 1 800 999 FAXD Fox International Ltd 23600 Aurora Road Bedford Heights OH 44146 Tel 1 800 321 6993 Fax 1 800 445 7991 Andrews Electronics 25158 Avenue St...

Страница 66: ...e network the telephone company will notify you in advance that temporary discontinuance of service may be required But if advance notice isn t practical the telephone company will notify the customer as soon as possible Also you will be advised of your right to file a complaint with the FCC if you believe it is necessary The telephone company may make changes in its facilities equipment operation...

Страница 67: ... continue flushing for at least 15 minutes If irritation develops and persists seek medical attention Ingestion Immediately wash mouth out with plenty of water Do not induce vomiting Slowly dilute with 1 2 glasses of water or milk and seek medical attention Never give anything by mouth to an unconscious person Aggravated Conditions None known Notes to Physician No specific antidote Section 5 Fire ...

Страница 68: ...idge contains liquid ink Pressurized No Color Black pH 7 0 8 5 Odor Faint Specific Gravity Approx 1 0 Solubility in Water Fully Miscible Specific Gravity Approx 1 0 Section 10 Stability and Reactivity Chemical Stability Stable Hazardous Polymerization Will not occur Conditions to Avoid None known Materials to Avoid None known Hazardous Decomposition Products Carbon monoxide carbon dioxide unidenti...

Страница 69: ...ean Inventory of Existing Commercial Substances EINECS list have been registered on the European List of New Chemical Substances ELINCS or are exempt ENCS Japan All ingredients are listed on the Japanese Existing and New Chemical Substances ENCS list have been registered or are exempt AICS Australia All ingredients are listed in Australian Inventory of Commercial Substances AICS or are registered ...

Страница 70: ...eiving Faxes Press until the desired reception mode appears in the display AUTO mode The machine automatically answers and receives faxes MANUAL mode Answer all calls even faxes by picking up the handset To begin fax reception press TEL FAX mode The machine automatically answers and receives faxes Voice calls are signalled by a special ringing sound Storing Destinations 1 Press then 2 Press an unu...

Страница 71: ...do de recepción deseado en el display Modo AUTO El contestador automáticamente contesta las llamadas y recibe faxes Modo MANUAL Contesta todas las llamadas incluso las de telefax levantando el auricular Para que comience la recepción del documento oprima Modo TEL FAX El contestador automáticamente contesta las llamadas y recibe faxes Las llamadas de voz se indican con un sonido de timbre especial ...

Страница 72: ...Keypad Dialing 30 Display messages 38 59 Distinctive ring 39 Document feeder 24 Document restrictions 24 Document sizes 24 Duplex Scan 40 E ECM mode Error Correction Mode 47 E mail addresses storing 19 E mail message 18 21 E mail options 21 E mail settings 17 18 E mail subject 18 21 F Fax Signal Receive 47 Fax to E mail transmission 20 File format 18 21 File name 22 Fine Priority setting 45 G Grou...

Страница 73: ... holder wiping 55 Pseudo Ring 46 Q Quality Mode setting 49 R Rapid Key Dialing 29 Rapid Key using for e mail 21 Receive Fax to E mail 41 Receive Fax to E mail List 50 Receive Ratio setting 48 Reception mode AUTO 13 32 MANUAL 13 32 TEL FAX 13 33 Redialing 30 Redialing automatic 30 Removing original document 25 Resolution 25 Ringer volume 13 S Scanning glass cleaning 52 Search Dialing 29 Searching f...

Страница 74: ...Index 72 W Web page in machine 17 ...

Страница 75: ...end the duration of any warranties beyond the time period described above on behalf of Sharp The warranties described herein shall be the sole and exclusive warranties granted by Sharp and shall be the sole and exclusive remedy available to the purchaser Correction of defects in the manner and for the period of time described herein shall constitute complete fulfillment of all liabilities and resp...

Страница 76: ...RECORDS Please record the model number and serial number below for easy reference in case of loss or theft These numbers are located on the rear side of the unit Space is also provided for other relevant information Model Number Serial Number Date of Purchase Place of Purchase PRINTED IN THAILAND TINSE4521XHTB UX B800SE ...

Отзывы: