background image

10

Daily operation

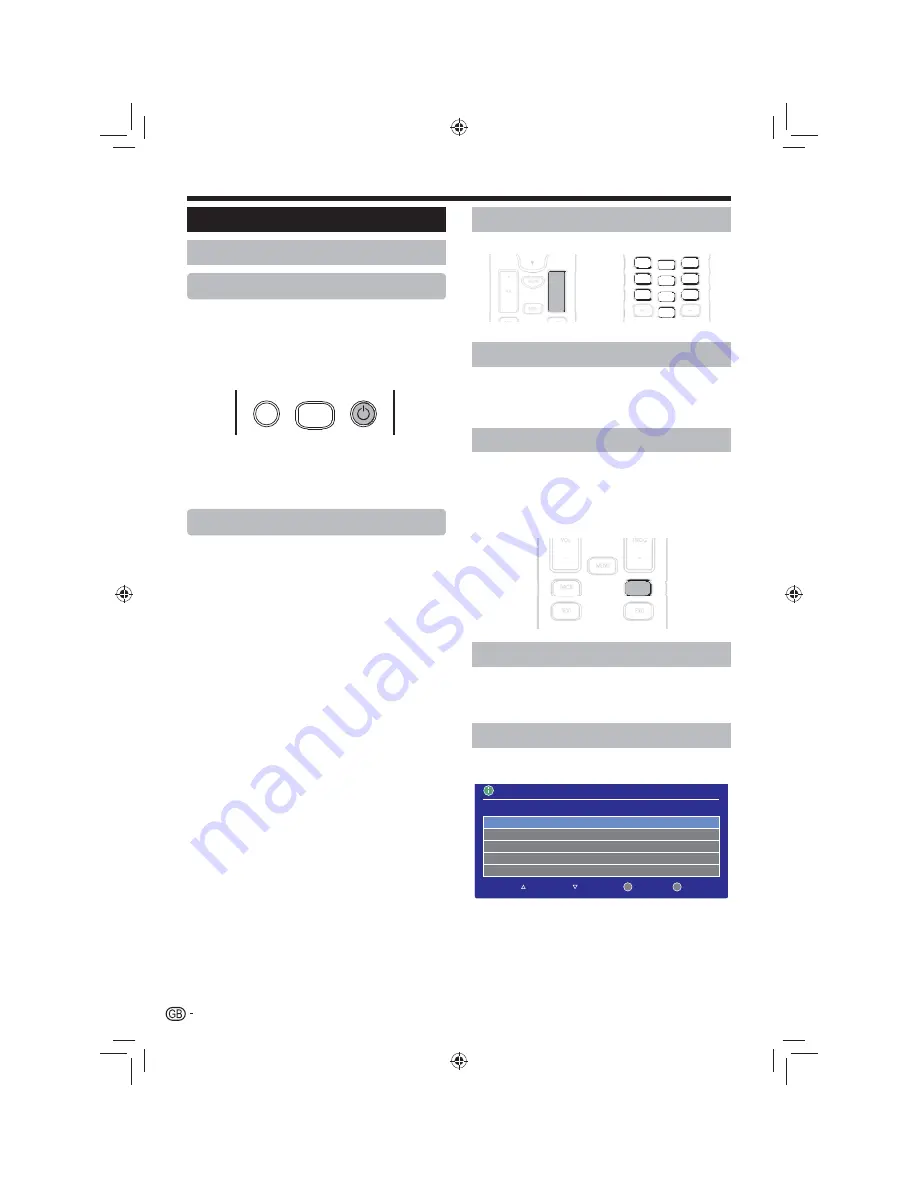
Switching on/off

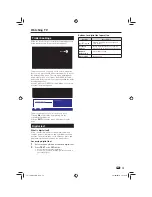
Standby mode

Select standby mode


E

If the Recorder is switched on, you can switch it to 

standby by pressing 

a

 on the remote control unit.

Switching on from standby


E

From standby, press 

a

 on the remote control unit.

MUTE

LIBRARY

NOTE

If you are not going to use this Recorder for long periods of 

• 

time, be sure to remove the power adapter from the supply. 

(Page 9).

A small amount of electric power is still consumed with the 

• 

Recorder in standby mode.

Adjusting the volume

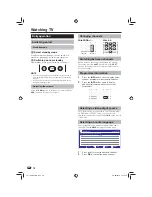
Press the 

VOL+

 button to increase the volume and the 

VOL-

 button to decrease the volume.

Changing channels

With PROG +/-: 

With 0

_

9:

VOL

+

PROG

+

GUIDE

MENU

BACK

INFO

1

2

3

4

5

6

7

8

9

REC

0

LAST

Switching between channels

Switch between the current channel and the previous 
channel by pressing 

LAST

. Each press of the 

LAST


button will toggle between the current channel and the 
previous channel.

Programme information

Press the 


1

INFO

 button once to display times, 

channel, programme, start and finish dates.

Press the 


2

INFO

 button again to display 

additional information about the current 
programme.

VOL

PROG

MENU

BACK

INFO

TEXT

EXIT

Selecting a video output source

Once the Recorder is connected to your TV using either 
a HDMI cable or SCART cable, you can select the 
appropriate output source by pressing 

A/V

 on the remote 

control unit.

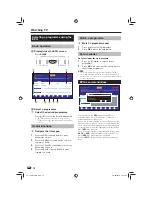
Selecting an audio language

Some programmes are broadcast with multiple audio 
channels. Press 

AUDIO

 to display the audio menu.

INFORMATION

Audio Channel

Select the audio channel that you want to use.

ENG

ENG

Stereo

Stereo

Exit Menu

Select

OK

Exit

Down

Up

Press 


1

a/b

 to select the desired channel. 

Press 


2

OK

 to confirm the audio channel.

Watching TV

TU-T2HR32_GB.indd   10

TU-T2HR32_GB.indd   10

29/06/2010   15:16:16

29/06/2010   15:16:16

Содержание TU-T2HR32

Страница 1: ... receive Digital Terrestrial TV signals subject to coverage an aerial upgrade may be required Text your postcode followed by your house name or number to 83331 or go to www freeview co uk availability Costs no more than a normal text Read this operation manual carefully 1 If you still encounter a problem please call our service help 2 line on 0845 880 0421 during normal weekday office hours TU T2H...

Страница 2: ...ories 6 Inserting the batteries 7 Using the remote control unit 7 Quick guide 8 Initial installation overview 8 Before turning on the power 9 Initial auto installation 9 Watching TV 10 Daily operation 10 Channel List 11 Selecting a programme using the EPG 12 Digital text 13 Recording TV 14 Recording a programme 14 Playing a recorded programme 14 Library 14 Connecting external devices 15 Video conn...

Страница 3: ...ce they can block ventilation openings This product is not designed for built in installation do not place the product in an enclosed place such as a bookcase or rack unless proper ventilation is provided or the manufacturer s instructions are followed Heat sources Keep the product away from heat sources such as radiators heaters stoves and other heat generating products including amplifiers To pr...

Страница 4: ...HDMI R Hold this button down for 5 seconds to revert the output to 1080i Page 19 LIBRARY T Display LIBRARY information Page 26 STANDBY ON Y Switch between Standby and On Page 10 LAST U Toggle between the current channel and the previous channel Page 10 PROG I Select the programme INFO O Display programme information Page 10 EXIT P Exit the MENU screen COLOUR BUTTONS A The colour buttons are corres...

Страница 5: ...2 3 4 5 6 12 RF IN Antenna in terminal 1 RF OUT Antenna out 2 terminal TV SCART terminal 3 SPDIF Digital audio 4 output terminal USB terminal For 5 service only Cooling fan outlet 6 Ethernet terminal 7 HDMI terminal 8 VCR SCART terminal 9 Optical infra red terminal 10 RS232 terminal For 11 service only 12V DC terminal 12 Introduction TU T2HR32_GB indd 5 TU T2HR32_GB indd 5 29 06 2010 15 15 51 29 0...

Страница 6: ...ARY 1 2 3 4 5 6 7 8 9 REC 0 LAST OK VOL PROG GUIDE MENU BACK INFO TEXT EXIT AD AUDIO A V WIDE SUBT MENU Page 4 Page 9 Page 9 Operation manual this publication AAA size zinc carbon battery x2 Page 7 Preparation TU T2HR32_GB indd 6 TU T2HR32_GB indd 6 29 06 2010 15 15 52 29 06 2010 15 15 52 ...

Страница 7: ...ine ones Note on disposing batteries The batteries provided contain no harmful materials such as cadmium lead or mercury Regulations concerning used batteries stipulate that batteries may no longer be thrown out with the household rubbish Deposit any used batteries free of charge into the designated collection containers set up at commercial businesses Using the remote control unit Use the remote ...

Страница 8: ...n the initial settings Turn on the power using the n a button on the Recorder Page 10 Run the first time installation o Page 9 Ensure the antenna is connected First Time Installation OK Please ensure that an aerial is connected Then press to scan for services Press OK to continue Start searching channels Watch TV Congratulations n Now you can watch TV If necessary adjust the antenna o to attain ma...

Страница 9: ...nected E Is the power adapter connected and plugged in E Is the HDMI cable connected between the Recorder and your TV E Press 1 a on the Recorder The first time installation screen is displayed Ensure the antenna cable is connected 2 Press OK to start the channel search 3 The Recorder will search for sort and store all receivable channels NOTE The first time installation process will be aborted if...

Страница 10: ...ressing LAST Each press of the LAST button will toggle between the current channel and the previous channel Programme information Press the 1 INFO button once to display times channel programme start and finish dates Press the 2 INFO button again to display additional information about the current programme VOL PROG MENU BACK INFO TEXT EXIT Selecting a video output source Once the Recorder is conn...

Страница 11: ...and press the RED coloured button Enter the PIN then press EXIT Set a channel as a favourite 3 You can set a channel as a favourite for quick access All favourite channels will be displayed in the favourites list Press 1 a b to select the channel you want to add to the favourites list Press the GREEN coloured button 2 The favourites list will be shown listing all favourite channels and the channel...

Страница 12: ...atch the programme Set a reminder Set a reminder for a programme Press 1 a b c d to select a future programme Press 2 OK A clock icon will be shown next to the selected programme NOTE If you set a reminder just before the programme start time a message will appear reminding you that the programme is about to start You can choose to automatically switch channels or cancel the reminder EPG recommend...

Страница 13: ...cing it in the scheduled recordings list Pressing EXIT will exit the menu without booking the item Digital text What is digital text Some channels are broadcast with digital text which contains pages of information and entertainment News weather sports information stock exchange prices and programme previews are among the many services Accessing digital text Select a channel which broadcasts digit...

Страница 14: ...1 pressa b c d on the remote control to select a programme you want to watch If the programme has not yet been watched 2 it will start playback from the start of the recording If part of the programme has already been 3 watched the following screen appears Press Blue to watch from the start or OK to resume playback INFORMATION Resume Playback You have already watched part of this programme Exit Me...

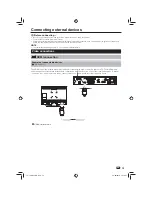
Страница 15: ...nnections HDMI connection Example of connectable devices HD Ready TV E The HDMI connection permits digital video and audio transmission via a connection cable to a TV The digital picture and sound data are transmitted without data compression and therefore lose none of their quality Analogue to digital conversion is no longer necessary in any connected devices which would also result in quality lo...

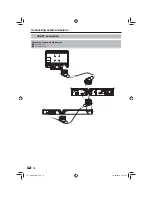
Страница 16: ...NET SPDIF HDMI VCR DC 12V DC TV IN RS 232 OPTICAL DOLBY HIGH DEFINITION MULTIMEDIA INTERFACE HDMI SCART OUTPUT 2 CH AUDIO OUT VIDEO OUT DIGITAL AUDIO OUT L R CB PB VIDEO COAXIAL Y S VIDEO CR PR Connecting external devices TU T2HR32_GB indd 16 TU T2HR32_GB indd 16 29 06 2010 15 16 22 29 06 2010 15 16 22 ...

Страница 17: ...V DIGITAL INPUT COAX 1 OPTICAL COAX 2 L R SPEAKER OUTPUT FR FL C RL RR _ POWER FUSE T2AL 250V ON OFF AC 230V 50Hz After connecting E Digital audio output setting After connecting to a surround sound system with a SPDIF cable you should set an audio output format compatible with the programme you are watching or the device connected Connecting external devices TU T2HR32_GB indd 17 TU T2HR32_GB indd...

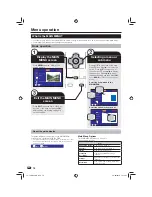
Страница 18: ...hannel Change Timeout Audio Desacription Volume Audio Delay Settings 720p Exit Menu Select OK Exit AV Settings Languages Parental Control Freeview General Selecting and adjusting options Settings HDMI Video HDMI Audio SCART Output Screen Size Menu Transparency Channel Change Timeout Audio Desacription Volume Audio Delay Settings 1080p Exit Menu Select OK Exit AV Settings Languages Parental Control...

Страница 19: ... sound AV Settings SCART Output Adjusts the video signal type when the Recorder is connected to your TV using a SCART cable Item RGB This selects an RGB video signal type The video signal will be splits the video output into separate red green and blue signals to provide the best picture quality Composite This selects a composite video signal Produces a single composite video signal which provides...

Страница 20: ... such as scenery body language and facial expressions Press AD on the remote control unit to toggle audio description on or off NOTE If audio description is available for a programme the AD symbol will be displayed in the Information Screen Page 10 and the EPG Page 12 When turning the AD function ON or OFF you may notice a brief loss in audio This is not a fault AV Settings Audio Description Volum...

Страница 21: ...Page 12 If subtitles are available they will be displayed at the bottom of the screen in the default subtitle language Languages Audio Language This function allows you to set the default audio language to English Welsh Gaelic or Irish Selecting audio languages Press AUDIO on the remote control unit to toggle switch between the available audio languages NOTE Not all programmes are broadcast with a...

Страница 22: ...tings PIN Disabled This will prevent a first time installation to be performed unless the parental settings PIN is entered Parental Control Allow parental changes This function allows you to prevent changes within the parental control menu without first entering the parental settings PIN Item Enabled This will allow access to the parental control menu without first entering the parental settings P...

Страница 23: ...function allows you to set a time interval for skipping backwards through a recorded programme This can be selected from either 10 30 40 or 60 seconds Freeview Auto Disk Management When Auto Disk Management is turned on if the recorder runs out of space whilst recording old recordings will automatically be deleted to create free space The internal hard drive can store up to 120 hours of digital TC...

Страница 24: ...Automatic The Recorder will automatically install software upgrades when available Manual The Recorder will display a message allowing you to confirm or cancel the software upgrade General Auto Retune This function allows you to control when new services channels are added and stored on the Recorder Item Always Start Whenever new services channels are detected the Recorder will automatically tune ...

Страница 25: ...Bandwidth Press 5 c d to adjust the bandwidth Press 6 b to select System Press 7 c d to select a System Press the BLUE coloured button to start 8 scanning for the specified channel If the channel is found it will be stored in the Recorder and will be available in the channel list and EPG Item UHF Channel The channel number you want to save the manually tuned channel as Frequency The frequency of t...

Страница 26: ... make a selection Exit Menu 8 Press the EXIT button on the remote control to exit the current screen Hours Remaining 9 This displays the available space on the Hard Disk Drive for recording Scheduled Recordings Display close the Scheduled E Recordings screen Select Scheduled Recordings from the Main Menu Guide GUIDE Scheduled Recordings Wed 16 Jun 2010 5 15pm 6 00pm Series Delete Nine contestants ...

Страница 27: ...e selected Page 10 Is the antenna connected properly Page 9 Hold the HDMI button on the remote control for 5 seconds to reset the output to 1080i Page 19 No sound Is the volume too low Check if you pressed mute on the remote control unit The Recorder sometimes makes a cracking sound This is not a malfunction This happens when the casing slightly expands and contracts according to changes in temper...

Страница 28: ... IEC 11172 2 MPEG 2 MP ML and MP HL ISO IEC 13818 2 MPEG 4 AVC MP L4 and HP L4 1 Field Frame Rate 60 30 Hz for NTSC or 50 25 Hz for PAL HD SD Decoding Capability Interlaced Mode Progressive Mode 1080i 720p 576p and 576i Aspect Ratio 16 9 Widescreen 4 3 Widescreen 16 9 4 3 Centre Cut Out 4 3 Letter Box 16 9 Video Input Output Digital Video HDMI with HDCP supported CVBS R G B for TV SCART OUT CVBS f...

Страница 29: ...ndby 0 8W Others Accessory Customer Selectable Remote Controller and Batteries User s Manual RF Cable 1 1M EMC Safety Compliant to CE ATC HDMI 1 4 HDCP Dolby Dolby Digital Stereo Dolby Digital HE AAC Software Dbook 6 1 compliant Tested to DTG Test Suite Audio Description Recorder mix MHEG5 HD Dbook 6 1 MHEG5 interaction channel MHEG5 iPlayer ready PIN CODE reminder NOTE You need to insert the PIN ...

Страница 30: ...discard this product please contact your local authorities and ask for the correct method of disposal For Switzerland Used electrical or electronic equipment can be returned free of charge to the dealer even if you don t purchase a new product Further collection facilities are listed on the homepage of www swico ch or www sens ch B Information on Disposal for Business Users 1 In the European Union...

Страница 31: ...o reset your channels on each occasion If you do not reset your channels you risk losing some or all of your TV services during and following switchover Please refer to Page 24 of this manual for help with resetting channels Please note that in order to receive the maximum number of available TV services on your equipment you must perform a first time installation and do not just add channels If y...

Страница 32: ...tee any fault which occurs must be notified to Sharp or its appointed Service Facility within one year from the date this product was purchased Proof of purchase must be provided 4 In the unlikely event of this product requiring repair please contact the Sharp DTR help line on 5 No person has any authority to vary the terms or conditions of this guarantee 6 This guarantee is offered as an addition...

Страница 33: ...33 Notes TU T2HR32_GB indd 33 TU T2HR32_GB indd 33 29 06 2010 15 16 49 29 06 2010 15 16 49 ...

Страница 34: ...TU T2HR32 EN 05 10 dcs 8670 TU T2HR32_GB indd 34 TU T2HR32_GB indd 34 29 06 2010 15 16 49 29 06 2010 15 16 49 ...

Отзывы: