background image

TINSEB006WRRZ-D31 SEC R-630D O/M

A32853,SEC R630D O/M

18

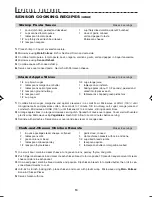
3. SALSA CHICKEN

4. SEAFOOD PASTA

5. VEGETARIAN ORZO

1. Put in 3-qt casserole:

1

c orzo

1

/

2

c vegetable bouillon

1

/

4

c pesto sauce

1

/

2

c small pieces of sundried tomatoes

1

tbsp minced garlic

1

tbsp Italian seasoning

Stir well. Cover. Touch 

One Dish Dinners

, number

5  and 

START

.

2. At pause, stir well and add:

3

c chopped green, red, orange & yellow peppers

1

large onion, thinly sliced

14

oz can artichoke hearts, drained & quartered

3

oz pitted ripe olives, cut in half

Stir well. Cover. Touch 

START

.

1. Put 1 

1

/

4

 oz dry taco seasoning into plastic bag.

Add :

1

lb boneless chicken breast thin strips

Shake together & set aside.
In 3-qt casserole combine :

6

oz pkg yellow rice mix with seasoning packet

1

/

2

c hot water

Stir well. Cover with lid or plastic wrap. Touch 

One

Dish Dinners

, number  3  and 

START

.

2. At pause, stir and add :

prepared chicken strips

1

/

2

c frozen peas

1

c canned corn

Stir together.
Add to chicken and rice mixture :

1

/

2

c apricot preserves

14 

1

/

2

oz can diced tomatoes

Stir well. Cover with lid or plastic wrap.

Touch 

START

.

3. Allow to stand covered for 3 to 5 minutes before

serving.

1. Put in 3-qt casserole:

8 - 9 oz fresh tortellini

2

cups water

Stir and cover. Touch 

One Dish Dinners

, number

4  and 

START

.

2. At pause, stir and add:

3

/

4

c creamy Alfredo sauce

1

/

4

lb raw shellfish like shrimp, scallops,

crab

3

c thinly sliced fresh vegetables like

carrots, mushrooms, green beans

Stir well. Cover. Touch 

START

.

3. Stir well. Re-cover and allow to stand 3 to 5

minutes.

Garnish with:

1

/

3

 c grated Parmesan cheese

3. Stir well. Re-cover. Allow to stand 3 to 5 minutes.

Garnish with:

1

/

2

 c Parmesan cheese, freshly grated 

1

/

4

 c

pinenuts.

Untitled-3

03.6.10, 11:09 PM

18

Содержание R-630D

Страница 1: ...afety Instructions 2 Unpacking and Installation Instructions 3 Grounding Instructions 3 Information You Need to Know 4 6 Part Names 7 8 Before Operating 9 Manual Operation 9 Special Features 10 21 Other Convenient Features 22 24 Cleaning Care 24 Service Call Check 25 THE ULTIMATE ACCESSORY 25 COOKBOOK ORDER FORM 26 Specifications 26 Guia Auto Touch Parte Interior de la Cubierta Trasera Auto Touch ...

Страница 2: ... purchase your complete mailing address including zip code your daytime telephone number including area code and description of the problem MODEL NUMBER ________________________ SERIAL NUMBER ______________ DATE OF PURCHASE ______________________ DEALER ____________________________ TELEPHONE ________________ SERVICER ___________________________ TELEPHONE ________________ PRECAUTIONS TO AVOID POSSI...

Страница 3: ... full satisfaction of all claims whether based on contract negligence strict liability or otherwise In no event shall Sharp be liable or in any way responsible for any damages or defects in the Product which were caused by repairs or attempted repairs performed by anyone other than an authorized servicer Nor shall Sharp be liable or in any way responsible for any incidental or consequential econom...

Страница 4: ...is appliance outdoors Do not use this product near water for example near a kitchen sink in a wet base ment near a swimming pool or similar loca tions 12 Do not immerse cord or plug in water 13 Keep cord away from heated surfaces 14 Do not let cord hang over edge of table or counter 15 See door surface cleaning instructions on page 24 16 To reduce the risk of fire in the oven cavity a Do not overc...

Страница 5: ...ection procedures Radio or TV Interference Should there be any interference caused by the microwave oven to your radio or TV check that the microwave oven is on a different electrical circuit relocate the radio or TV as far away from the oven as feasible or check position and signal of receiving antenna G R O U N D I N G I N S T R U C T I O N S Unpacking and Examining Your Oven Remove 1 all packin...

Страница 6: ...ter heating and shake thoroughly Wrist test before feeding Cut baked goods with filling after heating to release steam and avoid burns Stir liquids briskly before and after heating to avoid eruption Use deep bowl when cooking liquids or cereals to prevent boilovers Cook eggs in shells Reheat whole eggs Dry nuts or seeds in shells Pop popcorn in regular brown bags or glass bowls Exceed maximum time...

Страница 7: ...s that crisp food because they may be extra hot Don t assume that because a child has mastered one cooking skill he she can cook everything Children need to learn that the microwave oven is not a toy See page 23 for Child Lock feature It is not necessary to buy all new cookware Many pieces already in your kitchen can be used success fully in your new microwave oven Make sure the uten sil does not ...

Страница 8: ...igh joints move easily Meat and poultry show no pinkness Fish is opaque and flakes easily with a fork Check foods to see that they are cooked to the United States Department of Agriculture s recommended temperatures To test for doneness insert a meat thermometer in a thick or dense area away from fat or bone NEVER leave the thermometer in the food during cooking unless it is approved for microwave...

Страница 9: ...ling surfaces 8 Turntable motor shaft 9 Removable turntable support Carefully place the turntable support in the center of the oven floor 10 Removable turntable Place the turntable on the turntable support securely The turntable will rotate clockwise or counterclockwise Only remove for cleaning 11 Ventilation openings Rear 12 Oven light It will light when oven is operating or door is open 13 Waveg...

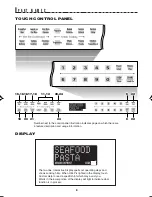
Страница 10: ...s cooking hints When HELP is lighted in the display touch Custom Help to read a specific hint which may assist you Words in the lower portion of the display will light to indicate what function is in process Number next to the control panel illustration indicates page on which there are a feature description and usage information TOUCH CONTROL PANEL ...

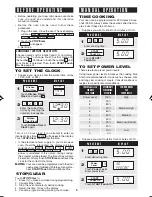
Страница 11: ...100 High 9 90 8 80 7 70 Medium High 6 60 5 50 Medium 4 40 3 30 Med Low Defrost 2 20 1 10 Low 0 0 Suppose you want to defrost for 5 minutes at 30 P R O C E D U R E D I S P L AY 1 Touch Power Level Enter power level 2 3 5 0 0 Enter defrosting time 5 0 0 5 0 0 Touch START Touch On Power Level 3 COOK COOK 30 PERCENT ENTER TIME OF DAY 1 3 0 2 1 2 3 0 1 2 3 0 Touch STOP Clear to 1 Erase if you make a mi...

Страница 12: ...ooking other foods ERROR will be displayed and the oven will turn off 8 Check food for temperature after cooking If addi tional time is needed continue to cook manually 9 Each food has a cooking hint Touch Custom Help when the HELP indicator is lighted in the display S P E C I A L F E AT U R E S SENSOR COOKING Covering Foods Some foods work best when covered Use the cover recommended in the chart ...

Страница 13: ... or microwave safe rack Cover with vented plastic wrap Touch Main Entrees number 3 and START After cooking let stand covered 3 5 minutes Dark meat should be 180 F and white meat should be 170 F Vegetables 1 Fresh Soft Broccoli Brussels sprouts Cabbage Caulif flowerets Cauliflower whole Spinach Zucchini Baked apples 2 Fresh Hard Carrots sliced Corn on the cob Green beans Winter squash diced halves ...

Страница 14: ...tand covered for 3 minutes Place rice into a deep casserole and add double quantity of wa ter Cover with lid or plastic wrap Touch Main Entrees number 5 and START After cooking stir cover and let stand 3 to 5 min utes or until all liquid has been absorbed This setting works well for frozen breakfast entrees pancakes waffles burritos etc Follow manufacturer s directions for how to prepare for micro...

Страница 15: ...ach 1 4 teaspoon salt 3 tablespoons chopped green pistachios 1 2 cup sugar 1 Combine brown sugar margarine and apricot preserves in a small bowl Microwave at HIGH 100 until margarine melts and preserves soften 45 seconds to 1 minute Stir in nutmeg salt sugar orange juice and cornstarch Microwave at HIGH 100 until thickened 4 to 6 minutes stirring several times 2 Arrange apple slices in a large mic...

Страница 16: ...y 1 large onion chopped 2 garlic cloves minced 2 tablespoons chili powder 1 tablespoon cumin 1 In 3 quart casserole place ground turkey onion garlic chili powder and cumin Mix thoroughly 2 Cover and microwave using Main Entrees Ground Meat Stir and drain 3 To meat mixture add zucchini tomatoes with their liquid tomato paste beans and corn Microwave covered using Sensor Reheat Creole Corn Makes 6 s...

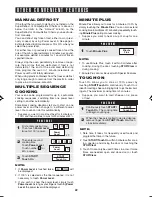
Страница 17: ... and program When audible signals are heard stir egg mixture mov ing the cooked portion to the center of the dish and uncooked portion to the outside After cooking stir and let stand covered until set Note that eggs will be slightly undercooked when removed from the oven and will finish cooking during the standing time 1 9 eggs MORE FROM YOUR MICROWAVE Your oven has 6 convenience selections to ass...

Страница 18: ...ty Check food for temperature after cooking If additional time is needed continue to cook manually SOUP PRESS START SEE LABEL SELECT FOOD Lunch on the Run NUMBER 3 Touch START Touch On 4 After cooking follow the directions in the display Touch number 3 to select soup LUNCH ON THE RUN CHART F O O D A M O U N T P R O C E D U R E 1 Meal in a Cup Place hot dog in bun Wrap each with paper towel or napk...

Страница 19: ...cloves garlic minced Stir together well Cover with lid Touch One Dish Dinners number 2 and START 2 At pause stir well Add 2 1 2 c sliced carrots 1 tsp salt 1 2 tsp pepper 2 1 SPICY COUSCOUS SEE RECIPE CARD PRESS START 1 Combine in 3 quart casserole Add 1 1 4 lb lean ground beef 14 1 2 oz can diced tomatoes 1 c tomato sauce 1 large onion chopped 1 3 c chopped green pepper 3 4 c couscous 1 clove gar...

Страница 20: ...Cover with lid or plastic wrap Touch One Dish Dinners number 3 and START 2 At pause stir and add prepared chicken strips 2 1 2 c frozen peas 1 c canned corn Stir together Add to chicken and rice mixture 1 2 c apricot preserves 14 1 2 oz can diced tomatoes Stir well Cover with lid or plastic wrap Touch START 3 Allow to stand covered for 3 to 5 minutes before serving 1 Put in 3 qt casserole 8 9 oz f...

Страница 21: ...r a helpful hint The oven will stop so the food can be checked The display will show Close the door Touch START Touch On 1 4 After defrost cycle ends follow the directions LET STAND 3 5 MINUTES S P E C I A L F E A T U R E S Touch SuperDefrost once F O O D A M O U N T SUPER DEFROST CHART P R O C E D U R E At pause turn over remove any thawed pieces and break remainder apart At end let stand covered...

Страница 22: ...h stage rearrange and if there are warm or thawed portions shield with small flat pieces of aluminum foil Remove any meat or fish that is almost defrosted Let stand covered for 10 to 20 minutes 2 Steaks Chops or Fish 5 4 0 lb After each stage rearrange pieces or remove portions should they become warm or thawed Let stand covered for 10 to 20 minutes 3 Chicken Pieces 5 3 0 lb This setting can also ...

Страница 23: ...ould you attempt to enter more or less than the allowed amount an error message will appear in the display More or less than the quantity listed in the chart should be made following the guidelines in any microwave book BEVERAGE CENTER CHART F O O D A M O U N T P R O C E D U R E Use this setting for heating COLD TAP WATER to a temperature somewhat below the boiling point to make instant coffee or ...

Страница 24: ... that time in the future 2 Touch START Touch On within 3 minutes after cook ing opening and closing the door or touching the STOP Clear 3 Touch On can only be used 3 times in a row If more times are needed open and close door or touch STOP Clear P R O C E D U R E 1 When the cheese is melted to desired degree remove finger from START Touch On Oven stops immediately 2 Continuously touch START Touch ...

Страница 25: ...tom Help and STOP Clear 2 AUDIBLE SIGNAL ELIMINATION If you wish to have the oven operate with no audible signals touch Custom Help the number 2 and STOP Clear To cancel and restore the audible signal touch Custom Help the number 2 and START Touch On 3 AUTO START If you wish to program your oven to begin cooking auto matically at a designated time of day follow this procedure Suppose you want to s...

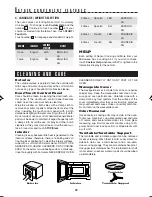
Страница 26: ...Close door and touch STOP Clear Interior Cleaning is easy because little heat is generated to the interior surfaces therefore there is no baking and set ting of spills or spattering To clean the interior surfaces wipe with a soft cloth and warm water DO NOT USE ABRASIVE OR HARSH CLEANERS OR SCOURING PADS For heavier soil use baking soda or a mild soap rinse thoroughly with hot water NEVER SPRAY OV...

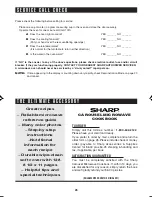
Страница 27: ...pearing in the display is counting down very rapidly check Demonstration Mode on page 23 and cancel S E R V I C E C A L L C H E C K TO ORDER Simply call this toll free number 1 800 642 2122 Please have your credit card ready If you prefer to order by mail complete and return the order form on page 26 Please include check or money order payable to Sharp Accessories Supplies Center for 6 00 plus 4 2...

Страница 28: ... _______ TOTAL ORDER AMOUNT _______ Price is subject to change without notice COOKBOOK ORDER FORM Mail to SHARP Accessories Supplies Center 2130 Townline Road Peoria Illinois 61615 1560 AC Line Voltage AC Power Required Output Power Microwave Frequency Outside Dimensions Cavity Dimensions Oven Capacity Cooking Uniformity Weight Single phase 120V 60Hz AC only 1650W 14 amps 1100W IEC Test Procedure ...

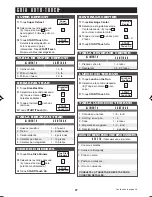
Страница 29: ...aliente 4 Calentar pan fresco 5 Calentar pan congelado 1 Toque One Dish Dinners 2 Seleccione la comida deseada Ej toque el número 1 para polenta condimentada 3 Toque START Touch On One Dish Dinners 1 START Touch On 1 Toque Beverage Center 2 Seleccione el ajuste Beverage Center deseado Ej toque 2 para volver a calentar café 3 Toque el número 2 4 veces para 2 tazas 4 Toque START Touch On Beverage Ce...

Страница 30: ...lato fuerte 1 Carne molida 2 Pechuga de pollo sin hueso 3 Piezas pollo con hueso 4 Pescado o mariscos 5 Arroz Comidas congeladas 1 Desayuno 2 Plato fuerte 3 Plato principal 4 Bocadillo 5 Pizza de microondas TABLA DE COCCIÓN CON SENSOR A L I M E N T O C A N T I D A D TABLA DE COMPU DEFROST A L I M E N T O C A N T I D A D 0 5 3 0 lb 0 5 4 0 lb 0 5 3 0 lb 2 0 4 0 lb 2 6 tazas 1 Carne molida 2 Bistec ...

Страница 31: ... 3 Touch number 2 for 2 servings 4 Touch START Touch On START Touch On 3 SUPER DEFROST CHART F O O D A M O U N T 1 0 lb 1 0 lb 2 0 lb 1 Ground Meat 2 Boneless Chicken 3 Bone in Chicken Pieces SUPER DEFROST Super Defrost 1 Touch Super Defrost 2 Select desired food Ex touch number 2 to defrost 1 0 lb boneless chicken breast 3 Touch START Touch On During defrosting the oven will stop follow the direc...

Страница 32: ... Pieces 4 Fish or Seafood 5 Rice Frozen Foods 1 Breakfast Foods 2 Entrees 3 Main Dishes 4 Snacks 5 Microwave Pizza SENSOR COOKING CHART F O O D A M O U N T 1 Touch Baked Potatoes 1 START Touch On Popcorn For other Sensor Cooking 1 Touch Popcorn 2 Touch number 1 for a regular bag 3 Press START Touch On SENSOR COOKING For Baked Potatoes Sensor Reheat Baked Potatoes COMPU DEFROST CHART F O O D A M O ...

Отзывы: