Sharp r-32b(st) Скачать руководство пользователя страница 3

R201T(W) [01-15].indd   1

6/8/10   7:32:07 PM

i

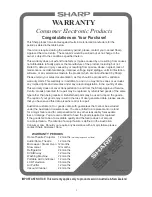
Congratulations on Your Purchase!

This Sharp product is warranted against faults in material and manufacture for the

period as stated in the table below.
If service is required during the warranty period, please contact your nearest Sharp

Approved Service Centre. These repairs would be carried out at no charge to the

owner, subject to the conditions specified herein. 


This warranty does not extend to defects or injuries caused by or resulting from causes 

not attributable to faulty parts or the manufacture of the product, including but not 

limited to, defect or injury caused by or resulting from misuse, abuse, neglect, lack of 

maintenance, accidental damage, improper voltage, liquid spillage, vermin infestation, 

software, or any alterations made to the product which are not authorised by Sharp.

Please retain your sales documentation, as this should be produced to validate a

warranty claim. This warranty is in addition to and in no way limits, varies or excludes

any implied rights and remedies under any relevant legislation in the country of sale.


WARRANTY PERIODS

Home Theatre Projector  12 months

Audio/Home Theatre 

12 months

Microwave / Steam Oven  12 months

Slow Juicer  


12 months

Refrigerator 


24 months

DVD/Blu-ray 


12 months

Washing Machine  

24 months

Portable Air Conditioner  12 months

LCD Television   

36 months

Air Purifier 


12 months

Vacuum Cleaner   

24 months

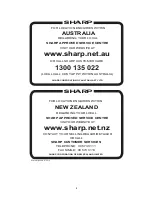
IMPORTANT NOTICE: This warranty applies only to products sold in Australia & New Zealand


SH

AR

P C

OR

PO

RA

TIO

N O

F

AU

ST

RA

LIA

 PT

Y. 

LIM

ITE

D

AB

N 4

0 0

03 

039

 40

5

1 H

un

tin

gw

oo

d D

riv

e

Hu

nti

ng

wo

od

 NS

214

8

SH

AR

P C

OR

PO

RA

TIO

N O

F

NE

W Z

EA

LA

ND

 LIM

ITE

D

59 

Hu

go 

Joh

nst

on 

Dri

ve

Pen

ros

e, A

uck

lan

d

WARRANTY

Consumer Electronic Products


SPform 040 (SEPT 2013)

Australian customers: Our goods come with guarantees that cannot be excluded 

under the Australian Consumer Law. You are entitled to a replacement or refund 

for a major failure and for compensation for any other reasonably foreseeable

loss or damage. You are also entitled to have the goods repaired or replaced 

if the goods fail to be of acceptable quality and the failure does not amount

to a major failure. The criteria of a major failure is defined in the Australian 

Consumer Law. Should you require any assistance with a major failure please

contact Sharp Customer Care.

This warranty does not cover transportation to and from the Sharp Approved Service

Centre. Goods presented for repair may be replaced by refurbished goods of the same 

type rather than being repaired. Refurbished parts may be used to repair the goods.

The repair of your goods may result in the loss of user generated data, please ensure 

that you have saved this data elsewhere prior to repair.


(excluding lamps and air filters)

Содержание r-32b(st)

Страница 1: ...een carefully developed to give optimum results when the step by step instructions are followed Whenselectinganotherhomeappliance pleaseagainconsider our full range of Sharp products MODEL R201T W Cover indd 1 6 18 10 5 23 32 PM ST 42 CONTENTS Pages Warranty i ii Warning 1 Special Notes and Warning 2 Oven and Accessories Installation 3 Control Panel 4 Before Operating 5 Setting the Clock 5 Microwa...

Страница 2: ......

Страница 3: ... LCD Television 36 months Air Purifier 12 months Vacuum Cleaner 24 months IMPORTANT NOTICE This warranty applies only to products sold in Australia New Zealand S H A R P C O R P O R A T I O N O F A U S T R A L I A P T Y L I M I T E D A B N 4 0 0 0 3 0 3 9 4 0 5 1 H u n t i n g w o o d D r i v e H u n t i n g w o o d N S W 2 1 4 8 S H A R P C O R P O R A T I O N O F N E W Z E A L A N D L I M I T E ...

Страница 4: ...573 0113 FOR LOCATION ENQUIRIES WITHIN AUSTRALIA REGARDING YOUR LOCAL SHARP APPROVED SERVICE CENTRE VISIT OUR WEBSITE AT www sharp net au OR CALL SHARP CUSTOMER CARE 1300 135 022 SHARP CORPORATION OF AUSTRALIA PTY LTD SPform019 AUGUST 2011 LOCAL CALL COST APPLY WITHIN AUSTRALIA SHARP APPROVED SERVICE CENTRE www sharp net nz CONTACT YOUR SELLING DEALER RETAILER OR CALL SHARP SHARP ii ...

Страница 5: ... is not working correctly or damaged until it has been repaired by a qualified service technician trained by SHARP It is particularly important that the oven door closes properly and that there is no damage to 1 Door warped 2 Hinges and Latches broken or loosened 3 Door Seals Sealing Surfaces and oven cavity buckled or deformed 4 Burn marks on the door seal faces Do not bump or catch utensils loos...

Страница 6: ...ate the oven without a load i e an absorbing material such as food or water in the oven cavity Liquids Beverages For boiling or cooking liquids see WARNING on page 2 to prevent explosion and delayed eruptive boiling d e d n e m m o c e r n a h t r e g n o l r o f t a e H time See REHEATING FOOD CHART on page10 Canned foods Remove food from can s n a c n i e l i h w d o o f k o o c r o t a e H Saus...

Страница 7: ...ed door seals around the door or dents inside the oven cavity or on the door If there is any damage please do not operate the oven until it has been checked by a SERVICE CENTRE APPROVED BY SHARP and repaired if necessary 2 Accessories provided 1 Turntable 2 Turntable support 3 Coupling 4 Operation manual 3 Ensure 4 This oven is designed for countertop or cabinet use as well It should not be instal...

Страница 8: ...ables A4 Pasta A5 Potato A6 Fish A7 Beverage A8 Popcorn 3 CLOCK button 4 TIME DEFROST button 5 STOP CLEAR button 6 START 30sec ENTER button 7 MICRO POWER button 8 WEIGHT DEFROST button 9 KITCHEN TIMER button 10 ENTRY dial Rotate to enter the cooking time time of day power level weight and to select an auto menu MICRO POWER CLOCK WEIGHT DEFROST TIME DEFROST KITCHEN TIMER STOP CLEAR START 30sec ENTE...

Страница 9: ...4 Rotate the ENTRY dial until the correct minutes are displayed the input time should be within 0 59 5 Press the CLOCK button to confirm the time The icon of the digital time will flash on the display and the clock indicator will disappear NOTES If the clock is set when cooking is complete the display will show the correct time of day If the clock has not been set the display will show 0 00 To che...

Страница 10: ...ce the cooking programme has been set if the START 30sec ENTER button is not pressed in 1 minute the setting will be cancelled The START 30sec ENTER button must be pressed to continue cooking if the door is opened during cooking An audible signal will sound once when pressing the button if inefficiently pressed there will be no sound Use the STOP CLEAR button to 1 Erase a mistake during programmin...

Страница 11: ... clock has been set If you wish to know the power level during cooking press the MICRO POWER button The current power level will displayed for 3 seconds The AUTO MENU programmes automatically calculates the correct cooking mode and cooking time of foods the example below for guidance on how to operate this function Example To cook fish with a weight of 250g by using the AUTO MENU function 1 Rotate...

Страница 12: ...s the MICRO POWER button twice or rotate the ENTRY dial to select the microwave power to P80 6 Press the START 30sec ENTER button once more to confirm the setting 7 Enter the cooking time by rotating the ENTRY dial until the display shows 5 00 minutes 8 Press the START 30sec ENTER button to start cooking Direct start You can directly start cooking on P100 microwave power level for 30 seconds by pr...

Страница 13: ...l can not be changed Before freezing foods ensure food is fresh and of good quality If necessary shield small areas of meat or poultry with flat pieces of aluminium foil This will prevent the areas from becoming warm during defrosting Ensure the foil does not touch the oven walls After defrosting an audible signal will sound five times and the LED will then display the time of day if the clock has...

Страница 14: ...microwave safe dish and cover with a lid or plastic wrap Place the dish on the centre of the turntable Stir halfway through cooking Pasta dried pasta e g Fusilli Farfalle Rigatoni A 4 100 Micro Pasta Cold Tap Water 1Cup 2 1 2 Cups 2Cups 4 1 2 Cups 4Cups 8 Cups Place the pasta in an appropriately sized microwave safe bowl and add the hot tap water Do not cover Place the bowl on the centre of the tu...

Страница 15: ...food is thoroughly reheated before serving To achieve the best results when reheating select a suitable microwave power level appropriate to the type of food e g A bowl of vegetables can be reheated using 100 while a lasagne which contains ingredients that cannot be stirred should be reheated using 50 NOTES Remove food from foil or metal containers before reheating ected by the shape depth quantit...

Страница 16: ...le Roller Stay Wash with mild soapy water and dry thoroughly Please check the following before calling for service Place one cup of water approx 250 ml in a glass measure in the oven and close the door securely _ _ _ _ _ _ _ O N _ _ _ _ _ _ _ S E Y n o e m o c p m a l n e v o e h t s e o D A _ _ _ _ _ _ _ O N _ _ _ _ _ _ _ S E Y k r o w n a f g n i l o o c e h t s e o D B Put your hand over the re...

Страница 17: ...EEF Roast Steaks Minced Beef 6 8 mins 500g 7 9 mins 500g 9 11 mins 500g 20 mins or until defrosted 5 10 mins 5 10 mins PORK Roast Chops Ribs Minced Pork 6 8 mins 500g 7 9 mins 500g 6 8 mins 500g 7 9 mins 500g 20 mins or until defrosted 5 10 mins 5 10 mins 5 10 mins LAMB Roast Chops 6 8 mins 500g 7 9 mins 500g 20 mins or until defrosted 5 10 mins POULTRY Chicken Whole Pieces 7 8 mins 500g 7 9 mins ...

Страница 18: ...ve safe dish with 1 tablespoon of water Cover Stand for 3 minutes Corn on the Cob 2 pieces whole 5 7 minutes Place in a shallow microwave safe dish Cover Stand for 3 minutes Mushrooms quartered 500g 4 6 minutes Place in a shallow microwave safe dish with 2 tablespoons of butter Cover Stand for 3 minutes Potatoes 4 medium 9 11 minutes Peel and cut potatoes into eights Cook in a dish with 1 cup wate...

Страница 19: ...s possible Rice and Pasta Cooking Chart 1 Wash and strain rice before measuring amounts 2 Place rice pasta in a medium large microwave safe bowl with water Cook uncovered stirring halfway through cooking Allow to stand for 2 minutes before straining any remaining water and serving Food Other Ingredients Cooking Time Pasta 1 Cup 2 cups Hot Water 13 minutes 2 Cups 4 cups Hot Water 17 minutes 4 Cups ...

Страница 20: ... minutes on HIGH 100 Remove from foil container Cover with plastic wrap or lid Allow to stand 2 minutes Dinner Plate refrigerated 350g 400g per serve 1 serve 6 minutes on MEDIUM HIGH 80 Slice potato Cover plate with plastic wrap and pierce 5 times with a skewer Place directly on turntable Allow to stand 3 minutes Casserole refrigerated 300g per serve 1 serve 2 minutes on HIGH 100 Place in a bowl c...

Страница 21: ...d with high fat content do not bring the wrap in contact with the food as it may melt Small amounts may be used to shield certain parts of meat and fi sh when cooking or defrosting Remove food in foil trays if possible and place in a microwave safe dish If not possible place the foil tray onto a heat proof plate allowing 2 5 cm between the walls of the oven Excessive over heating of these material...

Страница 22: ...RNING Foods such as poultry and joints of meat should be turned over after half the cooking time 4 PIERCING Pierce potatoes eggs tomatoes or any foods with a skin or membrane to allow steam to escape 6 STANDING TIME Standing time is important After cooking or defrosting ensure adequate standing time This allows the food to continue cooking or heating Refer to cooking guides for each menu or accord...

Страница 23: ...NOTES ...

Страница 24: ......

Отзывы: