background image

38

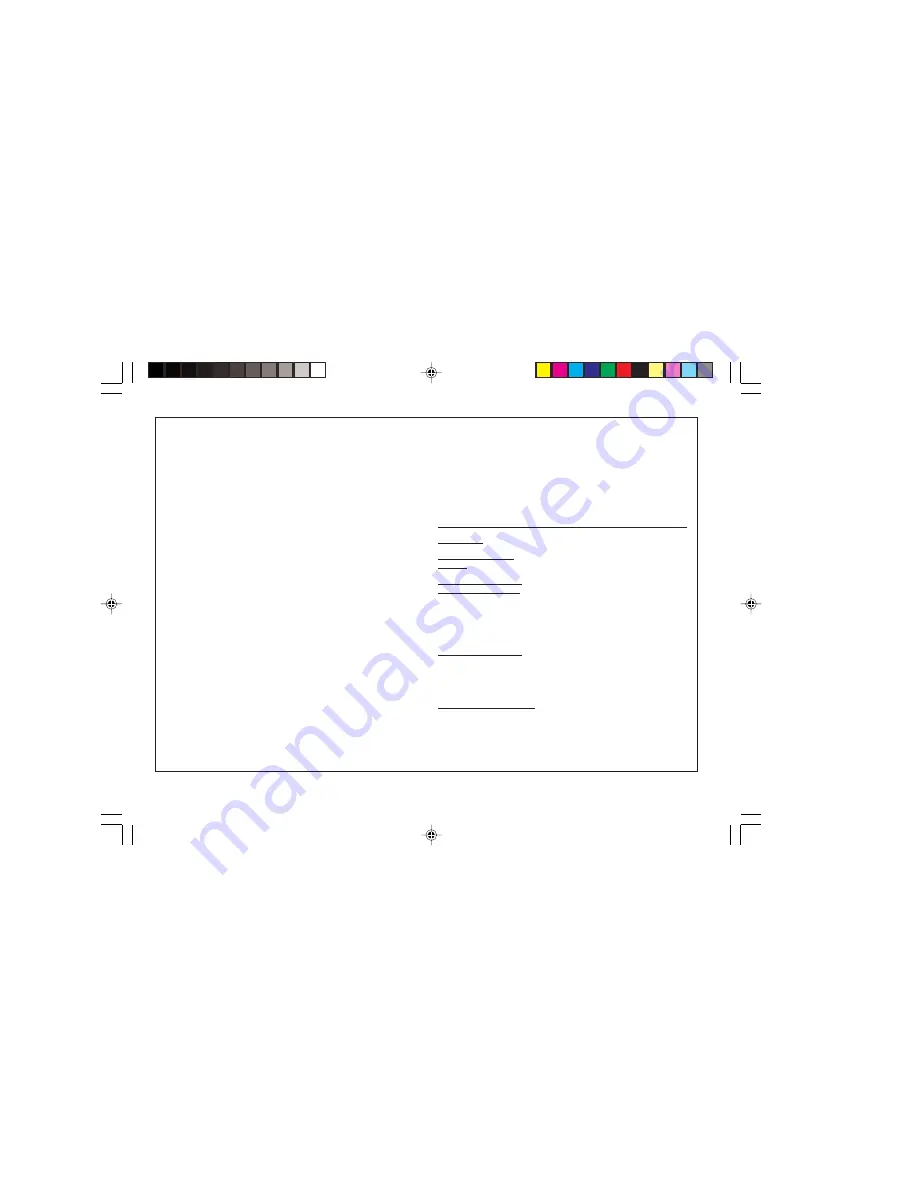
LIMITED WARRANTY

SHARP ELECTRONICS CORPORATION warrants to the first consumer
purchaser that this Sharp brand product (the “Product”), when shipped
in its original container, will be free from defective workmanship and materials,
and agrees that it will, at its option, either repair the defect or
replace the defective Product or part thereof with a new or remanufactured
equivalent at no charge to the purchaser for parts or labor for the period(s)
set forth below.

This warranty does not apply to any appearance items of the Product nor
to the additional excluded item(s) set forth below nor to any Product the
exterior of which has been damaged or defaced, which has been subjected
to improper voltage or other misuse, abnormal service or handling, or
which has been altered or modified in design or construction.

In order to enforce the rights under this limited warranty, the purchaser
should follow the steps set forth below and provide proof of purchase to
the servicer.

The limited warranty described herein is in addition to whatever implied
warranties may be granted to purchasers by law. ALL IMPLIED
WARRANTIES  INCLUDING  THE  WARRANTIES  OF
MERCHANTABILITY AND FITNESS FOR USE ARE LIMITED TO THE
PERIOD(S) FROM THE DATE OF PURCHASE SET FORTH BELOW.
Some states do not allow limitations on how long an implied warranty
lasts, so the above limitation may not apply to you.

Neither the sales personnel of the seller nor any other person is authorized
to make any warranties other than those described herein, or to extend
the duration of any warranties beyond the time period described herein
on behalf of Sharp.

The warranties described herein shall be the sole and exclusive warranties
granted by Sharp and shall be the sole and exclusive remedy available
to the purchaser. Correction of defects, in the manner and for the period
of time described herein, shall constitute complete fulfillment of all liabilities
and responsibilities of Sharp to the purchaser with respect to the Product,
and shall constitute full satisfaction of all claims, whether based on
contract, negligence, strict liability or otherwise. In no event shall Sharp

be liable, or in any way responsible, for any damages or defects in the
Product which were caused by repairs or attempted repairs performed
by anyone other than an authorized servicer. Nor shall Sharp be liable or
in any way responsible for any incidental or consequential economic or
property damage. Some states do not allow the exclusion of incidental
or consequential damages, so the above exclusion may not apply to you.

THIS WARRANTY GIVES YOU SPECIFIC LEGAL RIGHTS. YOU MAY
ALSO HAVE OTHER RIGHTS WHICH VARY  FROM STATE  TO STATE.

Your Product :

Electronic Organizer

Warranty Period for this

One (1) year parts and labor from date

Product :

of purchase.

Additional Items Excluded

Any consumable items such as paper,

from Warranty Coverage :

maintenance cartridge, ink cartridges
supplied with the Product or to any
equipment or any hardware, software,
firmware, fluorescent lamp, power cords,
covers, rubber parts, or peripherals other
than the Product.

Where to Obtain Service :

At  a  Sharp Authorized Servicer located
in the United States. To find out the
location of the nearest Sharp Authorized
Servicer, call Sharp toll free at 1-800-BE-
SHARP.

What to do to Obtain Service : Ship (prepaid) or carry in your Product to

a Sharp Authorized Servicer. Be sure to
have proof of purchase available. If you
ship or mail the Product, be sure it is
packaged carefully.

TO OBTAIN SUPPLY, ACCESSORY OR PRODUCT INFORMATION, CALL 

1-800-BE-SHARP

.

cover 3

OZ590_1119.pm65_cover_

02.12.6, 9:28 PM

Содержание OZ-590

Страница 1: ... 8 Timer 8 Telephone Mode 9 Calendar Mode 10 Schedule Mode 12 Anniversary Mode 13 To Do Mode 15 Memo Mode 16 Expense Mode 17 Editing Entries 20 Deleting Entries 20 Word Translator Mode 21 Calculator Mode 22 Conversion Mode 23 Secret Function 25 Game Mode 26 Managing the Organizer s Memory 27 Using the Included PC Software 27 Battery Replacement 30 Specifications 31 Appendix 33 Instrucciones abrevi...

Страница 2: ...rd numbers the loss of or alteration of stored data etc Screen layouts illustrated in this manual may differ from those on the actual product The information described in this manual is subject to change without notice CAUTIONS Do not carry the Organizer in the back pocket of slacks or trousers Do not drop the Organizer or apply excessive force to it Do not subject the Organizer to extreme tempera...

Страница 3: ...ode key t To Do mode key y Expense mode key h Clock mode key œ Calculation Conversion mode key x ENTER key In this manual these mode keys are represented by icons in parentheses Option port Stylus Touch Display RESET switch on the back of the unit Mode keys ENTER key Backlight key Power ON OFF key Cursor keys Search keys OZ590_1203 pm65 02 12 3 8 12 PM 1 ...

Страница 4: ...n the screen Use the stylus to tap Yes on the screen to proceed 7 Next a dialog WARNING All Data will be LOST Are you sure Yes No appears Again tap Yes to proceed 8 Memory Reset Please wait appears After a moment Home Clock will appear on the screen If a malfunction occurs under abnormal conditions If the Organizer is subjected to strong extraneous electrical noise or shock during use on rare occa...

Страница 5: ...Backlight will be disabled while transferring data with the PC Setting up the Backlight The Backlight can be set to turn off after a specified interval 1 Tap once or twice to display the second page of the Main menu then tap 2 In the list of Setup items tap to select 3 Backlight Time 3 Select a desired interval 10 20 or 30 seconds by using k or m then press x Adjusting the LCD Contrast 1 Tap once ...

Страница 6: ...sappears when the time reaches the End time of the entry Anniversary sign Appears prior to a special day programmed in the Anniversary Reminder C Capitalized uppercase letters will be entered b Beep sound Key touch sound beep is ON Entering User Information 1 Tap once or twice then tap to select 2 In the list of Setup items tap to select 2 User Information 3 On the menubar tap then enter your name...

Страница 7: ...d it will rotate through lowercase caps and caps lock mode to enable uppercase and lowercase character entries When the key appears on the keyboard tap the key once its appearance will change to indicating an uppercase character entry is enabled Tap again to set Caps Lock to enter a series of uppercase characters Tap once again to return to the lowercase keyboard mode Backspace key deletes a chara...

Страница 8: ...vigating the Clock mode Some icons and keys in the Clock modes can be tapped to activate functions Tap on this icon to display menu items Home Clock World Clock Timer and three Alarm modes can be accessed through here Tap on this menubar item to go back to the Main menu Tap to toggle Daylight Saving Time adjustment Refer to page 7 for details Tap this icon Z hereafter to switch between 12 hour 24 ...

Страница 9: ...is ON a DST icon ç appears on the screen The adjusted time will be displayed Setting the Home Clock 1 Enter the Home Clock mode tap the h icon in the Main menu Note During the period of Daylight Saving Time summer time set the DST ON beforehand as described in Setting Daylight Saving Time ON OFF later on this page 2 Tap e to enter the clock setting mode The hour field will be selected 3 While the ...

Страница 10: ...y or tap the screen to stop the Alarm sounding When the set time arrives the Alarm will sound and the reminder message will be displayed Note Each Alarm can be set independently from other Alarms Once set the Alarm can be activated or deactivated by tapping o or Timer The Timer mode literally functions as a timer When the specified time passes the Organizer will remind you with the alarm sound Set...

Страница 11: ...contact info for a business partner John Smith 1 Tap v in the Main menu to enter the Telephone mode then tap the menu on the left side of the menubar to set the category for this new entry Business for example 2 Tap then select New Entry in the menu 3 Enter data in the Last Name field enter Smith Note Data must be entered in the Last Name First Name or Company field to make the new entry valid 4 T...

Страница 12: ...he weekly view mode rotate through previously entered To Do Anniversary and Schedule items Displays the weekly view Displays a set of menus Refer to Schedule To Do and Anniversary mode sections of this manual for details Search 1 Tap v then select the category in the menubar 2 Tap then select Search Entry in the menu 3 Select desired field by tapping the field name Last Name for example then enter...

Страница 13: ...twice on the desired day Note New Sch New ToDo and or New Ann will appear when no entries under the categories are found on the day An empty entry cannot be viewed if an Anniversary entry is present but nothing else then a list of Anniversary entries will be displayed New entries can be entered by selecting New Sch New ToDo or New Ann Refer to Schedule To Do and Anniversary mode sections of this m...

Страница 14: ...te on September 15 2004 5 When done tap to set the cursor at the next field A Time bar appears on the screen s center 6 At the Time field tap 10 then 00 on the Time bar 7 Set the cursor at the end time of this event Enter 11 then 00 When done tap to move the cursor at the Alarm Time field 8 To set an alarm for this event tap Yes enter the Alarm Time 9 30 for example then tap to move onto the Descr...

Страница 15: ...rsary Mode The Anniversary mode is used to specify the month and day of special events such as wedding anniversaries and birthdays Once an Anniversary entry is made a flag appears on the specified date in the monthly calendar see page 11 The anniversary sign will then appear within the specified period Up to 491 alphanumeric characters can be entered in the Anniver sary description field Entry Exa...

Страница 16: ...he date or the description of an event 1 In the Main menu tap u to enter the Anniversary mode 2 In the Anniversary mode tap to select Search Entry in the menu The Search entry screen will appear 3 Tap to select the Date or Description checkbox If Date is selected an entry area for date will appear Enter the date you wish to search If Description is selected then a search string can be entered in t...

Страница 17: ...be later than the Start date 5 Tap to set the priority number from 1 High to 5 Low then tap 6 At the To Do description entry field up to 482 alphanumeric characters can be entered Enter Visit NY Exhibition then tap æ to set and activate the entry Direct Search Direct search can be done by either the Start date or the description of an event 1 In the Main menu tap t to enter the To Do mode 2 In the...

Страница 18: ...on 4 In the Memo field up to 474 alphanumeric characters can be entered Enter 12AB34567 then tap æ to store and activate the entry Setting Entry Status to Done Pending 1 In the Main menu tap t to enter the To Do mode A list of To Do entries appear 2 Tap to select and open the desired entry The overview of the entry will show 3 Tap the Pending Done checkbox indicating either Pending or Done The ent...

Страница 19: ...ormation The Expense Report allows you to see the total expense for a single day or for a specific period 1 Expense Item by item expense entry and view mode 2 Report Display the total expenses for a single day or a certain period 3 Category Assign a new category name up to 8 characters for each Entry Example The date is August 18 2004 You bought tickets for a business trip costing 1200 1 Tap y in ...

Страница 20: ...method of payment Cash Check Card or Others can be selected Tap to select Card 7 Next select the expense category Meals Hotel Car Phone Fares Enter t Entertainment Tips Misc Miscellaneous Free 1 Free 2 Tap to select Fares in this example then tap 8 In the next Description entry field up to 481 characters can be entered Enter Airline tickets for business then tap æ to set and activate the entry Dis...

Страница 21: ...enience 1 In the Main menu tap y to enter the Expense mode 2 Tap on the menubar then tap to select Change Category at the bottom of the list 3 Highlight the category you wish to change using the arrow keys then tap the selection to edit Select for example 2 Hotel 4 Type a new name for the category Up to 8 characters can be entered in this field Enter Books for example 5 When done tap æ to store an...

Страница 22: ...y If the cursor is placed in a date entry field tap to place it on the next b can be used to delete characters 4 Tap æ to store the modification Deleting Entries Delete 1 Recall an entry in the desired mode 2 Tap then select Delete Entry The confirmation display will appear Note To delete all entries select Delete All instead 3 Tap Yes to delete Select No to cancel OZ590_1211 pm65p10_23 02 12 10 5...

Страница 23: ... alphabetical order will then be displayed Press or to scroll through the word list or enter a new word using the keyboard and press x for another search Notes If you choose not to download the Dictionary Database for the English Spanish Translator then the extra memory space will be utilized by other applications In such case however the Word Translator function will be disabled tapping the icon ...

Страница 24: ...lay Mixed calculation 24 2 4 24 2 4 5 5 Constant repeat calculation The second figure is a constant value addition subtraction division 34 57 34 57 91 45 57 45 102 The first figure is a constant value multiplication 68 x 25 68 25 1700 68 x 40 40 2720 Percentage 10 of 200 200 10 I 20 Percentage 9 of 36 9 36 I 25 10 mark up 200 10 I 220 20 discount 200 20 I 160 Root 25 9 25 9 O 4 An 43 4 64 Unit div...

Страница 25: ...ame of the currency unit 5 Rename the right currency if necessary then press m Note The conversion result may have a slight calculation error as a result of rounding off the number Use as a reference only Conversion Table Conversion Pattern Unit 1 Unit 2 5 currency conversions are available Metric Conversion Patterns inch centimeter cm yard meter m yard feet mile kilometer km feet meter m centimet...

Страница 26: ... 5 Use j or l to change the conversion direction 6 Enter the amount e g 120 then press 120 approx 82 76 Tap c to clear the calculation result Metric Conversion Mode Twelve digit metric conversion calculations are available Convert metric unit Example Convert 68 F to C 1 In the Main menu tap to enter the Metric Conversion mode 2 In the Metric Conversion mode six conversion unit categories appear Le...

Страница 27: ...setting display will appear 4 Tap to select Edit Password 5 Enter a new password then press x Turning the Secret Function Off 1 In the Main menu tap then select 4 Password in the list The password entry display will appear 2 Enter the current password then press x 3 Tap to select Unlock Data A message Unlock Data will be displayed for 1 second then you will be directed to the Setup menu To delete ...

Страница 28: ...Brick Attack To access one of these games tap _ in the Main menu Slots As its name suggests Slots is an easy to access slot machine simulator 1 Tap _ in the Main menu then tap to enter the game 2 Place the desired bet by using k or m key Tap k to increase the bet tap m to decrease the amount 3 When the bet is set tap Spin to spin the reels 4 Just like the real slot machine you ll get the result af...

Страница 29: ...t Outlook 97 98 2000 2002 must be installed to utilize the Synchronization Software between the Organizer and your PC Managing the Organizer s Memory Use the memory management function to utilize the Organizer s memory more efficiently Note Before performing memory management back up your data While the memory management is in progress do not press the RESET switch Doing so may result in losing al...

Страница 30: ...complete click the Finish button to finish the installation process Synchronization Software After the Serial Port Setup is complete the Settings window will appear To bring up the Settings window manually right click on the Synchronization icon on the Windows system tray then select Settings in the menu General tab This tab allows you to select the application that you want to synchronize with th...

Страница 31: ...the Windows system tray then select Desktop Utilities in the menu Utilize the Desktop Utilities via the following graphic interface Backup Restore The Backup Restore menu of the Desktop Utilities allows you to make a backup file of the unit data or to restore it back to the internal memory of the unit Be noted that the setup parameters won t be backed up Backup Select Backup from button then enter...

Страница 32: ...de correctly oriented Never throw batteries into a fire because they might explode Keep batteries out of reach of children When the battery is near exhaustion remove it from the Organizer immediately to avoid battery leakage and corrosion inside the Organizer Battery Replacement Battery replacement time When B is displayed immediately replace the battery with a new one Follow the steps on page 31 ...

Страница 33: ... Specifications Model OZ 590 Product name Electronic Organizer Display 80 x 111 dot matrix liquid crystal display Memory capacity 8 MB Flash memory User area Approx 8 MB A In case of Telephone entries only Max 8064 entries B Other entries Max 16128 entries Entries can be stored until the total of both types A and B reaches 8 MB If the English Spanish Translation database is not downloaded then 192...

Страница 34: ...nguage Calculator mode 12 digits with calculation status symbol Addition subtraction multiplication division percentage square root memory calculation etc Currency Unit conversion mode 12 digits 25 combinations of currencies 5 and metric 20 conversions Game mode 2 games Secret function Protects entries with a password Power consumption 0 3 W Operating temperature 0 C 40 C 32 F 104 F Power supply B...

Страница 35: ...4 Iran Tehran 45 Ireland Dublin 46 Israel Jerusalem 47 Italy Milan 48 Rome 49 Japan Tokyo 50 Jordan Amman COUNTRY CITY 51 Kenya Nairobi 52 Mexico Acapulco 53 Hermosillo 54 Mexico City 55 Tijuana 56 Mid Atlantic 57 Myanmar Yangon 58 Netherlands Amsterdam 59 New Caledonia Noumea 60 New Zealand Auckland 61 Norway Oslo 62 Pakistan Karachi 63 Peru Lima 64 Portugal Azores 65 Lisbon 66 PuertoRico San Jua...

Страница 36: ...n accordance with the instructions may cause harmful interference to radio communications However there is no guarantee that interference will not occur in a particular installation If this equipment does cause harmful interference to radio or television reception which can be determined by turning the equipment off and on the user is encouraged to try to correct the interference by one or more of...

Страница 37: ...logo WARNING All Data will be LOST Are you sure Yes No dé un toque en Yes para proseguir 8 Aparece Memory Reset Please wait Después de un momento en la pantalla aparecerá el reloj local ÍNDICE Empleo del Organizador por primera vez S 1 Función de desactivación automática S 2 Preparación de la luz de fondo S 2 Ajuste del contraste de la pantalla LCD S 2 Activación y desactivación de la tecla de son...

Страница 38: ...e en una o dos veces para visualizar la segunda página del menú principal y luego dé un toque en 2 En la lista de elementos de preparación dé un toque para seleccionar 5 LCD Contrast 3 Utilice k o m para aumentar reducir el brillo de la pantalla Activación y desactivación de la tecla de sonido 1 Dé un toque en una o dos veces para visualizar la segunda página del menú principal y luego dé un toque...

Страница 39: ...dicando que se pueden introducir mayúsculas Dé un toque de nuevo a para establecer Caps Lock para introducir una serie de letras mayúsculas Dé un toque de nuevo a para volver al modo del teclado de minúsculas Tecla de retroceso borra un carácter a la izquierda del cursor Tecla de espacio introduce un espacio en el lugar en que se encuentra el cursor Tecla de retorno activa un salto de línea en la ...

Страница 40: ... reloj se pueden dar toques para activar funciones Ajuste del reloj local 1 Introduzca el modo del reloj local dé un toque en el icono h en el menú principal Nota Durante el periodo de la hora de verano ponga DST en ON de antemano como se describe en la página S 5 Activación desactivación de la hora de verano 2 Dé un toque en e para introducir el modo de ajuste del reloj Se seleccionará el campo h...

Страница 41: ...ato de la fecha ajuste predeterminado MDY deberá encontrarse en la parte inferior de la pantalla Cada vez que se dé un toque en la tecla del formato de la fecha los tres formatos de la fecha cambiarán de la forma siguiente Modo Mes Día Año Día Mes Año Año Mes Día MDY DMY YMD Jan 24 2004 Jan 24 2004 24 Jan 2004 2004 Jan 24 Nota El formato de la fecha seleccionado afectará a todos los modos del Orga...

Страница 42: ... del lado izquierdo de la barra de menús para establecer la categoría para esta nueva introducción 2 Dé un toque en y luego seleccione New Entry en el menú 3 Introduzca los datos en el campo del apellido Nota Los datos deberán introducirse en el campo del apellido nombre o compañía para que la nueva introducción tenga validez 4 Dé un toque en m y luego introduzca el nombre El área de introducción ...

Страница 43: ...te se desplazará por los elementos de introducción del día jl En el modo de vista semanal cambie entre los elementos cosas a hacer aniversario y programa Visualiza la vista semanal Visualiza un juego de menús Búsqueda 1 Dé un toque en v y luego seleccione la categoría en la barra de menú 2 Dé un toque en y luego seleccione Search Entry en el menú 3 Seleccione el campo deseado dando un toque en el ...

Страница 44: ... cursor en la hora final de este acontecimiento y luego introduzca la hora final Cuando termine dé un toque en para mover el cursor al campo de la hora de alarma 8 Para poner la alarma para este acontecimiento dé un toque en Yes introduzca la hora de alarma 9 30 por ejemplo y luego dé un toque en para pasar al campo de descripción Si no se desea ninguna alarma dé un toque en No para pasar a la int...

Страница 45: ...ión 5 En el campo de descripción introduzca la descripción para la ocasión 6 Cuando termine dé un toque en æ para guardar y activar la introducción Búsqueda directa 1 En el menú principal dé un toque en u para introducir el modo de aniversario 2 En el modo de aniversario dé un toque en para seleccionar Search Entry en el menú 3 Dé un toque para seleccionar la casilla de verificación Date o Descrip...

Страница 46: ... menú principal dé un toque en t para introducir el modo de cosas a hacer 2 En el modo de cosas a hacer dé un toque en para seleccionar Search Entry en el menú Aparecerá la pantalla de introducción de búsqueda 3 Dé un toque para seleccionar la casilla de verificación Date o ToDo Si se selecciona Date aparecerá un área de introducción para la fecha Introduzca la fecha que desee buscar Si se selecci...

Страница 47: ...a la cantidad de los gastos y luego dé un toque en 6 Dé un toque en el siguiente menú resaltado para seleccionar un método de pago Podrá seleccionar Cash Check Card u Others 7 A continuación seleccione la categoría de gasto de entre las siguientes Meals Comidas Hotel Car Automóvil Phone Teléfono Fares Billetes Enter t Entretenimiento Tips Propinas Misc Varios Free Gratis 1 Free 2 Seleccione la cat...

Страница 48: ...modo de gastos dé un toque en en la barra de menú para visualizar un menú 2 Payment Type se selecciona de forma predeterminada Dé un toque para seleccionar Expense Category y visualizar una lista de introducciones de gastos Nota Si se cambia el formato de visualización el formato de visualización del informe de gastos también quedará afectado Informe de gastos 1 Dé un toque en y para introducir el...

Страница 49: ...cancelar 3 Introduzca la palabra original deseada y pulse x La palabra inglesa o española correspondiente se visualizará a continuación Cuando se active el icono j o l habrá más letras Para ver las letras restantes de las palabras largas que no caben en la pantalla utilice j o l para desplazarlas Si no existe la palabra correspondiente se visualiza NOT FOUND Luego se visualizará la siguiente palab...

Страница 50: ...para introducir el modo de conversión de divisas 2 Pulse k o m para seleccionar la etapa de conversión de divisas apropiada 3 Dé un toque en para introducir el modo de ajuste 4 Cambie el nombre de la divisa de la izquierda en caso de ser necesario y luego pulse m Nota Para el nombre de la divisa se puede introducir un máximo de 3 caracteres 5 Cambie el nombre de la divisa de la derecha en caso de ...

Страница 51: ... PC El software consiste en Software de sincronización Puede resultar útil para sincronizar datos de Microsoft Outlook como por ejemplo contactos calendarios tareas y apuntes con el Organizador Utilidades de escritorio Se pueden utilizar para hacer copias de seguridad restaurar datos en el Organizador así como también para descargar la base de datos del diccionario para el traductor de palabras y ...

Страница 52: ...re Software de sincronización Después de completar la preparación del puerto serial aparecerá la ventana de ajustes Para mostrar manualmente la ventana de ajustes haga clic con el botón derecho del ratón en el icono de sincronización de la bandeja del sistema Windows y luego seleccione el elemento de ajuste deseado en el menú Ficha general En la ficha general usted podrá Hacer clic en la casilla d...

Страница 53: ...en adelante Todos Descarga o sincroniza todos los datos de programas Utilidades de escritorio Haga clic con el botón derecho del ratón en el icono de sincronización de la bandeja del sistema Windows y luego seleccione Desktop Utilities en el menú Utilice las utilidades de escritorio vía la interfaz de gráficos siguiente Copia de seguridad Restauración El menú de copia de seguridad restaurar las ut...

Страница 54: ...a de la base de datos del diccionario le permite descargar del PC la base de datos del diccionario para el traductor de palabras Inserte el CD ROM y luego haga clic en Download para seleccionar el archivo que va ha descargar OZ590_1206TB pm65 02 12 6 9 46 PM 18 ...

Страница 55: ...s pilas puede causar fugas en las mismas o una explosión siga estrictamente las precauciones siguientes Si el fluido de una pila que tiene fugas entra por accidente en sus ojos podrá causarle una grave lesión Si le ocurre esto lave sus ojos con abundante agua limpia y consulte inmediatamente a un médico Si el fluido de una pila que tiene fugas entra en contacto con su piel o ropas lave inmediatame...

Страница 56: ...e cambio de la pila en la posición NORMAL OPERATION y luego pulse el conmutador RESET 6 En la pantalla aparece un diálogo System Reset Clear All Data Yes No Dé un toque en No 7 Compruebe que el reloj tenga la hora correcta Precaución Los ajustes del reloj las introducciones de datos y u otros ajustes podrán perderse cuando se retire la pila durante un largo periodo de tiempo Reemplace la pila rápi...

Страница 57: ...35 MEMO OZ590_1203 pm65 02 12 3 8 12 PM 35 ...

Страница 58: ...37 MEMO OZ590_1203 pm65 02 12 3 8 12 PM 36 ...

Страница 59: ...d by Sharp and shall be the sole and exclusive remedy available to the purchaser Correction of defects in the manner and for the period of time described herein shall constitute complete fulfillment of all liabilities and responsibilities of Sharp to the purchaser with respect to the Product and shall constitute full satisfaction of all claims whether based on contract negligence strict liability ...

Страница 60: ...40 SHARP ELECTRONICS CORPORATION Sharp Plaza Mahwah New Jersey 07430 1163 PRINTED IN CHINA IMPRESO EN CHINA 02LGK TINSE0588EHZZ cover 4 OZ590_1119 pm65_cover_ 02 12 6 9 28 PM ...

Отзывы:

Похожие инструкции для OZ-590