DOCUMENT FILING
59
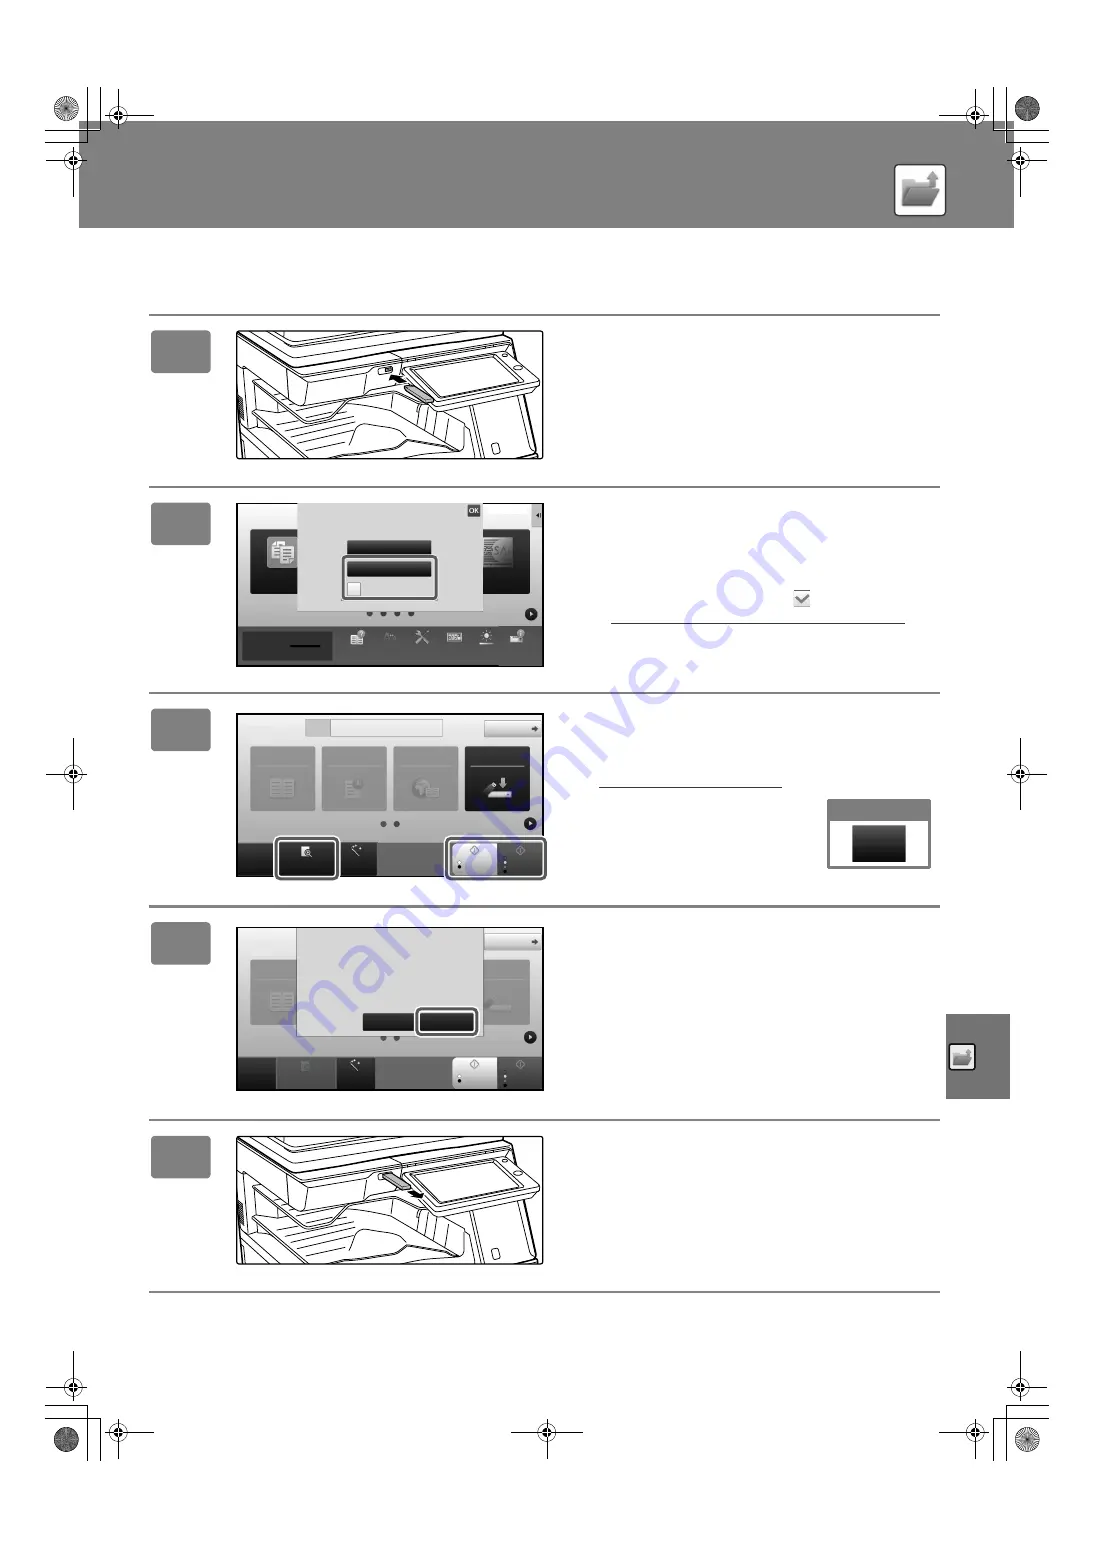
Scan to USB memory device
1
Connect the USB memory device to
the machine.
2
When a screen for selecting the action
appears, tap [Scan to External Memory
Device].
• To select detailed settings in normal mode, select the
[Perform Detail Setting] checkbox
.
►
BASE SCREEN OF SCANNER MODE (page 54)
• If the machine/device save screen is open, this screen will
not appear.
3
Tap the [Color Start] key or [B/W Start]
key.
To check a preview of a document, tap the [Preview] key.
►
PREVIEW SCREEN (page 20)
4
After scanning all originals, tap the
[Read-End] key.
When you scan the original using the automatic document
feeder, this screen does not appear.
5
Check the [Sending data has been
completed.] message, and remove the
USB memory device from the machine.
Easy
Copy
Sharp OSA
Perform Detail Setting
Print from external
memory device (USB)
Scan to External
Memory Device
External memory device (USB) is connected.
Settings
Total Count
LCD Control
Toner Quantity
Bk
Volume
Operation
Guide
Enlarge
Display Mode
10:15 AM
Job Status
CA
Preview
Auto Set
Original
Address External Memory Device
Detail
B/W
Start
Colour
Start
Address Book
History
Global
Address Search
Scan to HDD/
USB
8½x11
Cancel scanning
Cancel
Scan
Address Book
Scan to HDD/
USB
CA
Preview
Auto Set
Original
Detail
B/W
Start
Color
Start
Place next original. (Pg.No.1)
Press [Start].
When finished, press [Read-End].
Change Setting
Read-End
8½x11
!mxm6070_us_sg.book 59 ページ 2018年3月5日 月曜日 午後4時52分


