5-5
PREPARATIONS FOR USE AS A NETWORK
SCANNER
MAKE SURE THE MAIN POWER SWITCH IS IN THE
"ON" POSITION
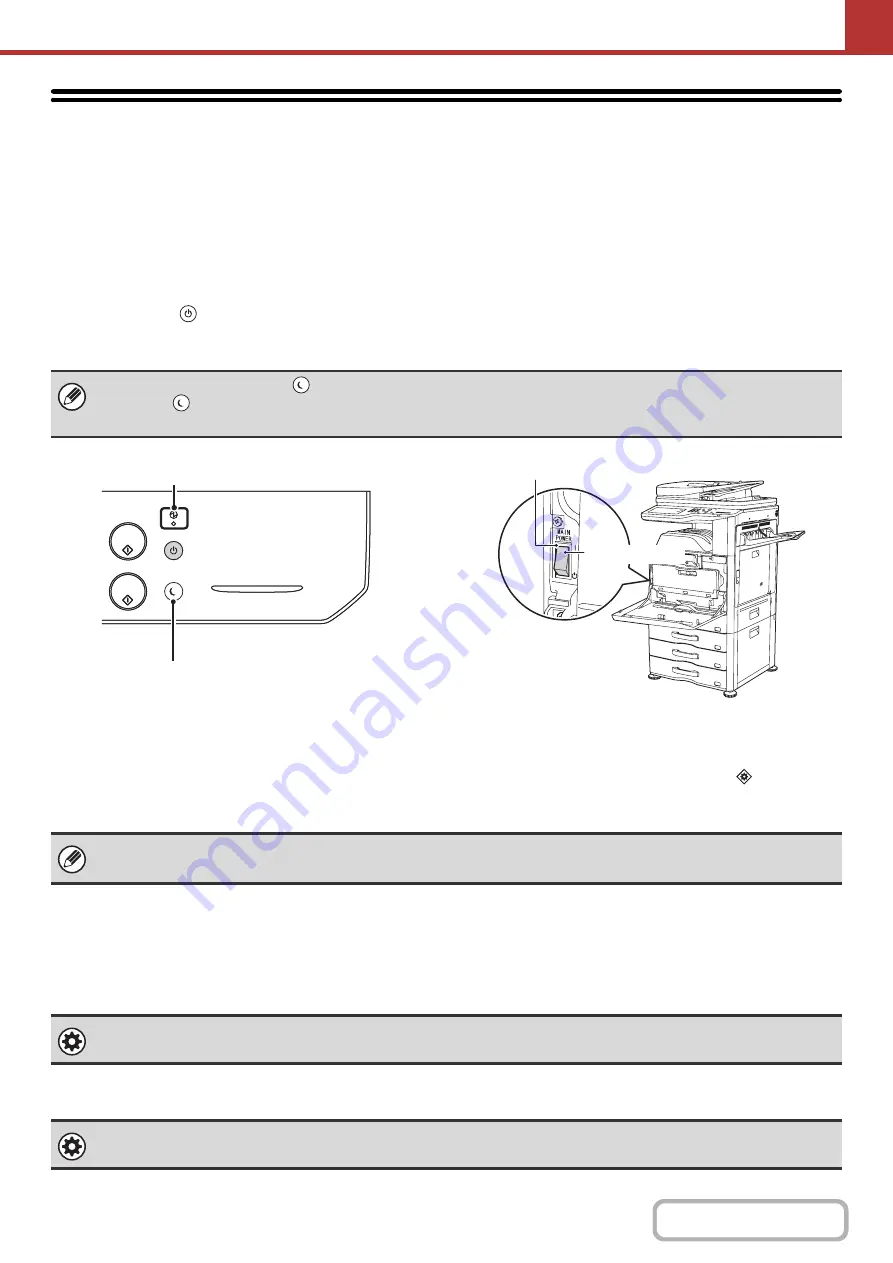
The main power is "on" when the main power indicator on the right side of the operation panel is lit.
If the main power indicator is not lit, the main power is "off". Switch the main power switch to the "on" position and press
the [POWER] key (
) on the operation panel.
If the Internet fax function will be used, and in particular if reception or timer transmission will take place at night, always
keep the main power switch in the "on" position.
CHECKING THE DATE AND TIME
Verify that the correct date and time are set in the machine.
The date and time are set in the system settings of the machine. When the [SYSTEM SETTINGS] key
(
)
is touched,
the system settings menu screen appears on the touch panel. Select [Default Settings], [Clock], and [Clock Adjust], and
set the year, month, day, hour, and minute.
STORING SENDER INFORMATION
Be sure to configure this information, as it is required for communication.
Before using Scan to E-mail
Store a default sender name in "Sender Name" and a reply e-mail address in "Reply E-mail Address". These will be
used when a sender is not selected.
Before using Internet fax
Store a sender name in "Sender Name" and a sender Internet fax address in "Own Address".
When the [POWER SAVE] key (
) indicator light is blinking, the machine is in auto power shut-off mode. If the [POWER
SAVE] key (
) is pressed when the indicator is blinking, the indicator will turn off and the machine will return to the ready
state after a brief interval.
Main power indicator
[POWER SAVE] key/indicator
Main power switch
"On" position
If "Disabling of Clock Adjustment" has been enabled in the system settings (administrator), the date and time cannot be set.
System Settings (Administrator): Default Sender Set
This is used to store the sender name and e-mail address that is used when a sender is not selected.
System Settings (Administrator): Sender Data Registration
Use this setting to program the sender name and sender address.
Содержание MX-2314N
Страница 11: ...Conserve Print on both sides of the paper Print multiple pages on one side of the paper ...
Страница 34: ...Search for a file abc Search for a file using a keyword Search by checking the contents of files ...
Страница 35: ...Organize my files Delete a file Delete all files Periodically delete files Change the folder ...
Страница 284: ...3 19 PRINTER Contents 4 Click the Print button Printing begins ...
Страница 293: ...3 28 PRINTER Contents 1 Select Layout 2 Select Long edged binding or Short edged binding Macintosh 1 2 ...
Страница 836: ...MX2314 GB ZZ Operation Guide MX 2314N MX 2614N MX 3114N MODEL ...


