


1 – 9
FO-3150U/C
6 Make sure the stack of paper is aligned against the right paper
guide, and then gently move the left paper guide to the 8 1/2 posi-
tion for letter or legal paper, or the A4 position for A4 paper.
7 Push the paper release lever back down.
• Note: If the paper does not feed correctly, remove the entire
stack from the tray and repeat the loading procedure from the
beginning.
8 Replace the paper tray cover.
• If you loaded other than letter size paper (or you changed the
paper size), change the paper size setting as explained on the
following page.
The fax has been set at the factory to scale received faxes to letter size
paper. If you loaded legal or A4 size paper, you must change the paper
size setting to LEGAL or A4.
Setting the paper size
1
2
3
4
5
Press
once and
four times.
Press
once
and
once.
Press
once.
Select the paper size:
LETTER:
LEGAL:
A4:
Press
to return to the date and time display.
FUNCTION
1
2
3
STOP
The display briefly shows
your selection, then:
PAPER SIZE SET
COPY CUT-OFF
1:LETTER
Display:
PRINT SET-UP
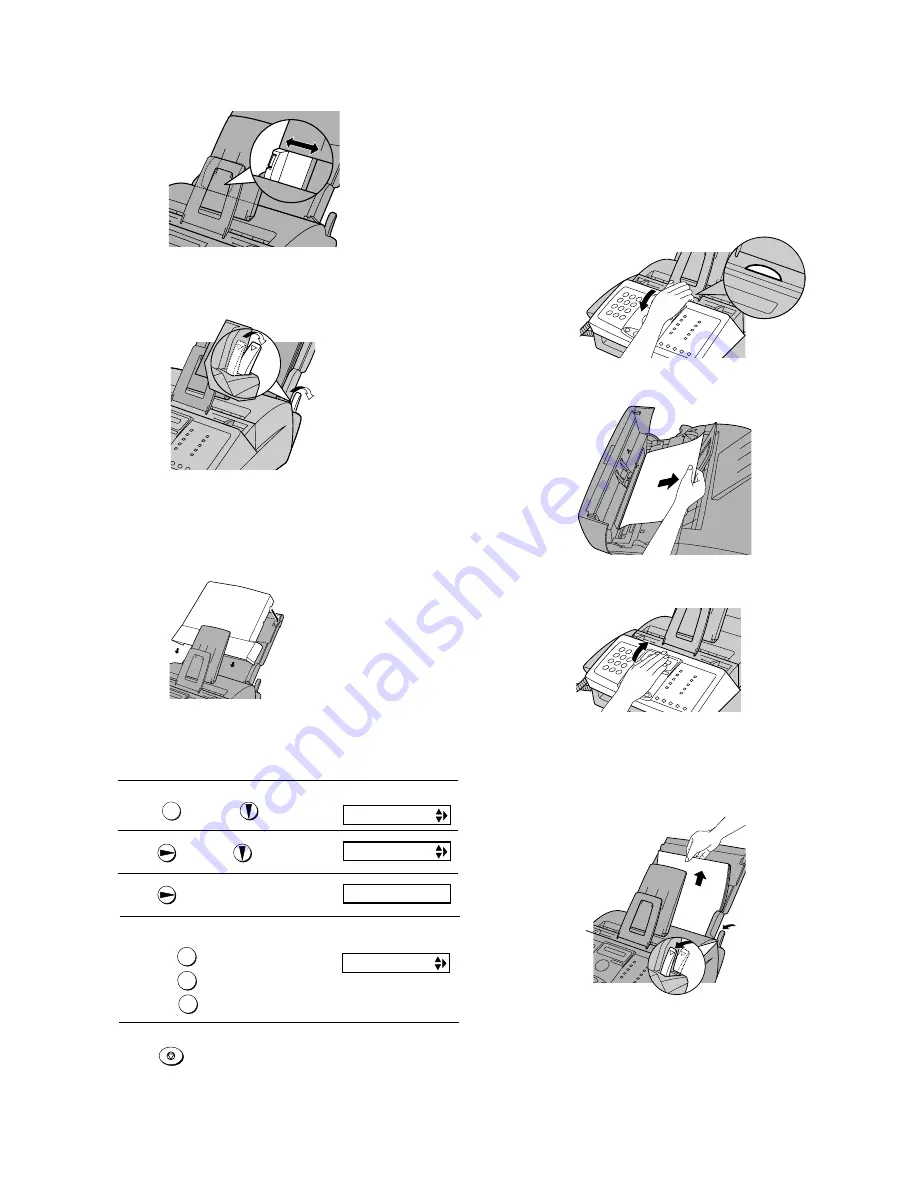
6. Clearing a jammed document
1 Open the operation panel by grasping the panel release and pull-
ing up.
2
Remove the document.
If the original document doesn't feed properly during transmission or
copying, or DOCUMENT JAMMED appears in the display, first try
pressing the START key. If the document doesn't feed out, open the
operation panel and remove it.
Important:
Do not try to remove a document without opening the operation
panel. This may damage the feeder mechanism .
3
Close the operation panel, making sure it clicks into place.
7. Clearing jammed printing paper
1 If most of the jammed page is protruding from the back of the fax,
remove the paper tray cover, pull the paper release lever toward
you, and try pulling the page out.
2 If the jammed page comes out, take out the rest of the paper in
the tray, straighten the stack, put it back in the paper tray, and
push down the paper release lever. Replace the paper tray cover.
• If you are unable to clear the jam in this way, continue with the
following steps.
Содержание FO-3150
Страница 107: ...FO 3150U C 6 9 Control PWB parts layout Top side ...
Страница 108: ...FO 3150U C Control PWB parts layout Bottom side 6 10 ...
Страница 112: ...FO 3150U C 6 14 TEL LIU and Hook SW PWB parts layout Top side ...
Страница 113: ...FO 3150U C TEL LIU and Hook SW PWB parts layout Bottom side 6 15 ...
Страница 116: ...FO 3150U C 6 18 Printer PWB parts layout ...
Страница 118: ...FO 3150U C Power supply PWB parts layout Top side 6 20 Power supply PWB parts layout Bottom side ...
Страница 120: ...FO 3150U C 6 22 Operation panel PWB parts layout Note Since the parts of PWB cannot be supplied change it as a unit ...
Страница 132: ...FO 3150U C 5 4 Drive unit 5 Scanner frame unit 9 1 7 8 2 5 6 4 3 B1 B1 7 8 5 5 6 B1 B1 6 Drive unit 1 2 4 12 3 9 10 11 ...
Страница 136: ...FO 3150U C 9 7 Upper frame 7 16 5 1 6 3 14 8 3 B2 B1 B2 B1 B3 W1 W2 W3 19 4 21 22 10 17 11 2 13 9 12 20 18 1 15 ...


