2
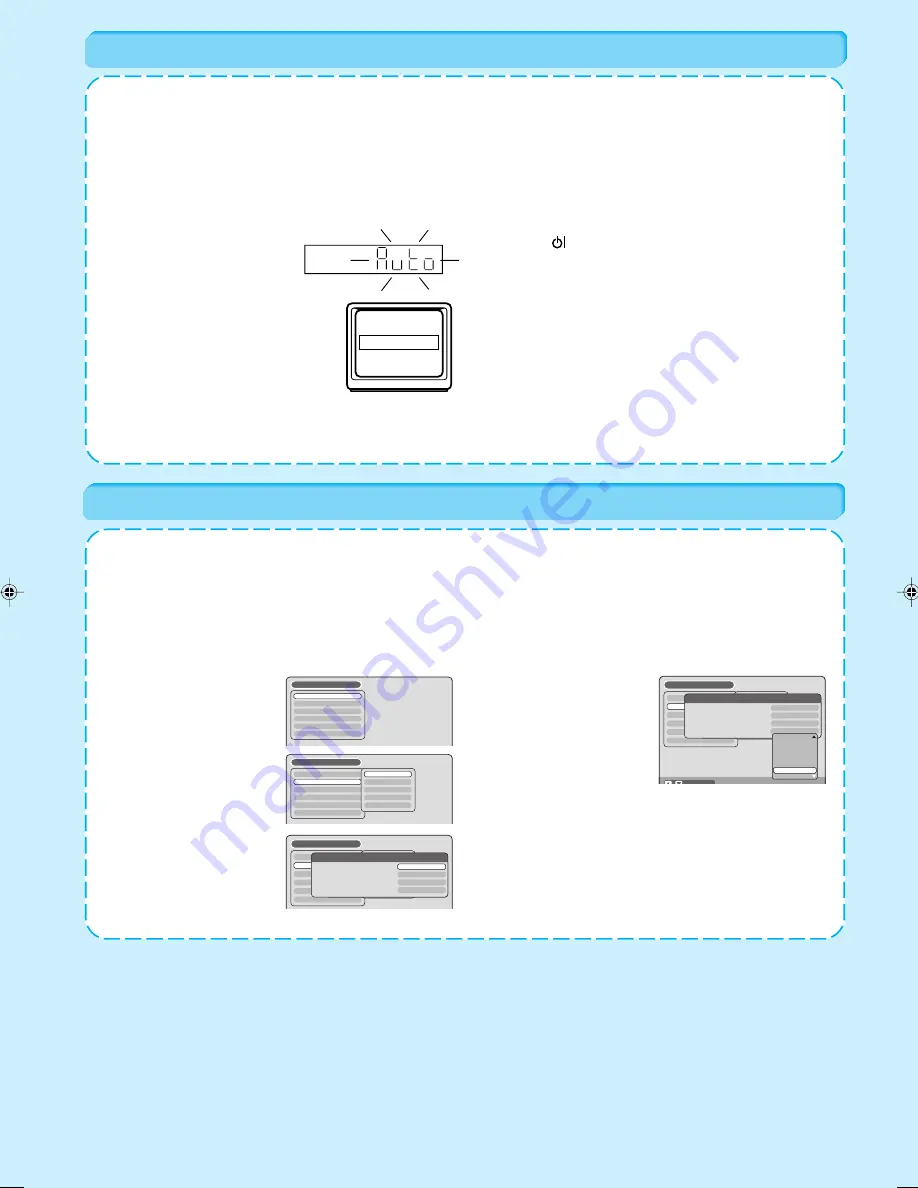
Plug your unit into the mains supply and it will automatically start to tune itself in and set the correct date and time. When auto
tuning is complete, you must switch the TV to it’s AV channel.
AUTOMATIC SETUP IS ONLY AVAILABLE WHEN YOU PLUG THE UNIT IN FOR THE FIRST TIME.
Preparation
• Make sure your unit is connected properly to the TV. (See the diagram of Connection on page 1.)
• If a satellite receiver is connected with the coaxial lead, make sure it’s switched ON and set to SKY ONE.
• Turn on the TV and select the channel you wish to allocate for video use.
• Especially ensure an external aerial is connected.
AUTO TUNING
The SETUP MENU consists of several menus where you can make various settings concerning language, clock, audio functions,
images and so on.
The following setting is a basic process. There are various procedures over the setting items. Please set the menu up according
to the key-guide of each SETUP MENU indicated below.
Preparation:
• Turn ON the TV and switch the TV to it’s AV channel (this may be labelled EXT/AUX etc.)
TIMER REC SET
SYSTEM SETUP
AV SETUP
REC SETUP
CHANNEL SETUP
OTHER
SETUP MENU
TIMER REC SET
SYSTEM SETUP
AV SETUP
REC SETUP
CHANNEL SETUP
OTHER
LANGUAGE
PARENTAL
CLOCK
DISC SETUP
OTHER
SETUP MENU
TIMER REC SET
SYSTEM SETUP
AV SETUP
REC SETUP
CHANNEL SETUP
OTHER
SETUP MENU
LANGUAGE
PARENTAL
CLOCK
DISC SETUP
OTHER
LANGUAGE
OSD LANGUAGE
DVD MENU
AUDIO
SUBTITLE
ENGLISH
ENGLISH
AUTOMATIC
ENGLISH
• The video tape and DVD should be stopped.
1.
Press
SETUP
. The SETUP
MENU screen will appear.
2.
Press
C
or
D
to select the
required menu and press
ENTER
. The submenu
screen of the selected
menu will appear.
3.
Press
C
or
D
to select the
required submenu and
press
ENTER
. The screen
for the selected submenu
will appear.
TIMER REC SET
SYSTEM SETUP
AV SETUP
REC SETUP
CHANNEL SETUP
OTHER
SETUP MENU
LANGUAGE
PARENTAL
CLOCK
DISC SETUP
OTHER
LANGUAGE
OSD LANGUAGE
DVD MENU
AUDIO
SUBTITLE
ENGLISH
ENGLISH
AUTOMATIC
ENGLISH
SELECT
ENGLISH
FRANCAIS
ESPANOL
DEUTSCH
ITALIANO
OTHER
AUTOMATIC
OFF
4.
Press
C
or
D
to select the
required item you want,
and press
ENTER
.
Selectable items will be
listed.
5.
Press
C
or
D
to select the required item and press
ENTER
. This completes the setting procedure.
To return to the previous screen, press
RETURN
. To
close the SETUP MENU, press
SETUP
.
• Some items cannot be selected, depending on the oper
ating status (For details, refer to page 20 of the operation
manual).
Automatic TV tuning and clock setting
SETUP MENU
1.
Plug in your unit's plug into the
mains supply. “Auto” will start to
flash in the unit display. And
also “AUTO TUNING” will be
displayed on the TV screen.
Your unit will automatically tune
itself in and set the correct time
and date (This may take
approx. 4 minutes).
2.
Press the
OPERATE
button to turn OFF the unit. Now
the TV is tuned to your unit.
Notes:
• The unit automatically corrects the clock setting every hour
and automatically adjusts the clock setting for Daylight
Saving Time.
• Your unit will tune the TV stations as follows.
CH 1
BBC 1
CH 5
Channel 5
CH 2
BBC 2
CH 6
Satellite
CH 3
ITV
CH 7
etc.
CH 4
Channel 4
2H00707A QS
5/14/05, 9:17 AM
2


