


8
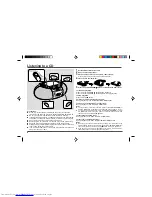
Recording to a Cassette Tape
Before recording:
●
When recording important selections, make a preliminary test to en-
sure that the desired material is properly recorded.
●
SHARP is not liable for damage or loss of your recording arising from
malfunction of this unit.
●
The ALC (Automatic Record Level Control) circuit automatically con-
trols the level of the input signal used for recording.
●
The VOLUME control may be adjusted with no effect on the recorded
signal. (Variable Sound Monitor)
●
Metal and CrO
2
tapes cannot be used for recording.
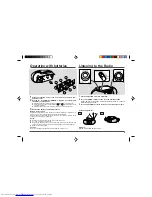
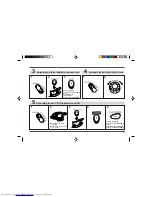
■
Recording from a CD
1
Set the FUNCTION switch to CD.
2
Load the disc to be recorded.
3
Load a blank cassette into the cassette compartment with the
side to be recorded facing toward you.
4
Press the RECORD
●
button.
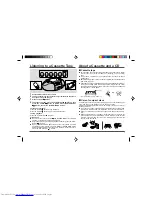
5
Press the PLAY/PAUSE
0 6
0 6
0 6
0 6
0 6
button on the CD.
To stop recording:
Press the STOP/EJECT
■
7
button.
If the STOP
■
or PLAY/PAUSE
0 6
button is pressed while recording,
or if the CD comes to its end, the tape deck will not stop.
To record a specific track:
Press the REVIEW/DOWN
5
or CUE/UP
4
button until the desired
track number is displayed, then start recording.
■
Recording from the radio
1
Set the FUNCTION switch to FM or AM.
2
Tune in to the station to be recorded.
3
Load a blank cassette into the cassette compartment with the
side to be recorded facing toward you.
4
Press the PAUSE
6
6
6
6
6
button.
5
Press the RECORD
●
button.
6
Press the PAUSE
6
6
6
6
6
button again.
To stop recording:
Press the STOP/EJECT
■
7
button.
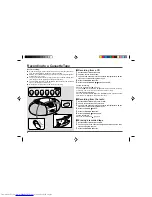
■
Erasing a recorded tape
1
Set the FUNCTION switch to TAPE.
2
Load a tape into the cassette compartment with the side to be
erased facing toward you.
3
Press the RECORD
●
button.


