background image

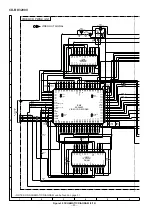
CD-BK3200V

– 30 –

A

B

C

D

E

F

G

H

1

2

3

4

5

6

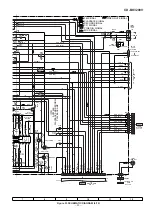
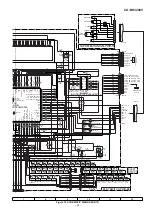
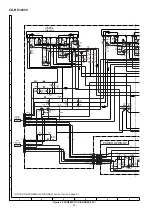
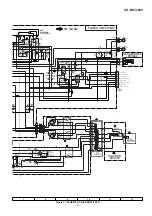
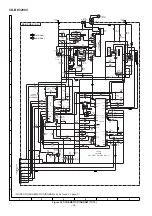
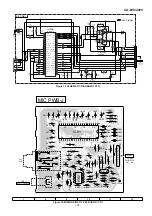
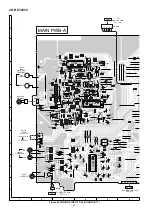
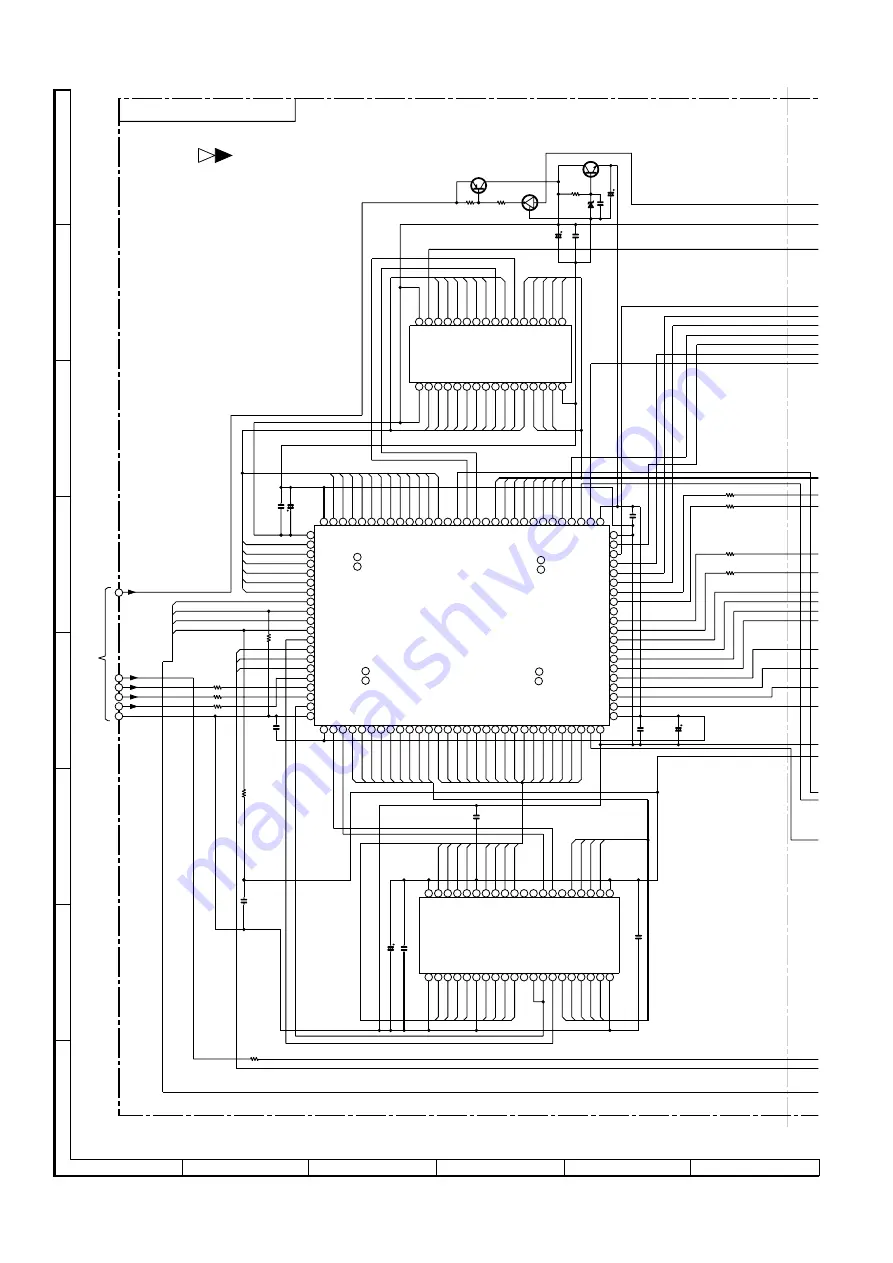
• NOTES ON SCHEMATIC DIAGRAM can be found on page 51.

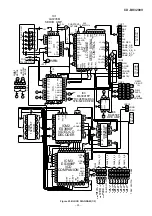
Figure 30 SCHEMATIC DIAGRAM (3/12)

ACLK

AUDO

AUBCK 

AULRCK

+5V

RES 

DATAD 

LRCK

BLCK

ARCLK

ARFS

AJN

D-GND 

TO  CD  SERVO

P29  11-B 

LA14

LA15

LA16

LA17

LA13

LA12

17

18

19

20

21

22

23

32 31 30 29 28 27 26 25 24

LA9

LA13

LA14

LD6

LA17

LD7

LA8

LA10

LA11

LD5

LD4

LD3

PJM

VCC

A17

A14

A13

A8

A9

A11

OE_

A10

CE_

D7

D6

D5

D4

D3

1 2 3 4 5 6 7 8 9 10 11 12

16

15

14

13

LA3

LA2

LA16

LA15

LA12

LD0

LA7

LA6

LA1

LD2

LD1

LA5

LA4

LA0

GND

D2

D1

D0

A0

A1

A2

A3

A4

A5

A6

A7

A12 

A15 

A16 

VPP 

80 79 78 77 76 75 74 73 72 71 70 69 68 67 66 65 64 63 62 61 60 59 58 57 56 55 54 53 52 51

LA2

LA3

LA4

LA5

LA6

LA7

LA8

LA9

LA10

LA11

LA0

LA1

LD2

LD1

LD0

LD7

LD6

LD5

LD4

LD3

LROMCE#

GND

LA11

LA10

LA9

LA8

LA7

LA6

LA5

LA4

LA3

LA2

LA1

LA0

LCS0#

LCS1#

LOE#

LWR#

LD7

LD6

LD5

LD4

LD3

LD2

LD1

LD0

AUX7

AUX5

AUX6

VCC3

100

99

100  

99  

98

97

96

95

94

93

92

91

90

89

88

87

86

85

84

83

82

81

82

81

1 2 3 4 5 6 7 8 9 10 11 12 13 14 15 16

19 20

23

26 27

18

17

21 22

24 25

28 29 30

DWE#

RAS#

GND 

CAS#

TDMFS

TDMDR

TDMCLK

ARFS

ARCLK

AJN

DOE#

ATFG/SEL_PLL1

ATCLK

AOUT/SEL_PLL0

ACLK

LA17

LA16

LA15

LA14

LA13

LA12

VCC 

DBUS15

DBUS14

DBUS13

DBUS12

DBUS11

DBUS10

DBUS9 

DBUS8 

DBUS7 

DBUS6 

DBUS5 

DBUS4 

DBUS3 

DBUS2 

DBUS1 

DBUS0 

MA8 

MA7 

MA6 

MA5 

MA4 

MA3 

MA2 

MA1 

MA0 

VCC3

50

49

RFSET#

YUV0

GND
AUX4

AUX3

AUX2

AUX1

AUX0

PCLA

PCLA2X

CPUCLK

HSYNC 

VSYNC 

YUV7

YUV6

YUV5

YUV4

YUV3

YUV2

YUV1

VCC3

GND

29

30

50

49

48

47

46

45

44

43

42

41

40

39

38

37

36

35

34

33

32

31

DBUS14

DBUS13

DBUS1 

DA4 

DBUS4 

DBUS2 

DBUS0 

DBUS5 

DBUS8 

DA3 

DA5 

DA8 

DA0 

DBUS6 

DBUS3 

DA7 

DA6 

DBUS12

DA1 

DBUS7 

DBUS11

DBUS9 

DBUS15

DA2 

DBUS10

1 2 3 4 5 6 7 8 9 10 11 12 13 14 15 16

20

19

18

17

40 39 38 37 36 35 34 33 32 31 30 29 28 27 26 25 24 23 22 21

DBUS7

DA3

DA4

DA2

DA5

DBUS2

DBUS1

DBUS0

DBUS5

DBUS4

DA6

DBUS10

DA8

DA7

DA0

DBUS3

DBUS8

DBUS9

DBUS15

DBUS14

DBUS6

DA1

DBUS11

DBUS12

DBUS13

CAS2_

OE_

VSS

D15

D14

D13

D12

VSS

D11 

D10

D9

D8

CAS_

A8

A7

A6

A5

A4

VSS VCC 

A3

A2

A1

A0

RAS_

WE_

VCC

D7

D6

D5

D4

D3

D2

D1

D0

VCC

VIDEO CD PWB-C (2/2)

+B

+B

+B

+B

+B

+B

+B

+B

9

2

3

1

10

4

2

1

3

VIDEO OUT SIGNAL 

CM40

0.01

ZD1

4.3A 

CM31     0.022

QM3

KRC104 S

RM41

8.2K

RM32   10

RM33   33

CM30

0.1

CM28

0.022

CM36 100/10

CM38 10/16 

RM30   33

QM2

KTC3203 Y 

CM39

0.1 

RM31   33

RM42     33

CM27

10/16

RM47

1K

RM36

330

RM34

10K

QM4

KTA1271 Y 

CM37

0.1

CM35

0.022 

CM34

10/16

CM32    100/10

CM29 0.022

RM35

100

CM33

0.022

CM26

0.022

RM45

4.7K

CM

0.

RM44     33

RM43     33

ICM4

IX0408AW

EEPROM

ICM2

ES3880F

VIDEO CD DECODER

ICM1

1625635T

DRAM

Содержание CD-BK3200V

Страница 1: ...UPPLY CORD AND AC PLUG ADAPTOR 3 SPECIFICATIONS 3 NAMES OF PARTS 4 OPERATION MANUAL 6 DISASSEMBLY 9 REMOVING AND REINSTALLING THE MAIN PARTS 12 ADJUSTMENT 13 CD CHANGER MECHANISM MAIN BASE PARTS ASSEMBLING ADJUSTING PROCEDURE 16 BLOCK DIAGRAM 25 SCHEMATIC DIAGRAM WIRING SIDE OF P W BOARD 28 VOLTAGE 50 NOTES ON SCHEMATIC DIAGRAM 51 TYPES OF TRANSISTOR AND LED 51 WAVEFORMS OF CD CIRCUIT 52 TROUBLESH...

Страница 2: ...EREIN MAY RESULT IN HAZARDOUS RADIATION EXPOSURE VOLTAGE SELECTION Before operating the unit on mains check the preset voltage If the voltage is different from your local voltage adjust the voltage as follows Turn the selector with a screwdriver until the appropriate voltage number appears in the window 110 V 127 V 220 V or 230 V 240 V AC Laser Diode Properties Material GaAIAs Wavelength 780 nm Em...

Страница 3: ... NTSC Type 6 disc multi play compact disc player Signal readout Non contact 3 beam semiconductor laser pickup D A converter 1 bit D A converter Frequency response 20 20 000 Hz Dynamic range 90 dB 1 kHz Frequency range FM 88 108 MHz AM 531 1 602 kHz Frequency response 50 14 000 Hz Normal tape Signal noise ratio 55 dB TAPE 1 playback 50 dB TAPE 2 recording playback Wow and flutter 0 3 WRMS Type 3 wa...

Страница 4: ...eo CD Stop or Return CD MP3 Disc Tape Stop Button with Indicator 27 Video CD Play or Repeat or Select or Resume CD MP3 Disc Play or Repeat Tape 1 Play Tape 2 Forward Play Button with Indicator 28 Tape 2 Reverse Mode Select Button 29 Microphone Level Control 30 Microphone Socket 31 Clock Button 32 Timer Sleep Button 33 Tuning and Time Down Button 34 Tuning and Time Up Button 26 27 28 12 34 33 32 31...

Страница 5: ...utton 16 On Stand by Button 17 MP3 Disc Display Button 18 Disc Direct Search Buttons 19 Disc Random Button 20 Disc Memory Button 21 Video CD Skip or Next CD MP3 Disc Track Up or Fast Forward Tape 2 Fast Wind Tuner Preset Up Button 22 Disc Pause Button 23 Video CD Play or Repeat or Select or Resume CD MP3 Disc Play or Repeat Tape 1 Play Tape 2 Forward Play Button 24 Video CD Stop or Return CD MP3 D...

Страница 6: ... unit using the AC plug adaptor supplied with the unit as illustrated The AC plug adaptor is not included in areas where the wall socket and AC power plug can be directly connected see illustration Setting the FM AM span selector The International Telecommunication Union ITU has established that member coun tries should maintain either a 100 kHz or a 50 kHz interval between broadcasting fre quenci...

Страница 7: ...or it has been reset 4 Press the TUNING TIME or button to adjust the hour and then press the MEMORY SET button Press the TUNING TIME or button once to advance the time by 1 hour Hold it down to advance continuously When the 12 hour display is selected AM will change automatically to PM 5 Press the TUNING TIME or button to adjust the minutes and then press the MEMORY SET button Press the TUNING TIM...

Страница 8: ... the tape stretched Cannot hear treble Are the capstans pinch rollers or heads dirty Sound fluctuation Cannot remove the tape If a power failure occurs during playback the heads remain engaged with the tape Do not open the compartment forcibly Wait until electricity resumes Symptom Possible cause The vocal part of a multiplexed disc is not heard Is the karaoke mode set to L CH R CH or V CANCEL Sym...

Страница 9: ...t safe and ensure excellent performance 1 Take cassette tape and compact disc out of the unit 2 Be sure to remove the power supply plug from the wall outlet before starting to disassemble the unit 3 Take off nylon bands or wire holders where they need to be removed when disassembling the unit After servicing the unit be sure to rearrange the leads where they were before disassembling 4 Take suffic...

Страница 10: ... the conductive aluminium foil around the front end of connector remove to protect the optical pickup from electrostatic damage Power Amp PWB F1 x 2 ø3 x 8mm F1 x 2 ø3 x 10mm F2 x1 F2 x 1 Front Panel F4 x 1 F1 x 1 ø3 x 10mm G1 x 2 ø3 x 8mm Push F4 x 1 Push F1 x 1 ø3 x 10mm Pull G2 x 1 Pull G2 x 1 Headphones PWB F3 x 1 Push Push K3 x 1 K1 x 1 Display PWB Play Switch PWB Open Cassette Holder H2 x 1 ...

Страница 11: ... A5 x4 2 Subwoofer 1 Screw B1 x4 11 2 3 Woofer 1 Screw C1 x4 11 2 4 Tweeter 1 Screw D1 x2 11 2 STEP REMOVAL PROCEDURE FIGURE Figure 11 1 A1 x 4 ø4 x 20mm A5 x 2 ø4 x 20mm A4 x 2 A4 x 2 Fromt Panel Side Panel A3 x 1 A5 x 2 ø4 x 20mm A2 x 3 C1 x 4 ø4 x 16mm B1 x 4 ø4 x 16mm D1 x 2 ø3 x 10mm Tweeter Woofer Subwoofer Figure 11 2 ...

Страница 12: ...ch roller pay attention to the spring mounting position How to remove the belt TAPE 2 See Fig 12 4 1 Remove the main belt D1 x 1 pc from the motor side 2 Remove the FF REW belt D2 x 1 pc How to remove the belt TAPE 1 See Fig 12 4 1 Remove the main belt E1 x 1 pc from the motor side 2 Remove the FF REW belt E2 x 1 pc How to remove the motor See Fig 12 5 1 Remove the screws F1 x 2 pcs to remove the ...

Страница 13: ...chanism See page 10 Note After removing the connector for the optical pickup from the connector wrap the conductive aluminium foil around the front end of connector remove to protect the optical pickup from electrostatic damage How to Remove the pickup See Fig 13 1 1 Remove the screws A1 x 2 pcs to remove shaft A2 x 1 pc 2 Remove stop washer A3 x 1 pc to remove gear A4 x 1 pc 3 Remove the pickup H...

Страница 14: ...nder optimum conditions T T EFBL FDO TE Stopped CH1 500mV DC 10 1 CH2 200mV DC 10 1 CH3 1V DC 10 1 500ms div 500ms div NORM 20kS s 1 2 3 Record Length Smoothing ON CH1 0 000V CH2 0 000V Main 100K Zoom 2k Mode SINGLE Type EDGE CH1 Delay 0 0ns Hold off 0 2µs CH3 0 00V CH4 0 00V BW FULL Trigger Filter Offset CH2 v DIV 200mV 1999 04 05 20 26 47 Test Stage Frequency Frequency Display Setting Adjusting ...

Страница 15: ... manual Do TOC IL Do normal play When these following key is input into PLAY key track number can be appoint directly PLAY key input MEMORY key input Laser ON MEMORY key input Tracking OFF play at that specific point MEMORY key input 1 key Track 1 2 key Track 3 3 key Track 7 4 key Track 11 5 key Track 13 6 key Track 15 Tracking ON play from that specific point MEMORY keyinput a Display FOF_XXXX b ...

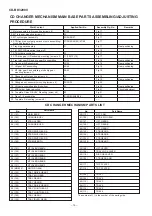
Страница 16: ...g screw x 6 80 Fig 21 19 Trays 1 6 assembling 91 92 93 94 95 96 Fig 22 20 Top plate R mounting screw x 6 Applied Part No Work Content Assembly Fig No Remarks CD CHANGER MECHANISM MAIN BASE PARTS ASSEMBLING ADJUSTING PROCEDURE 01 101 MAIN BASE 02 102 CHANGE BOX L 03 147 STB HOLDER 04 103 CHANGE BOX R 10 119 STB DRIVE GEAR A 11 120 STB DRIVE GEAR L 12 122 STB DRIVE GEAR R 20 149 STABILIZER FH 23 141...

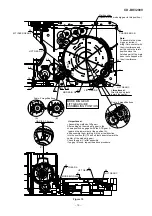
Страница 17: ...BIG GEAR turn it in the arrow direction TRAY BIG GEAR ASSEMBLING POSITION 31 TRAY BIG GEAR 37 TRAY GEAR C 38 TRAY IDLER GEAR 47 STB GEAR C 46 STB GEAR B 10 STB DRIVE GEAR A 11 STB DRIVE GEAR L ASSY 53 STB GEAR ANG 45 STB GEAR A 11 12 10 STB DRIVE GEAR L R ASS Y 46 STB GEAR B 37 TRAY GEAR C 47 STB GEAR C 31 TRAY BIG GEAR 38 TRAY IDLER GEAR 45 STB GEAR A 53 STB GEAR ANG L ...

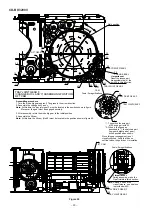
Страница 18: ...position becomes the reference stock position of the tray These holes must align It must not rotate in contact with the peripheral hatched part of 31 These holes must align After assembling 32 assemble 33 1 To position the axis part of 36 engage it with 38 2 When it is aligned as described in 1 the hatched part low gear height part of gear will be positioned in this position Note After positioning...

Страница 19: ...he main base is overlapped with the circumference Direct the short tooth toward the center MODE BIG GEAR LIFT GEAR A B C ASSEMBLING POSITION Scale 2 magnifications Scale 2 magnifications Assembling method of lift gear After setting up the mode big gear in the shown position engage it with the STB gear A gear on the lower side at the position A and assemble them turning it in the arrow direction in...

Страница 20: ...RAY JOINT GEAR F CHANGE BOX L ASS Y ASSEMBLING POSITION LIFT CAM Assembling procedure 1 Turn the mode big gear approx 37 degrees in the arrow direction 2 Assemble the change box L ass y Note At this time the tray joint gear F must be located in the position shown in figure Moreover the gear must be engaged securely 3 After assembly return the mode big gear to the initial position 4 Assemble the li...

Страница 21: ...10 11 45 42 LIFT GEAR A 43 41 32 35 40 44 33 30 Mark position 80 TOP PLATE F 37 121 OS LEVER Bend this portion to adjust the STB HOLDER When high Narrow the gap When low Broaden the gap Adjustment procedure 1 Rotate the MODE BIG GEAR by 37 in the arrowed direction 2 Check that the guide ribs CHANGE BOX L R and STB HOLDER on the arrowed TRAY are at the same height when looked from the front 3 If th...

Страница 22: ...F DISC OB lever Unlock the tray lock lever and pull out the tray which is not caught Move the caught tray or disc and remove the disc In case of 1 and 2 the mechanism is normal defective circuit parts etc However it may stop somewhere This is the reason why you should try to turn the tray big gear first In case of 3 either of the big gears does not turn Figure 22 L 91 96 TRAY1 TRAY6 Mark position ...

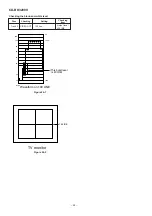
Страница 23: ... d G r e e n M a g e n t a C y a n Y e l l o w G r a y 59 94 Hz IH Figure 23 3 TV monitor B l u e R e d G r e e n M a g e n t a C y a n Y e l l o w G r a y Set the phase of color Phase check Track 2 VIDEO OUT burst signal B to 10 180 360 line Disc Checking Setting Checking Item Checking of vector scope waveform Check that the setting is within the illustrated range Figure 23 4 90 80 70 60 50 40 30...

Страница 24: ... 3 VIDEO OUT 150 line Output level 10 IRE Disc Checking Setting Checking Item Checking the black and white level Figure 24 2 IRE 100 80 60 40 20 20 40 100 12 5 0 NTSC Waveform on 140 LINE This burst level is 40 IRE 140 IRE TV monitor ...

Страница 25: ...1 DISC DETECT 1 SWB102 DISC DETECT 2 SWB103 DISC DETECT 3 MOB2 TRAY MOTOR MOB1 MAIN CAM MOTOR D C M M CAMA_B_C CAMA_B_T_A TM D C TRAY M TRAY M TM XL2 16 934MHz OE_ CE_ LOEt LROMCEt LSC1t DSC_C ARCLK AJN ARFS ARFS ARCLK AJN ODD NO ODD NO NO EVEN CNP1 ICM3 ES3889F VCD COMPANION ICM2 ES3880F VIDEO CD DECODER ICM4 IX0408AW EEPROM CAM M CAM M CAM M CAM M FO FO TR TR SL SL SP SP SPDO SLDO FD TO TE HFL T...

Страница 26: ... 21 22 3 4 24 2 1 8 18 17 3 11 16 3 15 10 9 7 23 14 12 13 1 2 1 2 1 2 20 19 7 18 10 8 17 13 21 4 5 2 24 23 6 9 16 14 12 15 1 SYSTEM MUTE SO302 FM ANTENNA TERMINAL FM ANTENNA B P F BF301 FM IF FM IF T302 8 4 3 1 5 7 IC301 TA7358AP FM FRONT END 9 6 B FM B4 CONSTANT VOLTAGE FM Q360 AM BAND COVERAGE AM TRACKING T303 T306 OSC BUFF FM OSC Q302 FM RF FM OSC L312 T301 IC303 LA1832S FM IF DET FM MPX AM IF ...

Страница 27: ... L 250V F800 T4A L 250V L OUT R OUT F802 T5A L 250V CLK MAIN EC PLAY SUBWOOFER R OUT L OUT CE_O DI DO XL701 4 194304 MHz Vcc Vcc IC902 STK40270N POWER AMP BIAS T1 T2 KEY T F IC701 IX0413AW SYSTEM MICROCOMPUTER 1 2 FL701 FL DISPLAY 6 10 100 99 98 96 95 81 27 79 65 63 61 53 52 43 42 33 25 10 7 9 8 6 5 43 42 34 33 31 30 29 23 9 8 7 80 78 70 39 37 66 64 63 62 60 58 43 42 41 28 26 13 18 8 10 7 3 1 11 1...

Страница 28: ...O LD VR PD GND FO FO TR TR M 2 1 3 4 6 2 3 1 4 5 6 5 4 3 2 1 2 8 7 6 5 4 3 1 8 7 6 5 4 3 2 1 1 7 6 5 3 4 2 1 2 3 4 5 7 6 REF ODRV AGCON ODRV REF REF REF REF REF REF REF REF REF REF REF REF REF REF AGCON ODRV APC LPF DH PH LPF LPF PH BH TO MPEG SECTION P31 12 C VIDEO CD PWB C 1 2 PICKUP UNIT CD MOTOR PWB G 11 B B B B IC3 M63001FP R52 56K R51 68K R53 56K R54 68K R55 56K R56 56K R50 47 CNP1 CNS1A CNS...

Страница 29: ...RVO PROCESSEROR AUTO ADJUST D A S H JITER DEFECT CONTROL A D SW SLICE LEVEL CONTROL PLL VCEC LRCK DATAD BLCK TO MPEG SECTION P30 1 E 1 3 2 4 5 6 7 8 9 FROM MAIN PWB P32 1 A TO MP3 SECTION P30 1 E FROM DISPLAY PWB P35 12 D 10 TRAY_B_C CAMB_B T_A CAMA_E B_A CAMA_C_D CAMA_A_B RES WRQ DRF DO DI CL CE 1 1 1 1 1 1 1 1 1 1 3 3 3 3 3 3 3 3 3 3 2 2 2 2 2 2 2 B B B B B TRAY SWICTH PWB E CAM SWICTH PWB F IC2...

Страница 30: ...LA13 LA12 VCC DBUS15 DBUS14 DBUS13 DBUS12 DBUS11 DBUS10 DBUS9 DBUS8 DBUS7 DBUS6 DBUS5 DBUS4 DBUS3 DBUS2 DBUS1 DBUS0 MA8 MA7 MA6 MA5 MA4 MA3 MA2 MA1 MA0 VCC3 50 49 RFSET YUV0 GND AUX4 AUX3 AUX2 AUX1 AUX0 PCLA PCLA2X CPUCLK HSYNC VSYNC YUV7 YUV6 YUV5 YUV4 YUV3 YUV2 YUV1 VCC3 GND 29 30 50 49 48 47 46 45 44 43 42 41 40 39 38 37 36 35 34 33 32 31 DBUS14 DBUS13 DBUS1 DA4 DBUS4 DBUS2 DBUS0 DBUS5 DBUS8 DA...

Страница 31: ...ECTION P29 11 C MPEG POWER DSA_STB DSA_DATA DSA_ACK HSS_DO HSS_DI HSS_STB HSS_ACK 8 7 6 5 4 3 2 1 2 1 PAL NTSC VGND VDAC B B B B B B B B B 7 6 5 8 11 TO CD SECTION P28 2 E FROM DISPLAY PWB P35 12 B FROM MAIN PWB P33 12 H CNS705 CNS602 RM83 10K RM84 10K CM2 10 16 RM71 3 3K RM78 4 7K RM82 10K RM77 4 7K QM1 2SC3265 Y CM1 1000 6 3 RM70 220 RM69 6 8K RM75 220 RM72 220 RM74 220 CM7 100 16 RM73 2 2K RM76...

Страница 32: ...ML R605 3 9K C607 0 1 ML C609 0 1 ML R607 10K C613 2 2 50 C619 1 50 R642 R643 R641 C630 1 50 C628 1 50 C626 1 50 C624 1 50 R606 3 9K C614 2 2 50 C608 0 1 ML C610 0 1 ML C6 0 0027 C602 22 50 C620 1 50 C622 10 50 R112 15K Q110 KRC104 M R114 10K Q122 KTC3199 GR R154 10K R155 150 Q109 KTA1266 GR Q111 KRC104 M C153 100 16 R113 10K R115 4 7K R156 220K R132 33K C124 0 0022 R124 2 7K R126 5 6K C122 47 25 ...

Страница 33: ... B B B B B B B B B B B B B B B B B B B B 2 1 2 1 CNP10 TO VIDEO CD PWB P31 12 C SWITCHING BIAS BIAS OSC R625 15K R626 15K R623 6 8K R624 6 8K R642 1K R643 1K R641 1K C630 1 50 C628 1 50 C626 1 50 C624 1 50 R606 3 9K C614 2 2 50 R608 10K 608 ML C610 0 1 ML C612 0 0027 ML C602 22 50 C620 1 50 C622 10 50 R638 180K R637 180K Q121 KTC3199 GR R153 10K Q122 KTC3199 GR R154 10K 50 R156 220K R157 220K C136...

Страница 34: ...AIN SPN TUN_SM GND AOUT TEST SEL C B A VCC AIN CIN DIFOUT RREF VREFC BIASC STB CLK DIN DOUT OSC VEE VDD VDD VSS VSS D_GND A_ 10V 5V M_ 12V 100 FIP0 FIP1 FIP2 FIP3 FIP4 FIP5 FIP6 FIP7 FIP8 FIP9 FIP10 FIP11 FIP12 FIP13 FIP14 FIP15 FIP16 FIP17 FIP18 SPEANA SEL A FIP19 VLOAD VDD2 FIP20 FIP21 FIP22 FIP23 FIP24 FIP25 FIP26 FIP27 FIP28 DIST IN MPEG_POW KARAOKE LATCH FL LATCH MIC SW JOG 1 JOG 0 DSA_STB DS...

Страница 35: ...O VIDEO CD PWB P29 11 D TO VIDEO CD PWB P31 12 B SOLENOID DRIVER SOLENOID DRIVER MOTOR DRIVER CNP9 CNP7 PLAY SWITCH PWB B3 R769 1K D714 DS1SS133 C714 20 10 C713 0 022 R737 1K R738 1K R739 1K R740 1K XL701 4 194304 MHz C712 15P C711 18P R735 1K R734 1K R733 1K R731 1K R730 1K R732 100 R779 10K R780 10K R781 10K RD35 33K RD34 15K SW737 REC PAUSE SW738 X BASS DEMO SW736 TUNING DOWN RD25 680 RD30 2 7K...

Страница 36: ...0 R802 10 ZD802 DZ6 2BSA C812 100 35 R804 47K R803 12K D818 DS1N40 CNP905 IC901 STK40270N POWER AMP C991 0 22 50 C990 0 22 50 C917 0 1 ML C916 0 1 ML Q991 KRA107 M R828 100 C825 3 3 50 Q990 KRC107 M R805 22K R819 22K C814 2200 63 C813 2200 63 R996 0 22 2W R910 100 1 4 Fusible C904 100 50 R994 0 22 2W R993 0 22 2W R995 0 22 2W C943 0 001 C944 0 001 C942 0 015 ML C941 0 015 ML R974 68K R975 68K R973...

Страница 37: ...100 50 C809 220 50 R801 2 2K Q801 TA1274 Y ZD801 DZ30BSC 47 50 C807 100 50 D818 DS1N404S F804 T2A L 250V D804 DS1N404S D806 DS1NS404S C806 0 047 ML D807 DS1N404S D805 DS1N404S C805 0 047 ML R826 220K R827 47K ZD806 DZ11BSB R944 270 1 2W FW901 C939 0 1 ML C940 0 1 ML R805 22K C801 2200 50 C802 2200 50 C813 00 63 R979 1K CNP904 R945 270 1 2W L902 L903 D909 DS1SS133 Q910 KTC3203 Y R952 15K C938 10 50...

Страница 38: ...C351 0 022 C397 0 022 R382 150 C381 12P CH X352 4 5 MHz C382 15P CH R375 470 C384 0 001 R378 1K R372 1K R374 1K R373 1K R316 4 7K CF303 C318 100P C313 22P CH R309 10K C324 3 9P UJ VD303 SVC211C C312 0 022 C306 0 022 C307 10 50 C311 18P R302 10 IC301 TA7358AP FM FRONT END C305 4 7P CH C310 15P CH BF301 B P F C303 10P CH C304 0 01 CNP301 SO302 FM ANTENNA TERMINAL L312 D305 DS1SS133 C308 4 7P UJ R311...

Страница 39: ...6 8K RK44 6 8K CK49 100P CK50 100P CK42 0 022 RK38 100 RK14 100 RK15 100 RK36 390 CK19 0 022 RK8 5 6K CK23 0 001 CK1 0 01 RK11 1K RK10 1K RK9 1K CK43 47 25 ZDK1 MTZJ5 6B RK12 100 RK13 1 2K QK1 KTC3203 Y ICK1 M65856SP MIC AMP RK2 56K RK3 56K RK4 10K RK7 1K JK1 MIC CK9 2 2 50 CK8 4 7 50 CK13 0 0047 CK17 220 10 CK18 100 16 CK16 0 22 CK15 0 068 CK25 2 2 50 CK26 2 2 50 CK12 2 2 50 CK14 0 001 CK21 0 068...

Страница 40: ...1 SW601 SPAN SELECTOR 100 kHz 10 kHz 50 kHz 9 kHz BK WH 1 2 SO302 FM ANTENNA TERMINAL JK601 VIDEO AUX IN R CH L CH AM LOOP ANTENNA FM 75 OHMS GND 1 2 TO VIDEO CD PWB P47 11 A JK671 VIDEO OUT 23 24 TO POWER AMP PWB P45 12 D MAIN PWB A 1 2 3 TO VIDEO CD PWB P47 10 A 1 2 3 4 5 6 RD WH BL WH BL WH CNS601 CNP8 CN CNP906 1 2 3 4 5 6 7 8 9 C625 C621 C617 C613 R612 R609 R610 R608 C372 C374 C373 C358 ZD351...

Отзывы: