2 – 4
5. Power ON start
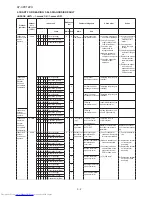
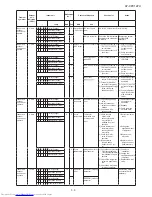
6. Self-diagnostic malfunction code display
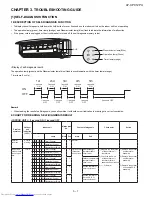
1) When a malfunction is confirmed, all relays turn off and a flashing
operation LED,timer LED,Plasamacluter LED is displayed to indi-
cate the type of malfunction.
When the air conditioner is in non-operating condition, holding
down AUX button for more than 5 seconds activates the malfunc-
tion code display function.
The operation continues only in the case of a serial open-circuit,
and the main relay turns off after 30 seconds if the open-circuit con-
dition remains.
In the case of a serial short-circuit, the air conditioner continues
operating without a malfunction code display, and the main relay
turns off after 30 seconds if the short-circuit condition remains.
The malfunction information is stored in memory, and can be
recalled later and shown on display.
2) The self-diagnostic memory can be recalled and shown on the dis-
play by stopping the operation and holding down AUX button for
more than 5 seconds.
(For details, refer to the troubleshooting section.)
7. AUTOMATIC AIR CONDITIONING
8. Airflow control
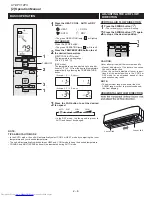
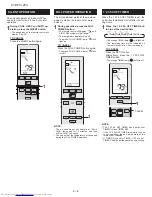
1) Press the SWING button on the remote control once.
The vertical adjustment louver will swing continuously.
2) Press the SWING button
again when the vertical adjustment louver
is at the desired position.
The adjusted position will be memoried and will be automatically
set to the same position when operated the next time.
CAUTION: Never attempt to adjust the louvers manually.
Manual adjustment on the louvers can cause the unit to malfunc-
tion.
When the vertical adjustment louver is positioned at the lowest pos-
ition in the COOL or DRY mode for an extended period of time, con-
densation may result.
9. Difference of operation in Auto and Manual
modes
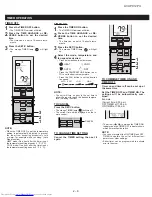
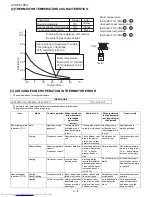
In the Auto mode, the temperature setting is automatically determined
based on the outside air temperature. In addition, the air conditioner
operation differs from the operation in the Manual mode as explained
below.
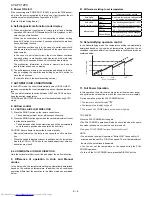
9.1. Difference relating to set temperature
10. Dehumidifying operation control
In the Dehumidifying mode, the temperature setting is automatically
determined based on the outside air temperature. In addition, the air
conditioner operation differs from the operation in the Manual mode as
explained below.
11. Full Power Operation
27ºC
+0
+0.5
-1.0
-1.5
25ºC
25ºC
28ºC
22ºC
22ºC
Room Temperature
Preset
temperature
-
In the AUTO mode, the unit will automatically select COOL or HEAT
mode by comparing the room temperature and your desired tempera-
ture.
The unit will automatically switch between HEAT and COOL mode to
keep the desired temperature.
COANDA and MULTI SPACE button will be inactivated during AUTO
mode.
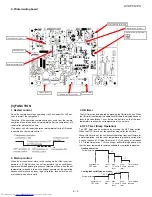
If the connecting wire “POWER ON” (POJP) is put on the PWB assem-
bly, when the power is supplied by turning on a circuit breaker, the air
conditioner automatically starts of operation in “AUTO”.
(Refer to Printed Wiring Board.).
AY-XPC12PU
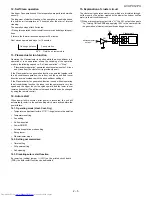
8.1. VERTICAL AIR FLOW DIRECTION
8.2. HORIZONTAL AIR FLOW DIRECTION
Hold the horizontal airflow louver link and adjust the air flow direction.
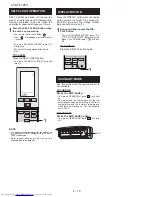
In this operation, the air/air heat pump
works at the maximum power
optimum louver direction to make the room cool or warm rapidly.
During operation, press the FULL POWER button.
and
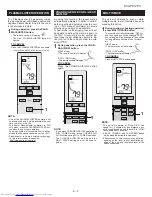
TO CANCEL
Press the FULL POWER button again.
The FULL POWER operation will also be cancelled when the opera-
tion mode is changed, or when the unit is turned off.
NOTE:
The air/air heat pump will operate at “Extra HIGH” fan speed for 15
The remote control will display”
“
The temperature display will go off.
The green FULL POWER lamp on the unit will light up.
The geen FULL POWER lamp on the unit will turn off
minutes, and then shift to “HIGH” fan speed. The vertical adjustment
louvre will be set obliquely downward.
You can not set the temperature or fan speed during the FULL
POWER operation.
To turn off the FULL POWER lamp, press the DISPLAY button.
+HDW
&RROLQJ
+HDW
&RROLQJ
+HDW
&RROLQJ
'HKXPLGLI\LQJ
$XWRPDWLFVHWWLQJ&DQEHFKDQJHG
ZLWKLQsഘsഒXVLQJUHPRWHFRQWURO
$XWRPDWLFWHPSHUDWXUHVHWWLQJEDVHG
RQRXWVLGHDLUWHPSHUDWXUH
$XWRPRGH
E\SUHVVLQJ$8;EXWWRQ
$XWRPRGH
VHWE\UHPRWHFRQWURO
&DQEHFKDQJHGEHWZHHQᨺഘ
ᨺഒXVLQJUHPRWHFRQWURO
0DQXDOPRGH
&DQEHFKDQJHGEHWZHHQᨺഘ
ᨺഒXVLQJUHPRWHFRQWURO
Temperature setting method
Содержание AY-XPC07PU
Страница 34: ...AY XPC12PU 2 1 INDOOR UNIT PARTS ...
Страница 35: ...AY XPC12PU 3 ...
Страница 36: ...4 AY XPC12PU ...

