background image

15

Skip stored channels

You can skip certain channels so that when you use

P


r

 or 

s

 buttons they are not displayed.

These channels are not deleted – they can be
accessed at any time using 

0–9

 numeric buttons.

1

Select the channel to be skipped.

2

Press 

k

.

• The programme number flashes and the selected

channel is skipped.

Canceling channel skip

1

Select the skipped channel using 

0–9

 numeric

buttons.

• The programme number flashes.

2

Press 

k

.

• The programme number no longer flashes and the

channel skip is canceled.

Useful features

Teletext function

What is Teletext?

Teletext broadcasts pages of information and
entertainment to specially equipped television sets.
Your TV receives Teletext signals broadcast by a TV
network, and decodes them into graphical format for
viewing. News, weather and sports information, stock
exchange prices and programme previews are among
the many services available.

Turning on and off Teletext

1

Select a TV channel or external input source
providing the Teletext programme.

2

Press 

to display the Teletext.
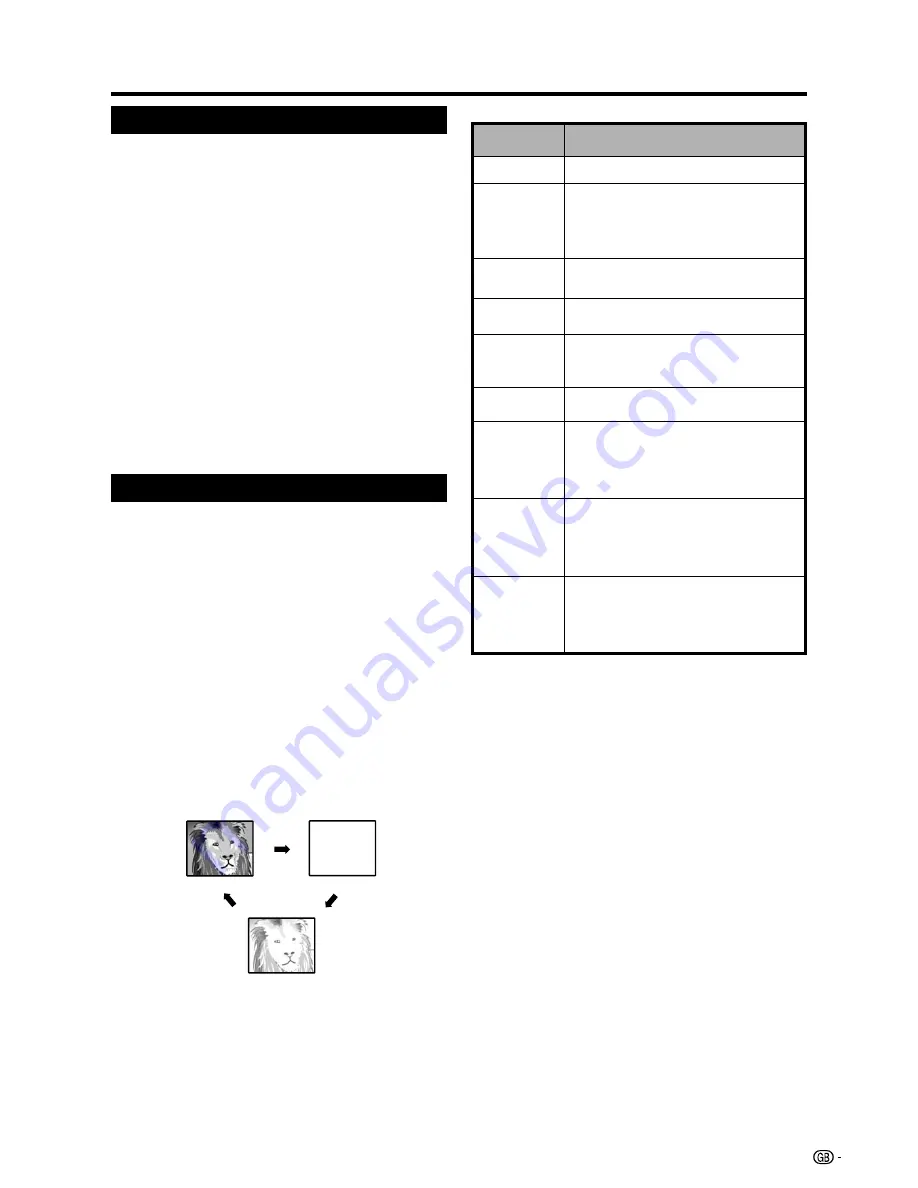
3

Press 

again to display the Teletext

and normal image at the same time on the screen.

• Each time you press 

7

, the screen switches

as shown below.

• If you select a programme with no Teletext signal,

“No Teletext signal” displays.

• The same message displays during other modes if

no Teletext signal is available.

Description

Increase or decrease the page number.

Select a group or block of pages displayed
in the coloured  brackets at the bottom of the
screen by pressing the corresponding

Colour (Red/Green/Yellow/Blue)

 on the

remote control unit.

Directly select any page from 100 to 899 by
using 

0–9

.

Switch the Teletext image to Top, Bottom or
Full.

Reveal or hide hidden information such as
an answer to a quiz.

Stop updating Teletext pages automatically
or release the hold mode.

Display the subtitle or exit the subtitle
screen.
• Subtitle will not be displayed when the

service does not contain the subtitle
information.

Reveal or hide subpages.
• Red button: Move to the previous subpage.
• Green button: Move to the following subpage.
• These two buttons are shown on the screen

by the signs 

l

 and 

k

.

Display the Index page.
When the TELETEXT is broadcast in TOP (Top
Over View) format, pages are sorted by blocks
and groups so that you can select a page
quickly.

Buttons

P (

r

/

s

)

Colour (Red/
Green/Yellow/
Blue)

0–9

v

 (Top/

Bottom/Full)

k

 (Reveal

hidden
Teletext)

3

 (Hold)

[

 (Subtitle

for Teletext)

(Subpage)

ENTER

Button functions

TELETEXT

TELETEXT

Содержание Aquos LC-20SD4E

Страница 1: ...RENTELEVISIE TELEVISIÓN EN COLOR LCD OPERATION MANUAL BEDIENUNGSANLEITUNG MODE D EMPLOI MANUALE DI ISTRUZIONI GEBRUIKSAANWIJZING MANUAL DE MANEJO LC 20SD4E OPERATION MANUAL BEDIENUNGSANLEITUNG MODE D EMPLOI MANUALE DI ISTRUZIONI GEBRUIKSAANWIJZING MANUAL DE MANEJO LC 20SD4E ENGLISH FRANÇAIS DEUTSCH ITALIANO NEDERLANDS ESPAÑOL ...

Страница 2: ... input 14 EXT colour 14 Language 14 Teletext language 14 Features menu 14 Backlight 14 Sleep timer 14 Auto power off 14 REC screen status 14 Useful features 15 Skip stored channels 15 Teletext function 15 DTV menu operations 16 DTV menu operation buttons 16 DTV On Screen Display 16 DTV common operations 16 About using the character set screen 17 Language Setup 17 Channel Organizer 17 Installation ...

Страница 3: ...and other openings in the cabinet are designed for ventilation Do not cover or block these vents and openings since insufficient ventilation can cause overheating and or shorten the life of the product Do not place the product on a bed sofa rug or other similar surface since they can block ventilation openings This product is not designed for built in installation do not place the product in an en...

Страница 4: ...nal on the back of your TV set to receive digitally terrestrially broadcast stations An indoor antenna can also be used under good reception conditions Passive and active room antennas are offered commercially Quick guide Setting the TV How to fix the cables Secure cables and cords with the supplied cable clamps Cable clamps AC cord Product shape varies in some countries Place the TV close to the ...

Страница 5: ...e insert two AA size batteries supplied When the batteries become depleted and the remote control unit fails to operate replace the batteries with new AA size batteries Using the remote control unit Use the remote control unit by pointing it towards the remote control sensor Objects between the remote control unit and sensor may prevent proper operation Cautions regarding the remote control unit D...

Страница 6: ...the next previous page 17 b INPUT SOURCE Select an input source TV EXT1 EXT2 See page 8 18 SLEEP Set the sleep timer in units of 30 min up to max 2 hr 19 p Display information Display various information channel number sleep timer etc See pages 23 and 24 20 DTV MENU DTV Display DTV Menu screen 21 MENU Display the MENU screen See page 9 22 a b c d Cursor Select a desired item on the setting screen ...

Страница 7: ...iew AC INPUT terminal Remote control sensor B Standby On indicator Headphone jack a Power button b Input button ENTER i l k Volume buttons Cursor c d P s r Programme channel buttons Cursor a b EXT2 terminals EXT1 RGB terminal Antenna input terminal DVB T 5V 80 mA OUTPUT Audio terminals COMMON INTERFACE slot MENU button ...

Страница 8: ...completely turn off the TV press a on the TV Off Red Green Orange Display status indicator Power off The TV is in standby mode The TV is on The TV screen is off and a Timer event has begun Although it only displays the tuning of the analogue channel it is actually tuning the digital channels at the same time NOTE Both analogue and digital channels are scanned at the same time during Automatic sear...

Страница 9: ...AUDIO R AV OUTPUT AUDIO OUT VIDEO S VIDEO AUDIO L L R R EXT2 MONO Connecting a DVD player You can use the EXT2 terminals when connecting to a DVD player and other audiovisual equipment DVD player EXT2 A game console camcorder and some other audiovisual equipment are conveniently connected using the EXT2 terminals NOTE EXT2 The S video terminal has priority over the video terminals Connecting a gam...

Страница 10: ... u e s c r e e n Re s e t 2 5 3 5 2 5 0 2 5 On Se l e c t EX I T En d A d j u s t MENU Re t u r n S e t u p A u d i o 1 Picture menu To adjust the picture settings 2 Audio menu To adjust the audio settings 3 Setup menu To set up TV channels select the language displayed on screen and other settings 4 Features menu To customize various features 5 Navigation buttons To navigate within the Menu scree...

Страница 11: ... screen displays 2 Press c d to select the desired menu 3 Press a b to select the desired menu item Example Brightness Contrast etc 4 Press c d to adjust the item to your desired position P i c t u r e F e a t u r e s B r i g h t n e s s Co n t r a s t Co l o u r T i n t S h a r p n e s s B l u e s c r e e n Re s e t 2 5 3 5 2 5 0 2 5 On Se l e c t EX I T En d A d j u s t MENU Re t u r n S e t u p...

Страница 12: ... o l Re s e t Se l e c t EX I T En d Ad j u s t MENU En d TV 2 5 2 5 0 O f f O f f S e t u p A u d i o Sound via Menu Operation C page 10 When set to Hi fi the sound from the built in speaker will be turned off and outputs only from the external device connected to the audio output terminals You can adjust the volume by pressing i Select Reset to reset all adjustment items to the factory preset va...

Страница 13: ...rst Installation 1 Repeat steps 1 to 3 in Programmes 2 Press a b to select Automatic search and then press d 3 Press a b to select the colour system and then press ENTER 1 Press MENU and the MENU screen displays 2 Press c d to select Setup 3 Press a b to select Programmes and then press d Loud sp sound Menu Operation A page 10 This function changes the sound mode See page 5 Sound wide Menu Operati...

Страница 14: ...s are erased 5 Press EXIT First installation You can run First Installation again even after setting up the preset channels 1 Press MENU and the MENU screen displays 2 Press c d to select Setup 3 Press a b to select First installation and then press d 4 You can set language country area andAutomatic search the same as in the initial auto installation Follow steps 1 to 3 on page 7 NOTE The initial ...

Страница 15: ...ive terminal This happens due to the setting of your external equipment Teletext language Menu operation C page 10 You can select a language for the Teletext from West Europe and East Europe Features menu Backlight Menu operation A page 10 Adjust the screen brightness Bright Medium Dark Sleep timer Menu operation A page 10 Set the sleep timer in units of 30 min up to max 2 hr Off 30 60 90 120 Auto...

Страница 16: ...Each time you press 7 the screen switches as shown below If you select a programme with no Teletext signal No Teletext signal displays The same message displays during other modes if no Teletext signal is available Description Increase or decrease the page number Select a group or block of pages displayed in the coloured brackets at the bottom of the screen by pressing the corresponding Colour Red...

Страница 17: ...ssigned in the Channel Organizer screen TV RADIO Press to switch between TV and RADIO mode DTV MENU Press to open the DTV Menu screen or return to the previous step a b c d Press to select a desired item on the screen or adjust a selected item ENTER Press to go to the next step or complete the setting EXIT Press to exit the DTV Menu screen Colour Each of the coloured buttons have a unique function...

Страница 18: ...zer in the Main menu Sample Channel Organizer screen Channel Organizer Select D Menu TV Radio Enter Exit 0 9 001 BBC ONE 002 BBC TWO 007 BBC THREE 030 CBBC 1 Fav 2 Lock 3 Skip 4 Go To 5 Delete 6 Rename 7 Move 8 Move To Enter View S No Service Name Fav Lock Skip Del Sel Dutch English Finnish French German Greek Italian Polish Portuguese Russian Spanish Swedish Turkish Welsh Gaelic Available languag...

Страница 19: ...IN Skip Services that are set to skip will not be picked up when pressing P s r 1 Press a b to select the desired service 2 Press on the remote control An icon displays indicating the service to be skipped Pressing will turn the skip icon on and off 3 Press DTV MENU NOTE To view services that are set to be skipped use numeric buttons or select from the Channel List Go To Use this function to jump ...

Страница 20: ...n your area NOTE To cancel the scan in progress press EXIT Move Sort the order of the selected service by moving the service position 1 Press a b to select the desired service 2 Press on the remote control An icon displays indicating the service to be moved Pressing will turn the move icon on and off 3 Move the selected service to the desired position using a b and then press ENTER to register the...

Страница 21: ...then press GREEN Delete An icon displays indicating the carrier to be deleted Pressing GREEN will turn the delete icon on and off Press ENTER or DTV MENU A confirmation message displays Press c d to select Yes and then press ENTER 3 To re scan the selected carrier Select the carrier and then press BLUE Rescan Re scanning starts A confirmation message displays Press c d to select Yes and then press...

Страница 22: ...anner position Display Transparency Bottom 10 Select Adjust D Menu Exit 4 Secs Enter Selectable items 1 Sec 2 Secs 7 Secs Top Bottom None 10 20 50 OSD Setup items Banner timeout Banner position Display Transparency Description Select how long the service banner information appears on screen Select whether the service banner information appears on top or bottom of the screen Select the desired leve...

Страница 23: ...se 1 Press ENTER while the cursor is on Common Interface The CI module name is displayed CI Module Module Name D Menu Exit Top Up TV Enter 2 Press ENTER to access the CI menu Detailed information on the CI card in use is displayed 3 Press a b to select the item and then press ENTER Detailed information on the selected item is displayed NOTE To view paid TV broadcasting you need to make a contract ...

Страница 24: ...not the screen switches on when the timer event begins See REC screen status on page 14 This is so that if you are using the timer to make a recording to your VCR or other device the TV screen will not switch on unless you want it to If you are watching another event an alarm message displays on the screen a few seconds before the preset time To cancel the preset select the event to delete press G...

Страница 25: ... display more detailed information press p again You can verify the signal strength and quality of the selected service here Using the digital channel list Select services by using the Channel list instead of using numeric buttons or P s r 1 Press ENTER when no other menu screen is displayed Viewing a service banner A service banner shows event names start end time of event and other useful inform...

Страница 26: ...l Service letting you experience DTV interactively When provided the Digital Service will start when you press 7 Sample Digital Service screen Using the multi audio function Change the audio mode and language for the currently viewed service 1 Press 6 when no other menu screen is displayed Displaying subtitles Set the desired language for the subtitle display and enable disable the subtitle displa...

Страница 27: ...ustment correct See page 11 Is the antenna connected properly See page 3 Is the volume too low See page 5 and 6 Make sure that headphones are not connected See page 6 Check if you pressed e on the remote control unit See page 5 Troubleshooting Appendix IMPORTANT NOTE ON RESETTING THE PIN We suggest that you remove the following instruction from the operation manual to prevent children from reading...

Страница 28: ...V Hyper band S1 S41ch Auto Preset 199 ch Auto Preset 200 Carrier 1000 Program Receiving Channel Brightness 430 cd m2 Backlight life 60 000 hours at Backlight Standard position Viewing angles H 170 V 170 Audio amplifier 2 1 W g 2 Speaker 110 mm g 40 mm Terminals EXT1 EXT2 S VIDEO Y C input RCA pin AV input Rear UHF VHF 75q Din type Analogue Digital SCART AV input output RGB input TV output Antenna ...

Страница 29: ...ich could otherwise arise due to inappropriate waste handling 2 In other Countries outside the EU If you wish to discard this product please contact your local authorities and ask for the correct method of disposal For Switzerland Used electrical or electronic equipment can be returned free of charge to the dealer even if you don t purchase a new product Further collection facilities are listed on...

Страница 30: ...ON MANUAL BEDIENUNGSANLEITUNG MODE D EMPLOI MANUALE DI ISTRUZIONI GEBRUIKSAANWIJZING MANUAL DE MANEJO SHARP ELECTRONICS Europe GmbH Sonnistraße 3 D 20097 Hamburg Deutschland Printed on environmentally friendly paper Auf ökologischem Papier gedruckt Imprimé sur papier écologique Stampato su carta ecologica Afgedrukt op ecologisch papier Impreso en papel ecológico ...

Отзывы: