background image

1

Dimension: 140mm x 215mm

COLOR TELEVISION

H

 OPERATION MANUAL

H

MODEL

27SF560

Products that have earned the ENERGY STAR

b

 are designed to protect the

environment through superior energy efficiency.

CONTENTS

PAGE

IMPORTANT INFORMATION/IMPORTANT
SAFEGUARDS ....................................................

2–4

• Trademarks ............................................................... 5
• Supplied Accessories ............................................... 5
• Before Operating Your Television .............................. 5
• Antenna Connections ........................................... 6–7
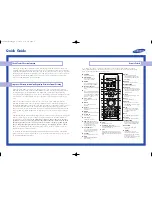
• Quick Reference Control Operation ..................... 8–9
• EZ SETUP during First Use ............................. 10–11
• Antenna Setup DIGITAL ................................... 11–12
• Accessing the MAIN MENU screen without

Remote Control ...................................................... 12

• Channel Call ........................................................... 12
• Changing Viewing Channel .................................... 13
• Language ............................................................... 14
• Sleep Timer ............................................................ 14
• Video Adjust ........................................................... 15
• Audio Select ..................................................... 16–17

MTS (Multichannel TV Sound) ............................ 16
SPEAKER (Internal Speaker Switch) ................. 16
FAO (Fixed Audio Output) ................................... 16
AUDIO ADJUST ................................................. 17

• Digital Audio ........................................................... 18

This operation manual includes basic operating

instructions in Spanish and French.

SPANISH is on page 53–58.

FRENCH is on page 59–64.

PAGE

• Closed Caption ................................................. 19–20
• Parent Control .................................................. 21–31

V-CHIP Operation ......................................... 21–28
VIEW TIMER ................................................ 29–31

• Energy Save ........................................................... 32
• Set Up .............................................................. 33–40

EZ Setup ....................................................... 33–34
Channel Setting ............................................ 34–36
Blue Screen ........................................................ 37
Personal Preference ..................................... 38–39
Universal Plus Function ................................ 39–40

• Auto Input ............................................................... 40
• CH/Input ID ....................................................... 41–42
• Screen Format ........................................................ 43
• Using the Video and Audio Input Terminals ...... 44–45
• Using the Audio Output Terminals .......................... 46
• Operation of Universal Remote Control ........... 47–50
• Before Calling for Service ....................................... 51
• Calling for Service .................................................. 51
• Warning message for Digital broadcasting ............. 52
• Specifications ......................................................... 52
• Limited Warranty .................................................... 65

C133 WJ

STANDARD 

DEFINITION TELEVISION

27SF560(01-04).p65

26/10/05, 6:23 PM

1

Содержание 27SF560

Страница 1: ... 16 SPEAKER Internal Speaker Switch 16 FAO Fixed Audio Output 16 AUDIO ADJUST 17 Digital Audio 18 This operation manual includes basic operating instructions in Spanish and French SPANISH is on page 53 58 FRENCH is on page 59 64 PAGE Closed Caption 19 20 Parent Control 21 31 V CHIP Operation 21 28 VIEW TIMER 29 31 Energy Save 32 Set Up 33 40 EZ Setup 33 34 Channel Setting 34 36 Blue Screen 37 Pers...

Страница 2: ...nder the 1972 Consumer Product Safety Act PLEASE READ CAREFULLY THE IMPORTANT LIMITED WARRANTY CLAUSE ON THE LAST PAGE WARNING TO REDUCE THE RISK OF FIRE OR ELECTRIC SHOCK DO NOT EXPOSE THIS APPLIANCE TO WET LOCATIONS CAUTION TO REDUCE THE RISK OF ELECTRIC SHOCK DO NOT REMOVE COVER OR BACK NO USER SERVICEABLE PARTS INSIDE REFER SERVICING TO QUALIFIED SERVICE PERSONNEL The lightning flash with arro...

Страница 3: ...t and cart combination should be moved with care Quick stops excessive force and uneven surfaces may cause the equipment and cart combination to overturn 7 Wall or shelf mounting should follow the manufacturer s instructions and should use a mounting kit approved by the manufacturer 8 Slots and openings in the cabinet and the back or bottom are provided for ventilation To insure reliable operation...

Страница 4: ... not attempt to service this television equipment yourself as opening or removing covers may expose you to dangerous voltage or other hazards Refer all servicing to qualified service personnel 20 Unplug this television equipment from the wall outlet and refer servicing to qualified service personnel under the following conditions A When the power cord or plug is damaged or frayed B If liquid has b...

Страница 5: ...at the safety feature of the polarized plug Note If the set is not going to be used for a long period such as during a vacation unplug the set from the wall outlet to economize power If the TV set is plugged in a slight current still flows even with the POWER BUTTON in the OFF position Lines and other noise may appear in TV broadcast images when an FM tuner or radio is located near the TV and both...

Страница 6: ...d 75 ohm coaxial cable VHF ANTENNA UHF ANTENNA COMBINER not supplied or Antennas The antenna requirements for good color television reception are more important than those for black white television reception For this reason a good quality outdoor antenna is strongly recommended The following is a brief explanation of the type of connections that are provided with the various antenna systems 1 A 7...

Страница 7: ...crambled channels Set your TV on channel 3 or 4 Typically one of these channels is used If this is unknown consult your cable TV company For more specific instructions on installing cable TV consult your cable TV company One possible method of utilizing the converter descrambler provided by your cable TV company is explained below Please note RF switch equipped with position A B not provided is re...

Страница 8: ...d under the PULL OPEN indication pull and lift the door open To close the door Using the projection lower the door until closed Caution When opening or closing the door do not insert your fingers into the gap between the door and front panel This may result in an injury Rear Panel ANTENNA CABLE INPUT TERMINAL IN 1 S VIDEO TERMINAL LINE OUT AUDIO TERMINALS COMPONENT VIDEO TERMINALS IN 3 VIDEO AUDIO...

Страница 9: ...ccessed quickly by using these buttons See page 38 39 VOLUME UP DOWN k Increases sound l Decreases sound Changes or selects the TV adjustments on On Screen Display MENU Press Accesses MAIN MENU Press again Exits MAIN MENU CATV DVD TV VCR MODE SELECT SWITCH In TV VCR position signals sent will be for TV and VCR control In CATV DVD position signals sent will be for cable TV converter and DVD control...

Страница 10: ...ing for digital channel will start If you want to stop the EZ SETUP process once it has started press VOL l and it will be canceled If you stop the EZ SETUP process before it finish tunning analog channels the tunning for digital channels will started to process If you want to SET UP again please refer to page 33 34 on SET UP To cancel EZ SETUP Press VOL l SELECT ENGL I SH FRANCA I S SELECT CH SET...

Страница 11: ...s VOL k l to access the CH SETTING screen then press CH a s to move the E mark to select ANTENNA SETUP DIGITAL Note Antenna Setup Digital can only be select during Digital Channel 5 Press VOL k l to access ANTENNA SETUP DIGITAL screen H SIGNAL STRENGTH i Press CH a s to select SIGNAL STRENGTH ii Adjust the direction of the antenna to obtain the signal strength level 60 or higher SLEEP T IMER AUD I...

Страница 12: ...ssing MENU on the TV set Some features of your TV set are not accessible without the Remote Control If you lost your Remote Control contact a Sharp Service Center for a replacement On the Set MENU button CH CH 3 2 1 6 5 4 9 8 7 0 Channel Call To display receiving channel information 1 Press DISPLAY once The display appears as shown on right If the viewing channel is a digital channel the informati...

Страница 13: ...s 5 ENTER Note When selecting a 1 digit channel number it is not necessary to press 0 before the number When you enter 0 9 only channel selection will be made if there is no operation for a few seconds To select a 3 digit analog channel number e g Channel 115 Press 1 1 5 ENTER Note When you enter 0 9 only channel selection will be made if there is no operation for a few seconds If you push 0 by it...

Страница 14: ... AUD I O CC ES SLEEP T IMER AUD I O SELECT CLOSED CAPT I ON PARENT CONTROL ENERGY SET UP SAVE V I DEO ADJUST MENU DI GI TAL AUD I O CC ES SLEEP T IMER AUD I O SELECT CLOSED CAPT I ON PARENT CONTROL ENERGY SET UP SAVE V I DEO ADJUST MENU DI GI TAL AUD I O CC ES ENGL I SH FRANCA I S ESPAÑOL LANGUAGE ENGL I SH FRANCA I S ESPAÑOL ID IOMA SLEEP T IMER 12 0M REMA I N BLUE SCREEN PERSONAL PREF UN I VERSA...

Страница 15: ...eo Adjust PICTURE TINT COLOR SHARP COLOR TEMP RESET CH s CH a BRIGHT P I CTURE 50 DI GI TAL P I CTURE 50 DI GI TAL VOL k increases contrast VOL l decreases contrast SLEEP T IMER AUD I O SELECT CLOSED CAPT I ON PARENT CONTROL ENERGY SET UP SAVE V I DEO ADJUST MENU DI GI TAL AUD I O CC ES MENU VOLUME k l CHANNEL UP a DOWN s 1 2 3 4 5 6 7 8 9 0 POWER TV MENU FLASHBACK DISPLAY INPUT VOL CH CH VOL ENTE...

Страница 16: ...erminals See page 46 H FAO Fixed Audio Output This function turns the TV s internal speakers OFF and allows fixed audio output from the AUDIO OUTPUT Terminals See page 46 With FAO the TV s volume control is disabled 1 Press MENU to access the MAIN MENU screen 2 Press CH a s to move the E mark to AUDIO SELECT 3 Press VOL k l to access the AUDIO SELECT screen 4 Press CH a s to move the E mark to MTS...

Страница 17: ...f you want to hear stereo sound again Selecting MTS while receiving video signals from INPUT terminals does not change the type of sound in this case sound is determined by the video source If FAO mode is on SPEAKER mode will automatically turn off Changing SPEAKER setting will not affect FAO mode Audio Select Continued 2 1 STEREO SAP ON ON A I R A I R MONO Analog CHANNEL call on screen TREBLE RES...

Страница 18: ...re available to be selected However selectable service are depands on the programs contains The services are toggles as shown on below If a program has three services audio service toggles like below Note AUDIO SERVICE The type of audio transmitted in a digital broadcast signal In additional it is possible for multiple audio tracks to accompany a signal video track 5 Press MENU to exit SLEEP T IME...

Страница 19: ... displays over the picture other various information such as TV program schedule weather forecast etc that is independent of the TV programs H During viewing analog channel 1 Press MENU to access the MAIN MENU screen 2 Press CH a s to move the E mark to CLOSED CAPTION 3 Press VOL k l to access the CLOSED CAPTION setting screen 4 Press CH a s to move the E mark to either MODE or DATA 5 Press VOL k ...

Страница 20: ...re poor or if there are problems at the broadcast source This does not necessarily indicate a problem with your TV If any button is pressed to call up the ON SCREEN DISPLAY while viewing a CLOSED CAPTION broadcast the closed captions will disappear momentarily If no TEXT broadcast is being received while viewing in the TEXT mode the screen may become dark and blank for some programs Should this oc...

Страница 21: ...ased Example 2 R in the age based rating is blocked this will automatically block the higher rating NC 17 X also RATING G GENERAL AUDIENCES All ages admitted PG PARENTAL GUIDANCE SUGGESTED Some material may not be suitable for children PG 13 PARENTS STRONGLY CAUTIONED Some material may be inappropriate for children under 13 R RESTRICTED Under 17 requires accompanying parent or adult guardian NC 17...

Страница 22: ...le for TV MA Please note that the lower age rating TV PG does not change from its previous settings after this Note Content ratings can be modified but only in the combinations indicated by V in the table on page 21 Changing a lower age rating s content setting to BLOCK automatically changes the same higher age rating s content setting to BLOCK regardless of their previous settings Changing a lowe...

Страница 23: ...hildren under the age of 8 because it could contain controversial themes or issues 14 Over 14 Years Could contain themes where violence is one of the dominant elements of the storyline but it must be integral to the development of plot or character Language usage could be profane and nudity present within the context of the theme 18 Adults Intended for viewers 18 years and older and might contain ...

Страница 24: ...e V CHIP select screen PARENT CONTROL screen V CHIP select screen MAIN MENU screen SLEEP T IMER AUD I O SELECT CLOSED CAPT I ON PARENT CONTROL ENERGY SET UP SAVE V I DEO ADJUST MENU DI GI TAL AUD I O CC ES SLEEP T IMER AUD I O SELECT CLOSED CAPT I ON PARENT CONTROL ENERGY SET UP SAVE V I DEO ADJUST MENU DI GI TAL AUD I O CC ES V I EW T IMER V CH I P BLOCK PARENT CONTROL MPAA TV GU I Cdn n E g l i ...

Страница 25: ... select either BLOCK or unblock 6 Press MENU to return to the TV GUIDELINES screen 7 Repeat steps 4 to 6 until all ratings and their contents are set 8 When done press MENU to return to V CHIP select screen 9 Press MENU to exit Note If SECRET No is not set enter a SECRET No as show in steps 7 and 8 of 1 MPAA RATING Parent Control V CHIP Operation Continued TV GUIDELINES screen CONTENT RATING scree...

Страница 26: ...r unblock for each rating item by pressing CH a s and VOL k l if you select Cdn French Ratings in step 2 MPAA TV GU I Cdn n E g l i s R h a t i n s g Cdn r F en c h Ra t i n s g E D L I NES STATUS ON After downloading the rating data C C8 G PG 14 18 I ND I V B LOCK B LOCK B LOCK I DUAL BL MENU RETURN OCK ENGLISH INDIVIDUAL BLOCK screen G 8 13 16 18 I ND I V B LOCK B LOCK I DUAL BL MENU RETURN OCK ...

Страница 27: ...EN ACTIVATED will not be displayed if STATUS is not configured to ON 2 Press MENU then INPUT SECRET No will be displayed 3 Enter the 4 digit secret No using the REMOTE KEYPAD then V CHIP BLOCK will be canceled temporarily If the wrong secret No is chosen SECRET No IS INCORRECT will be displayed Input the secret No again in this case Note If you turn the power ON from OFF the V CHIP BLOCK will be a...

Страница 28: ... your secret No clear the original secret No and set up a new one 1 Repeat steps 1 to 4 of 1 MPAA RATING or 1 to 2 of To temporarily cancel the V CHIP BLOCK then INPUT SECRET No will be displayed 2 Press and hold both VOL k and CH a on theTV set simultaneously until the message INPUT SECRET No disappears 3 Press the MENU button twice to exit Parent Control V CHIP Operation Continued VOL k and CH a...

Страница 29: ...o VIEW TIMER 5 Press VOL k l to access VIEW TIMER 6 Press CH a s to select VIEWING TIME and OFF TIME For each selection press the VOL k l to set the time duration 7 Press CH a s to select STATUS Press the VOL k l to turn ON the VIEW TIMER If STATUS is OFF VIEW TIMER will not operate 8 Press MENU INPUT SECRET No will be displayed Note If SECRET No is already set skip to step 10 Parent Control VIEW ...

Страница 30: ...teps 5 6 Note When you choose the correct secret No the VIEW TIMER access screen is displayed If the wrong secret No is chosen SECRET No IS INCORRECT is displayed Input the secret No again in this case To cancel the VIEW TIMER While the TV set is OFF but the VIEW TIMER is set 1 Turn on the TV a blue screen message TIME OVER will appear If you do nothing the TV will turn off in approximately 30 sec...

Страница 31: ... displayed Now you can cancel the VIEW TIMER settings or change the secret No while INPUT SECRET No is displayed Notice of Remaining VIEWING TIME For every 30 minute interval the remaining time will be displayed for 4 seconds For the last 5 minutes the remaining time will be displayed every minute 0 REMAIN will be displayed for 10 seconds just before the VIEWING TIME expires REMAIN 30M VIEWING TIM...

Страница 32: ...to display 1 Press MENU to access the MAIN MENU screen 2 Press CH a s to move the E mark to ENERGY SAVE 3 Press VOL k l to access the ENERGY SAVE select screen 4 Press CH a s to move the E mark to either SCREEN or STANDBY 5 Press VOL k l to select ON or OFF 6 Press MENU to exit MAIN MENU screen ENERGY SAVE select screen VOL VOL VOL VOL CH CH MENU VOLUME k l CHANNEL UP a DOWN s 1 2 3 4 5 6 7 8 9 0 ...

Страница 33: ... the EZ SETUP process before it finish tunning analog channels the tunning for digital channels will started to process To cancel EZ SETUP Press VOL l Set Up MAIN MENU screen EZ SETUP screen CH SETTING screen SET UP screen BLUE SCREEN PERSONAL PREF UN I VERSAL LANGUAGE CH SETT I NG CH I NPUT I D AUTO I NPUT SCREEN FORMAT PLUS SET UP A IR CH SEARCH CH SEARCH CH MEMORY EZ SETUP CH SETT I NG ANALOG A...

Страница 34: ...reen 7 Press CH a s to move the E mark to the desired mode 8 Press MENU to exit Note Receivable channels of your TV set are AIR channels CABLE channels VHF 2 through 13 1 HRC and IRC mode only UHF 14 through 69 2 through 125 STD HRC and IRC Set Up Continued MAIN MENU screen CH SETTING screen SET UP screen AIR CABLE screen BLUE SCREEN PERSONAL PREF UN I VERSAL LANGUAGE CH SETT I NG CH I NPUT I D AU...

Страница 35: ...ized channels will be lost H DIGITAL CH SEARCH Saving DIGITAL broadcast TV channels into memory 1 Repeat step 1 to step 5 of Channel Setting See page 34 Press CH a s to move the E mark to DIGITAL CH SEARCH 2 Press VOL k l to access the DIGITAL CH SEARCH screen To start Press VOL k The tuner will search through all available channels in your area and add them into the TV memory To stop PressVOL l C...

Страница 36: ...nel to theTV memory or press VOL l to erase a channel from the TV memory 5 Press MENU to exit Set Up Continued VOL VOL CH SETTING screen CH MEMORY screen A IR CH SEARCH CH SEARCH CH MEMORY EZ SETUP CH SETT I NG ANALOG ANALOG ANTENNA SETUP CABLE DI GI TAL DI GI TAL ERASE ADD CH MEMORY AI R 1 0 CH CH CH CH VOL VOL CH A I R ERASE ADD 1 0 MEMORY CH A I R ERASE ADD 1 0 MEMORY VOL k To add channel 10 to...

Страница 37: ...broadcast signal To continue watching TV under these conditions switch the BLUE SCREEN OFF While INPUT 1 2 or 3 COMPONENT is selected the BLUE SCREEN will not be shown even if BLUE SCREEN is turned on MAIN MENU screen SET UP screen BLUE SCREEN select screen BLUE SCREEN PERSONAL PREF UN I VERSAL LANGUAGE CH SETT I NG CH I NPUT I D AUTO I NPUT SCREEN FORMAT PLUS SET UP BLUE SCREEN OFF BLUE SCREEN ON...

Страница 38: ...nd ENTER 22 5 Press 2 2 5 and ENTER To reset a registered CHANNEL Number input twice Note can not be enter as channel number but will function as reset registered Channel Number when input twice Only 3 digit numbers are allow to input for cable channel MAIN MENU screen SETUP screen PERSONAL PREFERENCE select screen BLUE SCREEN PERSONAL PREF UN I VERSAL LANGUAGE CH SETT I NG CH I NPUT I D AUTO I NP...

Страница 39: ... 4 Press CH a s to move the E mark to UNIVERSAL PLUS 5 Press VOL k l to access the UNIVERSAL PLUS select screen to select VCR or DVD mode SET UP screen MAIN MENU screen UNIVERSALPLUSselectscreen BLUE SCREEN PERSONAL PREF UN I VERSAL LANGUAGE CH SETT I NG CH I NPUT I D AUTO I NPUT SCREEN FORMAT PLUS SET UP BLUE SCREEN PERSONAL PREF UN I VERSAL LANGUAGE CH SETT I NG CH I NPUT I D AUTO I NPUT SCREEN ...

Страница 40: ...NTROL ENERGY SET UP SAVE V I DEO ADJUST MENU DI GI TAL AUD I O CC ES BLUE SCREEN PERSONAL PREF UN I VERSAL LANGUAGE CH SETT I NG CH I NPUT I D AUTO I NPUT SCREEN FORMAT PLUS SET UP MAIN MENU screen SET UP screen AUTO I NPUT INPUT2 AUTO CH CH VOL VOL AUTO INPUT select screen AUTO I NPUT INPUT2 OFF CHANNEL UP a DOWN s VOLUME k l MENU PERSONAL PREFERENCE MENU MUTE CATV TV DVD VCR VOL CH CH VOL A B C ...

Страница 41: ...u are viewing a digital channel CH INPUT ID cannot be set 4 Press VOL k l to access the CH INPUT ID screen MAIN MENU screen SET UP screen CH INPUT ID screen SLEEP T IMER AUD I O SELECT CLOSED CAPT I ON PARENT CONTROL ENERGY SET UP SAVE V I DEO ADJUST MENU DI GI TAL AUD I O CC ES CH CH SLEEP T IMER AUD I O SELECT CLOSED CAPT I ON PARENT CONTROL ENERGY SET UP SAVE V I DEO ADJUST MENU DI GI TAL AUD I...

Страница 42: ...ymbols RESET Resetting the ID to _ _ _ _ Press CH a s to move the E mark to RESET then press VOL k l The previously set ID will return to _ _ _ _ 6 Press MENU to exit Note The maximum number of ID labels available to register Analog channel names is 20 for AIR channels and 40 for CABLE channels If you wish to register a new ID when all the available ID labels are assigned delete a registered ID to...

Страница 43: ... digital channel please set this function to 4 3 The 16 9 screen format will be cancelled when the power is turned off Example While in 4 3 mode if the picture appears stretched vertically as in screen A below switch to 16 9 mode The picture will return to normal as shown in screen B MAIN MENU screen SET UP screen SCREEN FORMAT select screen Screen A 4 3 Screen B 16 9 VOL VOL CH CH VOL VOL CH CH C...

Страница 44: ...O OUTPUT L To VIDEO OUTPUT To AUDIO OUTPUT L To AUDIO OUTPUT R To AUDIO OUTPUT L To AUDIO OUTPUT L To AUDIO OUTPUT R Using the Video and Audio Input Terminals VIDEO EQUIPMENT Connecting video equipment for playback of video material To view video material from external video equipment make sure to connect the equipment properly to the input terminals on the TV set Connecting video device equipped ...

Страница 45: ... you wish to use video equipment connected to the VIDEO terminal IN 1 unplug equipment connected to the S VIDEO terminal For detailed information on the connection and use of auxiliary equipment refer to the instruction manuals of the equipment being used The connection cables cords can be obtained from your local video store AIR or CABLE INPUT 1 IN 1 Rear INPUT 2 IN 2 Front INPUT 3 COMPONENT IN 3...

Страница 46: ...f the TV and connect the audio cables to the AUDIO LINE OUTPUT terminals on the TV 3 Turn the TV set and stereo amplifier on 4 If you desire you can turn off the sound of the TV s internal speakers by accessing the TV s AUDIO SELECT screen See pages 16 17 5 Adjust the volume control on the stereo amplifier to a moderate listening level 6 Control of the audio can be adjusted using the audio control...

Страница 47: ... may not be compatible with the remote control Some brands may not enable channel selection until the ENTER is pressed In such case try the following Example When you select channel 24 1 Press REMOTE KEYPAD 2 2 Press REMOTE KEYPAD 4 3 Press ENTER For detailed information on the use of the CableTV converter Box refer to their operating manuals Using your Remote with your TV After installing the bat...

Страница 48: ...r model years or due to format differences VHS BETA In such cases you may have to try more than one code to find the code your VCR accepts Note Depending on the model year produced brand and type of VCR some models may not be compatible with the remote control Akai Audio Dynamics Broksonic Canon Capehart Craig Curtis Mathis Daewoo DBX Dynatech Emerson Fisher Funai GE Goldstar Hitachi Instant Repla...

Страница 49: ...owing steps and list to quickly find the remote control code for your accessory DVD First look up your DVD s remote control code number before going through the Setting Method 1 Slide CATV DVD TV VCR switch to DVD 2 Press and hold down INPUT and CH s on your remote control Then release both buttons 3 Within 10 seconds after releasing INPUT and CH s enter your DVDs two digit remote control code num...

Страница 50: ...DISPLAY and CH s enter your converter s two digit code number using REMOTE KEYPAD refer to the list The remote control is now ready to send commands to your converter Some brands have more than one remote code listed due to changes in the remote codes from early to later model years In such cases you may have to try more than one code to find the code your converter accepts Note Depending on the m...

Страница 51: ...X X X X X X X X X X X X X X X X X X X X X X X X X X X X X X X X X X X X X X X X X X X X X X X X X X X X X X X X X X X X X X X X X X X X X X X X X X X X X X X X X X X X X X X X X X X X X X X X X X X X X X X X X X X X X X X X X X X X X X X X X X X X X X X X X X X X X X X X X X X X X X X X X X X X X X X X X X X X X X X X X X X X X X X X X X X X X X X X X X X X X X X X X X X X X X X X X X X X X X X X ...

Страница 52: ...t x 1 Rear Antenna x 1 Rear Sound Output 5 W RMS x 2 Power Source AC 120 V 60 Hz Power Consumption XXX W Dimensions 29 31 32 W 23 9 16 H 20 17 64 D W x H x D mm 761 mm W 598 5 mm H 515 mm D Weight approx 92 6 lbs 42 kg Specifications Design and specifications are subject to change without notice H The warning message about reception of digital broadcast Warning message for Digital broadcasting The...

Страница 53: ... granted by Sharp and shall be the sole and exclusive remedy available to the purchaser Correction of defects in the manner and for the period of time described herein shall constitute complete fulfillment of all liabilities and responsibilities of Sharp to the purchaser with respect to the Product and shall constitute full satisfaction of all claims whether based on contract negligence strict lia...

Отзывы: