10
9. DPI Settings
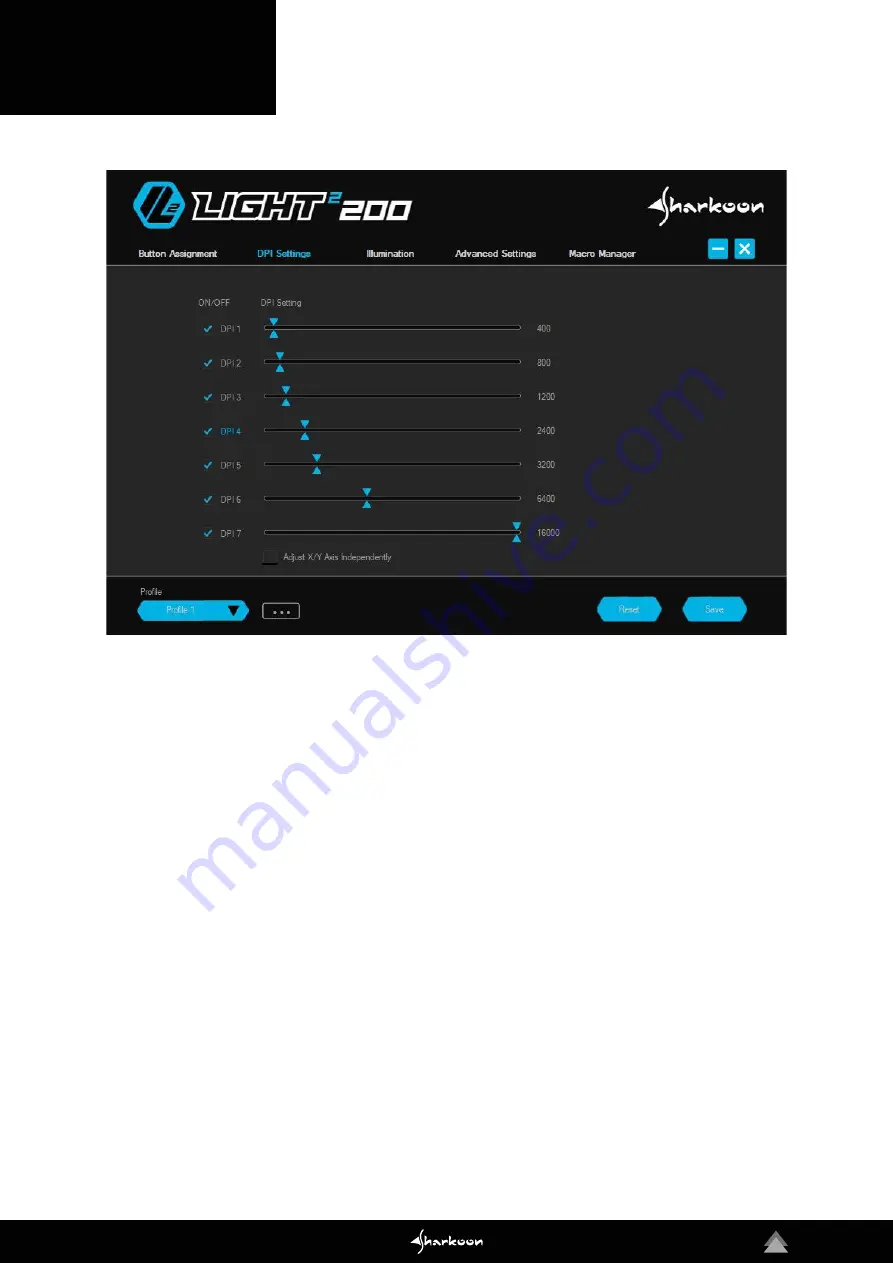
The seven DPI steps of the Light² 200 can be modified as desired. Each step can be assigned with a DPI value bet-
ween 50 and 16,000. If required, the settings for the DPI values can be made separately for the X-axis and the Y-axis.
The currently selected DPI step is highlighted in blue. DPI steps which are not needed can be deactivated.
The DPI steps are named, from top to bottom, DPI 1 to DPI 7. To deactivate a step, click in the box which is on the
left next to the DPI step name. The check will disappear. The empty box indicates that the DPI step in deactivated.
The step will no longer be selected when switching through the DPI steps with the corresponding mouse button. To
reactivate the step, click again in the box to replace the check.
To adjust the level of the DPI step, move the top or bottom blue slide control - to the left or to the right - along the
slide bar. To adjust a single slide control separately for each axis, click below in the box titled “Adjust X/Y Axis
Independently“. As soon as the box is checked, the DPI values, at the end of the slide bars, are indicated according
to the axis. The blue slide control on the top side of the slide bar adjusts the DPI value of the X-axis. The blue slide
control on the bottom adjusts the Y-axis. To adjust the DPI value for both axes at the same time, click again in the
box “Adjust X/Y Axis Independently“ to remove the check.


