

Hardware Setup
Remove the Router(s) from their packaging and placing them in a suitable location.
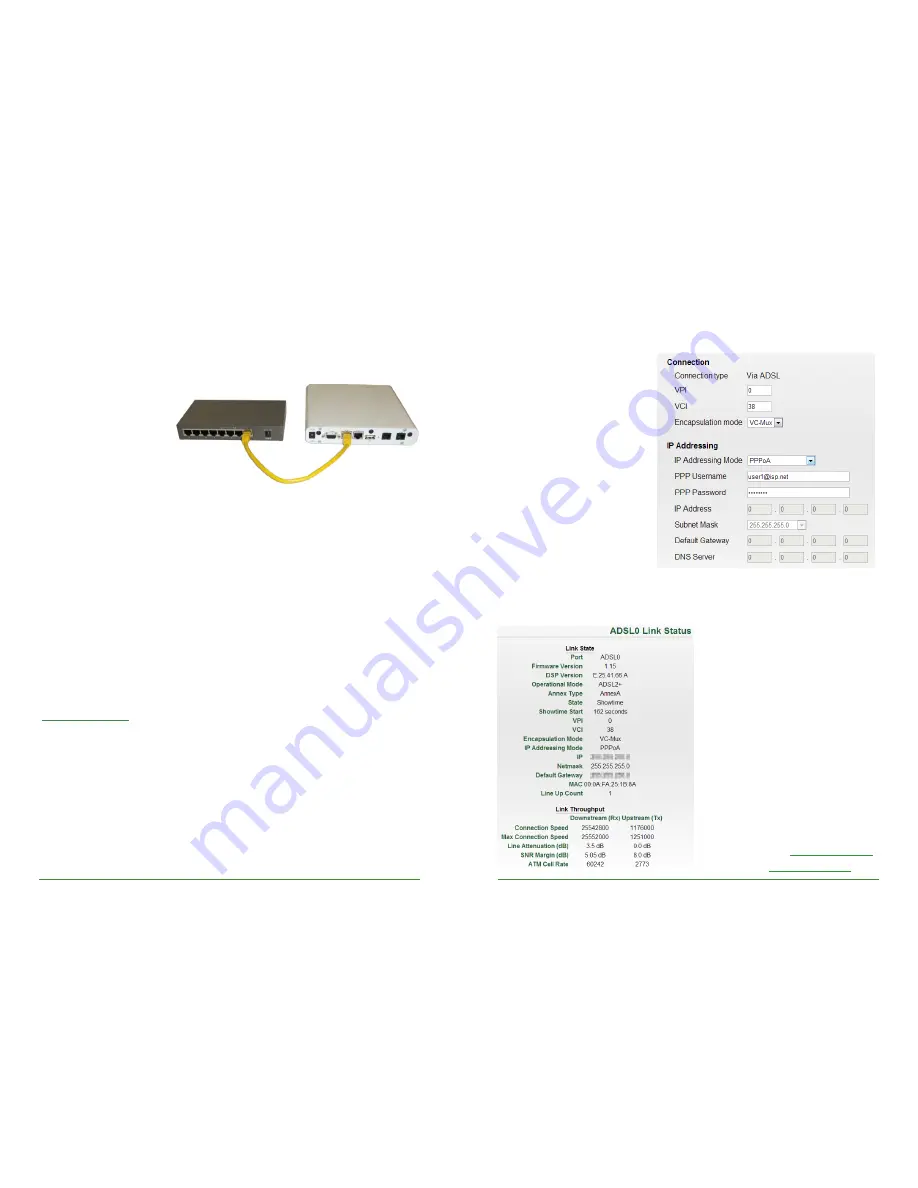
The recommended setup is to connect the Routers together via an unmanaged
switch. However if you only
have 1 Power Router Pro you
can plug this directly into
your network or firewall.
After
connecting
the
Sharedband Routers togeth-
er the next step is to connect
them to the phone line. This is done with the thin black cables found in the box for
each Router. Please ensure you are only using one microfilter per line or connecting
directly to the master socket.
Plug the power lead into the back of the Router and into the nearest power outlet.
Software Setup
Now the Routers are powered on, its time to configure the ADSL details. You should
have received the details when your ISP installed your lines or when you signed. If
your unable to locate the details, call your ISP and request the ADSL log in details.
Using a PC connected directly into the Sharedband Router, or the Switch if you used
one, open a web browser and go to this address.
http://192.168.3.1/
You will be presented with a log in screen. The defaults are:
Username: admin
Password: Bonding123
(You should change the password once setup is complete)
Sharedband Power Router Pro QIG
2
www.sharedband.com
Once you have logged in you will be presented with the Main Menu. Click on
Settings
then click
WAN Connection Settings (ADSL 0)
On this page enter your ADSL log
in details. You will need to select
PPPoA
from the drop down box
(unless the paper work from your
ISP dictates otherwise). In the
following two boxes enter your
ADSL Username and Password,
and press
Save
.
Click on Settings then click
WAN
Connection Settings (ADSL 1)
.
Enter the ADSL details for the sec-
ond connection and press
Save
and Reboot
.
Router should now be connected to the
Internet. This will be indicated by the
LEDs on the front of the router. For
more information click on
Diagnostics
then
ADSL 0 Link Status
.
If you have multiple routers, repeat the
above steps for the other Routers. Each
router has different IP address. This
corresponds with the number written
on the base of the Router. For example
router two will be
http://192.168.3.
2
,
Router 3 will be
http://192.168.3.
3
, etc.
www.sharedband.com
3
Sharedband Power Router Pro QIG


