page
22
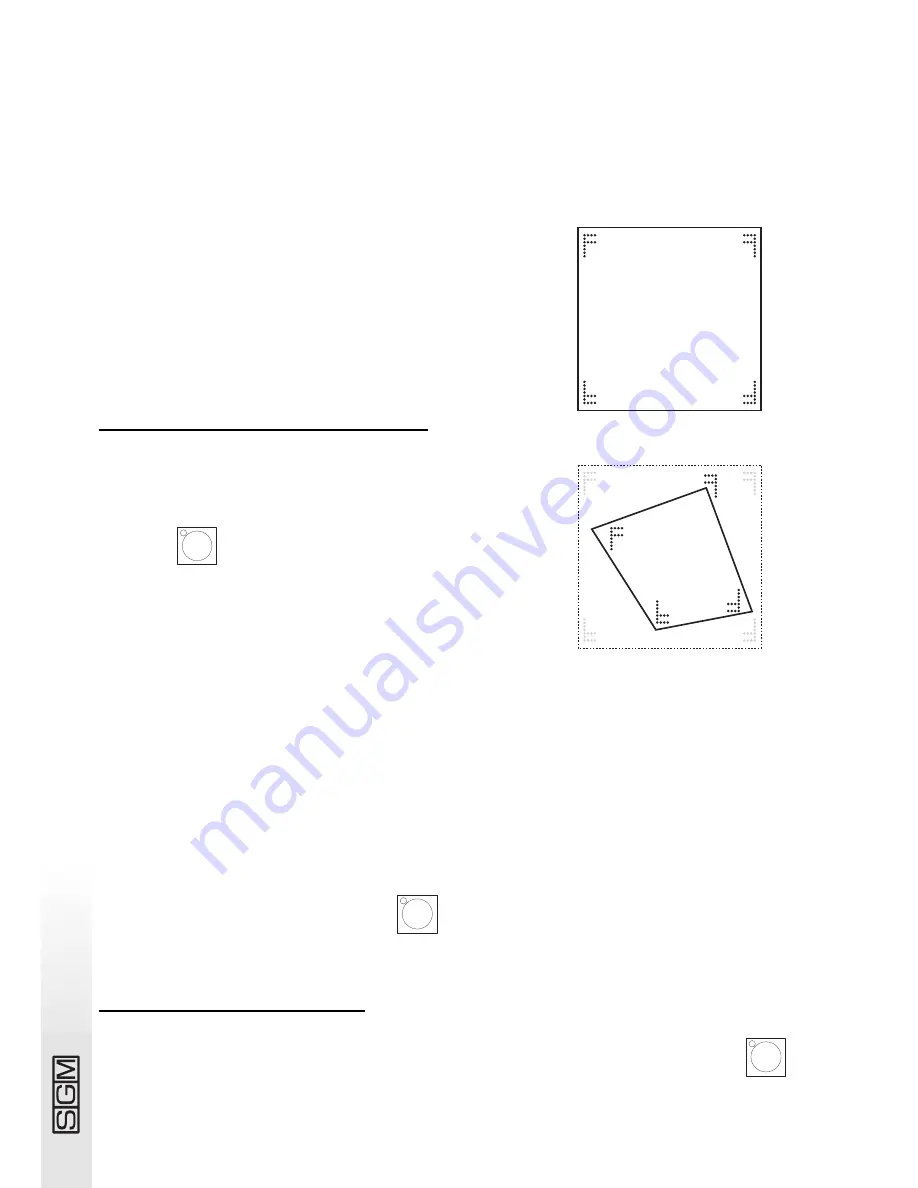
Operating areas can be created as required, without being obliged to form regular shapes, as
shown in the design alongside.
There’s no command for resetting a operating area once it’s been set, but to do so the 4 corners
are selected and the co-ordinates shown in the design alongside entered: 0.0 - 999.0 - 999.999 -
0.999.
Reducing the scan area of a fixture also considerably improves the precision of moving parts,
whether they’re mirrors or heads. In fact, reducing the scanning
area doesn’t reduce the number of steps for positioning, which
remains unchanged (255 for 8-bit fixtures and 65.536 for 16-bit
fixtures). If the fixtures being controlled don’t have commands
for automatic inversion of scanning co-ordinates, (to facilitate
positioning fixtures mounted opposite each other), the Scan
Control scanning areas allow to solve the problem by simply
setting the corner values crossed over (e.g. setting corner 0.0
as 999.0 and vice versa).
7.6 - Creating a program
As already said, Studio Scan Control has 12 programs for intel-
ligent fixtures, each made up of a maximum of 12 scenes.
To create a new program or modify one which already exists,
press the
button: these operations are only possible in
this operating mode.
Pressing one of the PROG buttons (numbered from 1 to 12)
gives access to the required program.
To create or modify scenes, use the buttons numbered from 1
to 12 in the SCENE area: pressing on gives access to the requi-
red scene.
In this situation, buttons 1-12 of the UNIT zone allow to set the required values for each individual
fixture controlled.
For each program, operators can decide how many and which scenes it has, which fixtures work
in the program and which of the controlled fixtures’ effects accept the commands sent by the
Scan Control.
Once this preparatory phase is completed, to create the scenes in the program, just press the but-
ton of the scene to be prepared, then press (singly or in groups) the buttons of the fixtures and
enter the required parameters.
When the scene is complete, press the
button to store it and then (keeping it pressed
down) press the button of the current scene.
7.6.1 - Copying a scene
To copy the contents of one scene to another, press the button of the “origin” scene, then
and (holding it down) press the button of the “target” scene.
s to re
s to re
d i re c t
0,0
999,0
999,999
0,999
scan
area
0,0
999,0
999,999
0,999
new
scan
area


