7
8
Driver Installation
Once connected to the machine, connect the USB cable to the PC, then
plug the machine into the AC power outlet and perform the following
steps:
-Plug the USB Thumb Drive into the PC (it contains the driver
software for the laser controller)
-Twist the Emergency Stop button clockwise, it will pop outwards and
the “Indicator Lamp” will light, this shows that the machine has power
-Remove the cap from the lens of the emitter (be careful not to touch
the lens with your fingers)
-Insert key into the laser safety switch and rotate clockwise, you will
hear the cooling fans for the laser source start and the secondary red
line focusing laser will light (optional, if equipped)
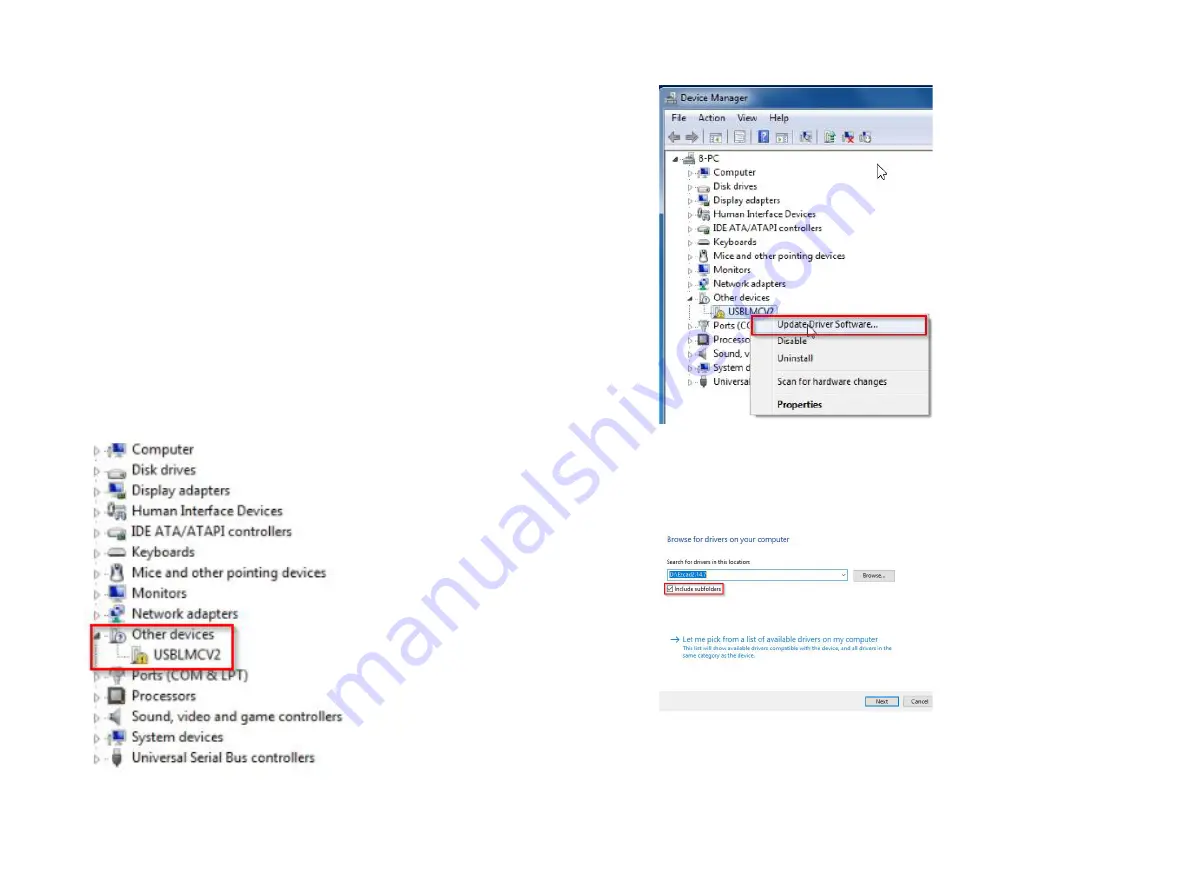
-On the PC, Navigate to the Control Panel > System and Security >
Administrative Tools > Device Manager, you will see the new device
listed under “Other Devices” (Figure 2)
Figure 2
Figure 3
You will be presented with a new window that asks you where to
locate the updated driver for the device, choose “Browse my Computer
for Driver Software”. The USB thumb Drive that was provided with
your machine will have the necessary software on it.
Figure 4
Before proceeding make sure that the USB Thumb Drive that was
provided is plugged into the PC, browse to it and select the main
Ezcad2.x.x folder and select it. Windows will look in the subdirectories
to locate the proper driver for the device (Figure 4).
When you find the device
“USBLMCV2”, this is
the laser controller, right
click on it and choose
“Update Driver Software”
(Figure 3).
N O T E :
the name of
the new device may
v a r y d e p e n d i n g o n
t h e c o n t r o l l e r t h a t
your machine comes
configured with.
Содержание SFX-GS
Страница 2: ......


