-
60 -
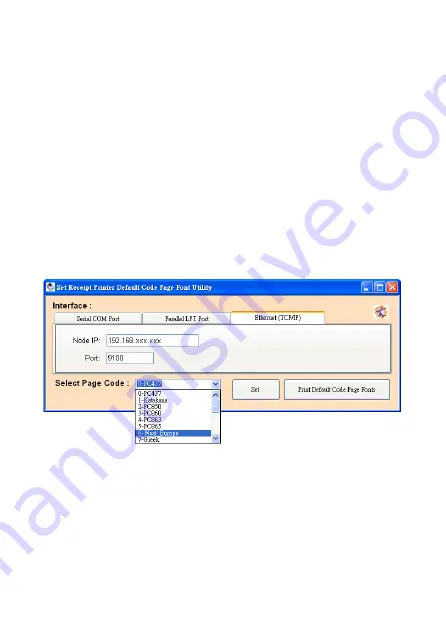
Select Page Code
To select the codepage desired:
1.
Make sure to the DIP switch 4 of the printer is set
ON
(please refer to DIP Switch Configuration for further
information).
2.
Go to the scroll menu and select the preset codepage
desired.
User can enter the codepage number into the field
manually. (Please refer to the printed Self-Test page
for the code number support).
3.
Click
“Set” button to confirm the setting.
4.
Re-initiate the Printer:
Be sure to
Turn-Off and Turn-On
the printer again to
initiate the printer with new codepage setting.
(User can perform the self-test again to exam the new
codepage setting)
Содержание QP-300
Страница 1: ...Save the user manual for future reference QP 300 Thermal Receipt Printer Instruction Manual...
Страница 2: ......
Страница 4: ......
Страница 11: ...7 Part Description Product Views Top View Side View Front View Bottom View Rear View Serial USB...
Страница 12: ...8 Dimensions...
Страница 16: ...12 Multi I O Ports Printer Cable Cash Drawer Power Adaptor USB RS 232 RJ 45 RJ 11 PWR...
Страница 18: ...14 Baud Rate Setting DIP 7 DIP 8 19200 Default 9600 115200 38400...
Страница 25: ...21 4 Click Next to continue...
Страница 26: ...22 5 Select the Operating System For example select Windows XP for Windows XP version Click Next to continue...
Страница 28: ...24 1 Select Module Number Select the proper Printer Model Number...
Страница 32: ...28 Access sub menu Ports and click to select the correct port for your printer Click OK to exit...
Страница 49: ...45 Printer Status This menu displays the printer status and can perform print test...
Страница 55: ...51 2 Access submenu Port and click Add Port 3 Select Standard TCP IP Port and click New Port and proceed...
Страница 57: ...53 6 Additional Port Information Select Custom and click Setting to continue...
Страница 59: ...55 8 Click Finish to complete...
Страница 65: ...61...
Страница 66: ...20150410...


