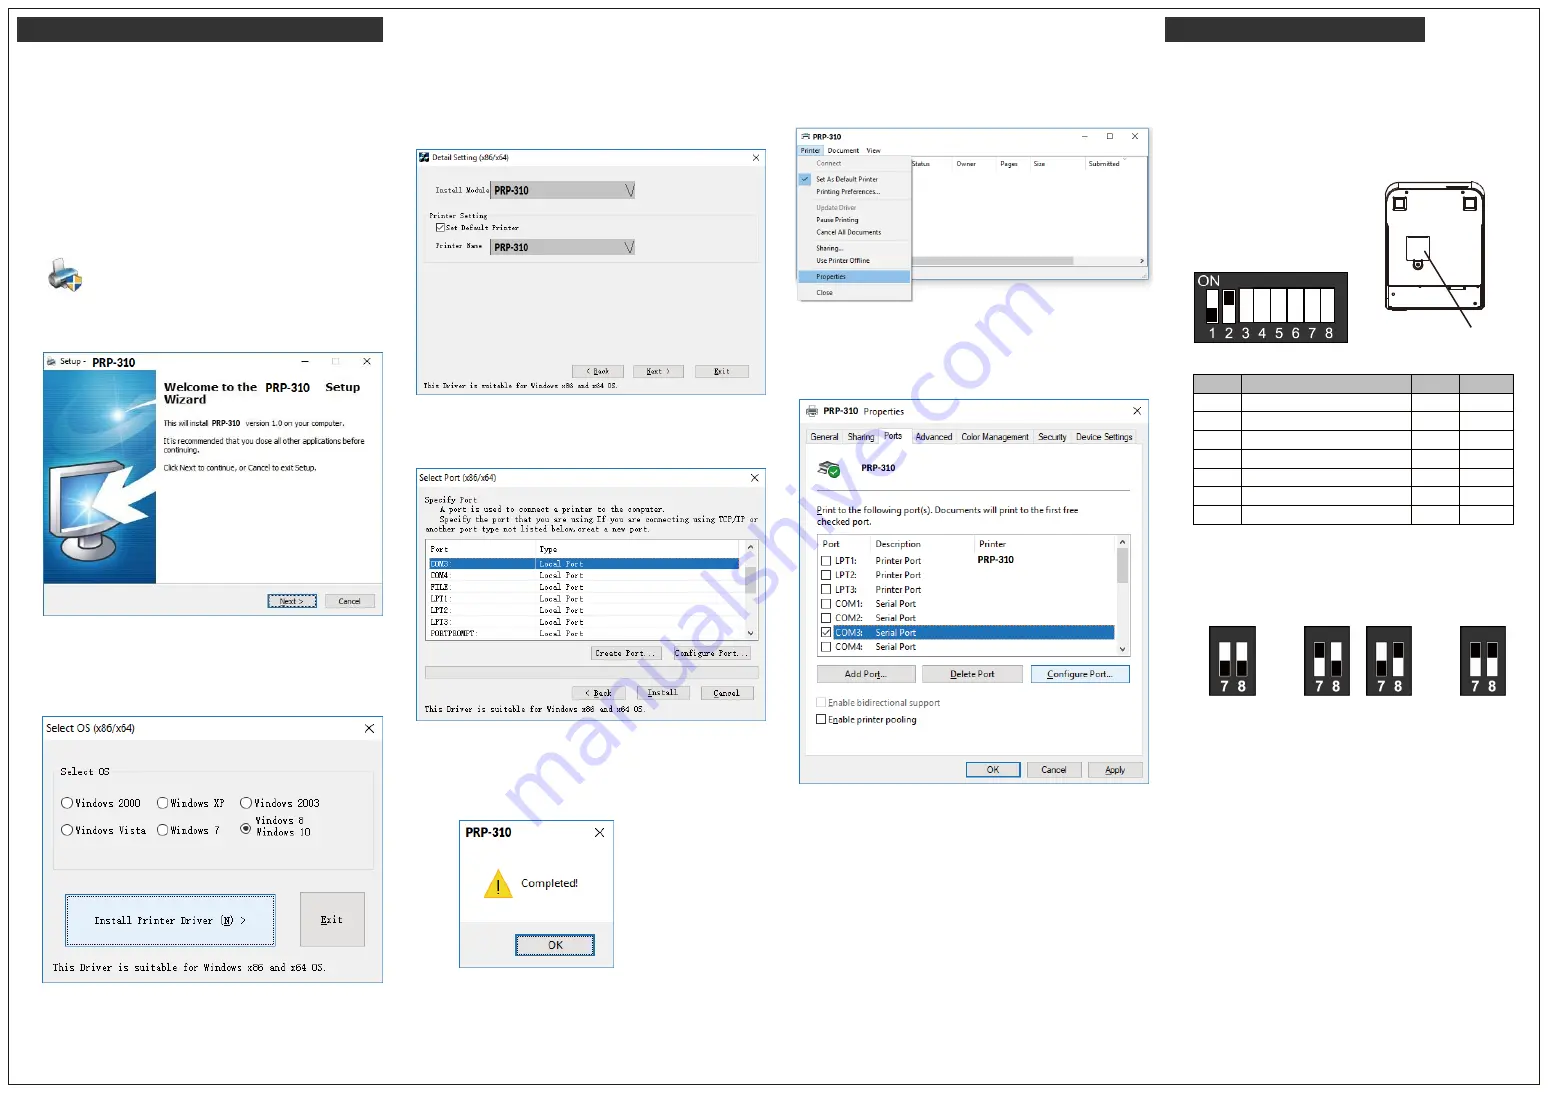
Installing the Driver of The Printer
DIP Switch Configuration
Before installing the driver of your printer, make sure the
printer is properly connected to the host PC.
To install the driver of the printer, access the website and
download the driver:
1.
Double click the icon “Advanced PRP.exe” to initiate the
installation.
4. Default Printer Setting:
To set the printer as the default printer, click the checkbox
“Set Default Printer” to confirm.
Click “Next” to continue.
7.
Examine the Port Setting:
Remember to access the properties of your printer.
Make sure the port of printer is correctly configured.
To change the setting of the printer manually:
1. Turn off the printer.
2. Loosen the securing screw of the protective cover.
3. Adjust the DIP switches to configure the printer.
2. Click “Next” to continue.
5.
Printer Interface Setting
:
Select the appropriate communication interface.
Click “Install” to complete the installation.
Access sub menu “
Ports
”, and click to select the correct
port for your printer.
Click “OK” to exit.
DIP Switches
Protective Cover
“*” Default Setting
Baud Rate Setting
3.
Select the Operating System:
For example: select “Windows 8 Windows 10” for
Windows 10 version.
Click “Install Printer Driver (N)” to continue.
6.
Installation Completed:
Click “OK” to exit the menu.
It’s recommended restarting the computer after
installation is completed.
Note:
Please refer to the Instruction Manual for further information.
19200
(*Default)
9600
115200
38400
Ver. 1.1
20190128
DIP
Function
ON
OFF
1
Auto Cutter
No
Yes*
2
Audio Alarm
Yes *
No
3
Print Density
Dark
Light *
4
Two-byte Character Code
No
Yes*
5
Character Per Line
42
48 *
6
Cutter with Cash Drawer
Yes
No *
7 & 8
Baud Rate Setting
---
OFF*


