background image

13

12

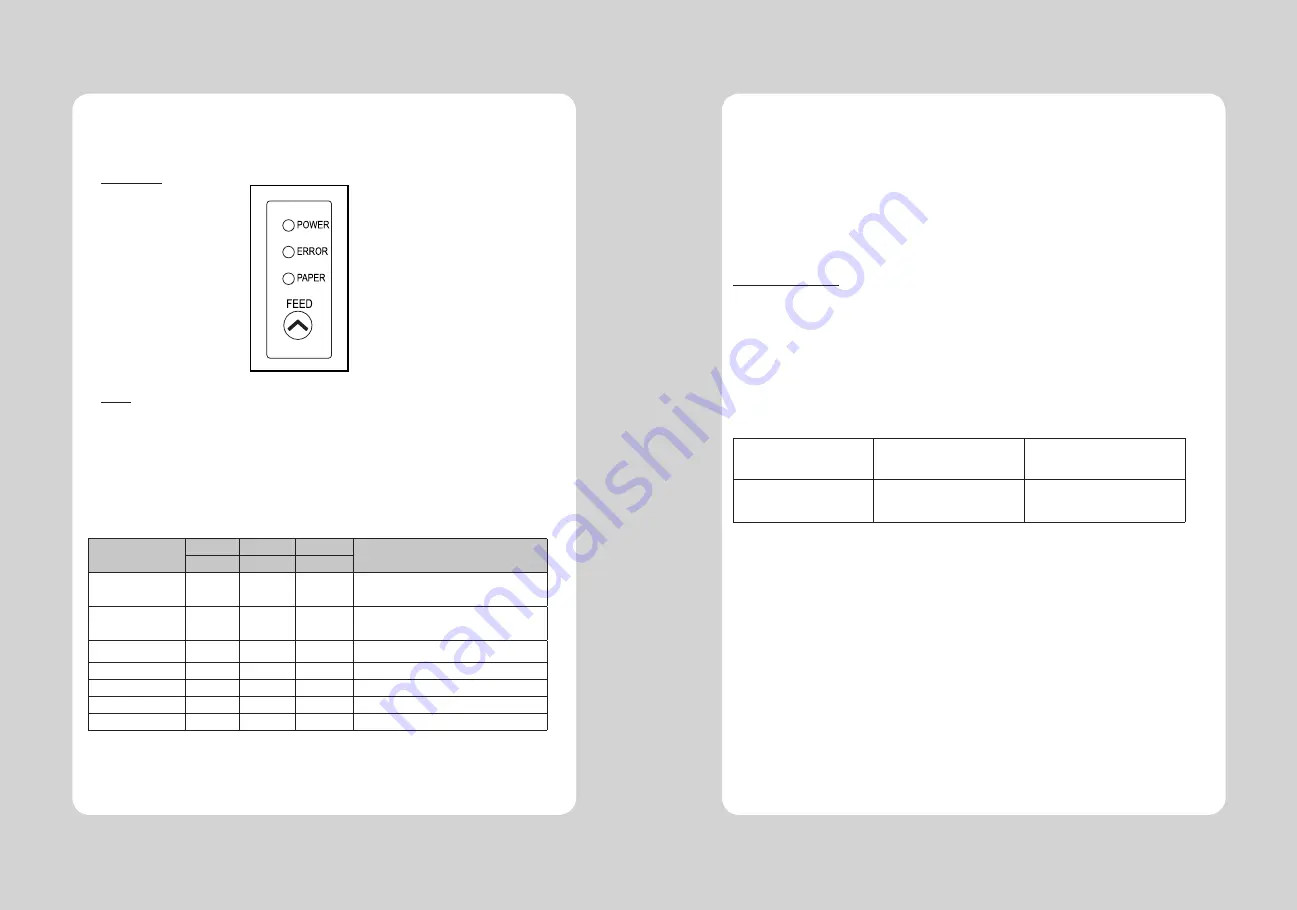
3-1. Control panel

You can control the basic paper feeding operations of the printer with the button on the control panel. 
The indicator lights help you to monitor the printer’s status.

Control Panel


Button

The button can be disabled by the ESC c 5 command.

Press the FEED button once to advance paper one line. You can also hold down the FEED button to 
feed paper continuously.

3-2. Error indicators

This section explains the different patterns signaled by the three LED indicators located on the top 
cover of the printer.

STATUS

PAPER

ERROR

POWER

REMARKS

RED

RED

GREEN

Power off

OFF

OFF

OFF

Normal power is not supplied to 

the printer

Power on

OFF

OFF

ON

Normal power is supplied to the 

printer

On line

OFF

OFF

ON

Normal error-free mode

Cover open

OFF

ON

ON

Close cover

Paper empty

OFF

ON

ON

Insert new paper roll

Paper near end

ON

OFF

ON

Paper is low

Test mode

OFF

OFF

ON

Ignored error led

3. Control panel and other functions

The self-test result indicated whether the printer is operating properly. Also with this, user can check 
following options or status of the printer.

 

Control circuit

 

Printer mechanism

 

Printing quality

 

ROM version

 

Interface setting

This test is independent of any other equipment or software.

Running the self test

1. Make sure the printer is turned off and the printer cover is closed properly before performing the self test
2. Turn the printer on holding the FEED button, then the self-test will start. The self-test prints the printer 
    setting value and then prints the following, and pauses. (Error LED On)

SELECT MODE BY BUTTON
1. ASCII PRINT
2. SELECT BAUDRATE MODE
3. HEXADUMP MODE

3. Press the FEED button consecutively (1~3)

1. ASCII PRINT
(press the FEED button once)

2. SELECT BAUDRATE MODE 
(press the FEED button twice)

3. HEXADUMP MODE 
(press the FEED button triple time)

Printing test page constructed 
with ACII code.

Set the speed of Serial Interface
(You can set the BAUDRATE in 
this mode)

Printing the HEX value received 
from the interface

 

Wait for 5~6 seconds if you want to exit. Printer performs a cutting when exiting this mode

4. The printer is ready to receive data after finishing setting. 

4. Self Test

Содержание SLK-T20EB Series

Страница 1: ...All specifications are subject to change without notice Receipt Printer User s Manual MODEL SLK T20EB Series T20EB Rev D 03 16...

Страница 2: ......

Страница 3: ...Cutter Specifications 19 9 3 Interface 19 9 4 Electrical Characteristics 19 9 5 Environmental Requirements 20 9 6 Reliability 20 9 7 Certification 20 10 Command List 21 Table of Contents 1 Parts Ident...

Страница 4: ...are damaged or missing please contact your dealer for assistance The Printer CD Roll Paper Interface Cable optional Adaptor Optional 2 Setting Up the Printer For connection to a host computer For conn...

Страница 5: ...ine 4 GND System Ground Ethernet Interface PIN SIGNAL I O 1 Data Out Output Data 2 Data Out Output Data 3 GND Ground 4 Data IN Input Data 5 Data IN Input Data 6 N C 7 N C 8 N C This equipment is indoo...

Страница 6: ...ff power switch 1 Make sure that the printer is not receiving data Otherwise data may be lost 2 Open the paper roll cover by pushing down the cover open button 3 Remove the used paper roll core if the...

Страница 7: ...ing 1 Make sure the printer is turned off 2 Take out DIP switch cover as shown 3 Turn screw with drivers to a direction until paper is released from the cutter 2 4 Adjustment of paper width 1 Please a...

Страница 8: ...hether the printer is operating properly Also with this user can check following options or status of the printer Control circuit Printer mechanism Printing quality ROM version Interface setting This...

Страница 9: ...ASCII characters that correspond to the codes Hecadecimal Dump 1B 21 00 1B 26 02 40 40 1B 25 01 1B 63 34 00 1B c4 41 42 43 44 45 46 47 48 ABCDEFGH A period is printed for each code that has no ASCII...

Страница 10: ...int head cleaning as the print head is very hot during printing turn off the printer power and wait approximately 10 minute before start 3 When cleaning the print head take care not to touch the heate...

Страница 11: ...Cutter Life T20EB T20EB 1 5 million cuttings 1 8 million cuttings 9 3 Interface USB B type Serial RS 232C Ethernet 9 4 Electrical Characteristics 1 Input Voltage DC 24V 10 2 Current Consumption Operat...

Страница 12: ...int and return to standard mode in page mode 5 CAN Cancel print data in page mode 6 DLE EOT Real time status transmission 7 DLE ENQ Real time request to printer 8 DLE DC4 Generate pulse at real time 9...

Страница 13: ...t cut mode and cut paper 54 GS W Set printing area width 55 GS Set relative vertical print position in page mode 56 GS a Enable disable Automatic Status Back ASB 57 GS f Select font for HRI characters...

Отзывы: