SerVision
Embedded Video Gateway System Guide
Configuring Camera Settings
105
each second of recording. Obviously, some stream quality is lost when lower quality settings are used. All three
standard quality settings produce recordings in SIF size when the unit’s video resolution is VGA and recordings in
CIF size when the video resolution is D1 (see
, page 18). High quality is the optimal recording
configuration, and is recommended for use whenever possible. For information about the framerates and bitrates
used for the standard quality levels, see
NOTE:
If SVMultiClient is used to view live video-streams from a camera, the quality settings selected for
recording are also used for streaming live video the SVMultiClient at the highest-quality level. Thus, if
a camera is configured to record video at a high bit rate, and SVMultiClient operators also play live
video streams from the Video Gateway at highest quality, the total amount of data sent over the
network to SVMultiClient can be considerable. Depending on the package supplied by your internet
service supplier, this may result in high bills for internet services, especially if live video is transmitted
over the cellular network. To prevent such high fees, it may be advisable to set SVMultiClient’s default
quality level for live video streaming to medium or lowest. For additional information, please refer to
the
SVMultiClient User Guide
.
Configuring Video Recording
This section explains how to configure video recording settings for a camera.
To set up video recording for a camera:
1. In the
Camera
configuration screen, under
Recording Type
, select the desired type of recording, as follows:
Continuous:
Recording takes place all the time, regardless of whether events occur or not
By Event:
Recording only takes place when an event occurs
None:
Recording is not activated for the camera
If you select
By Event
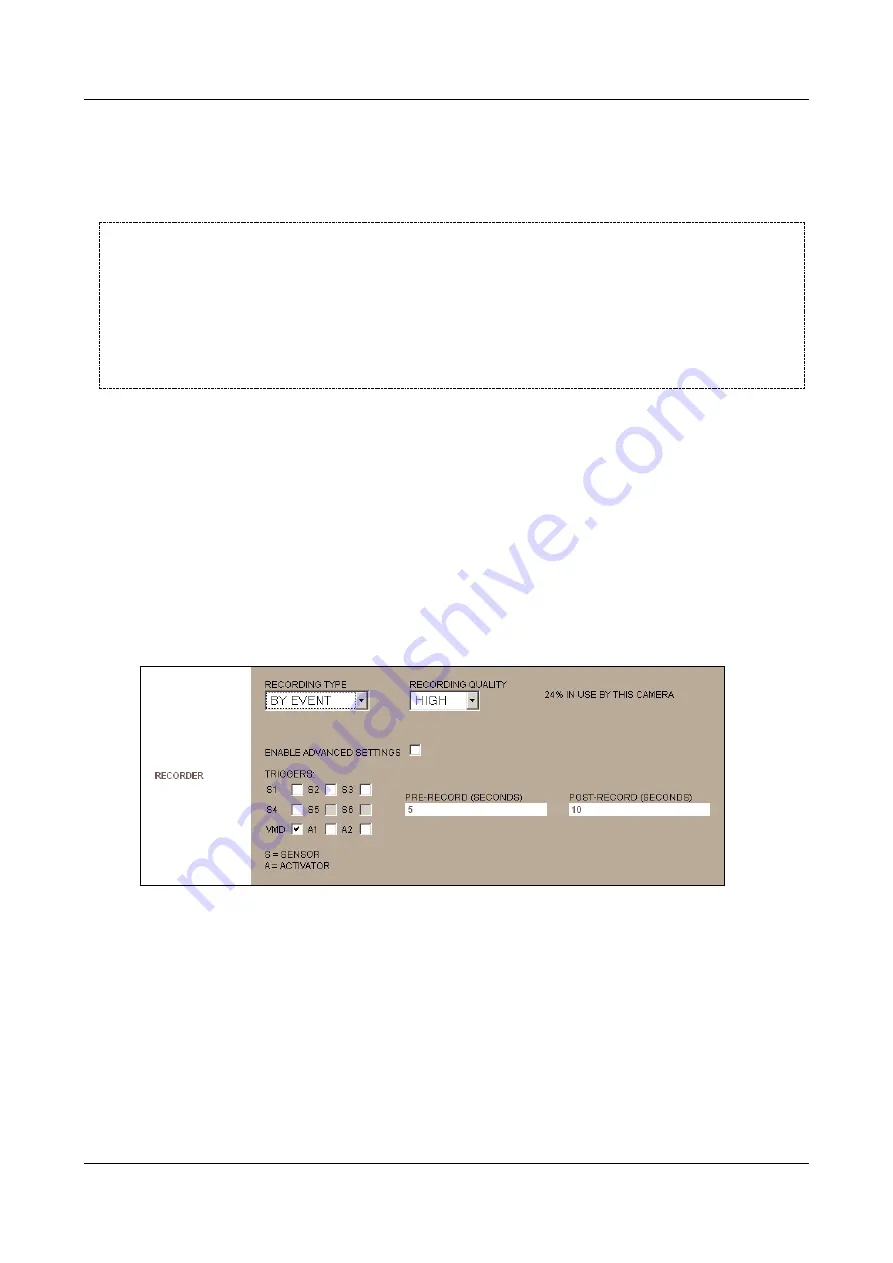
, the fields required to configure the event-triggered recording are added to the screen:
Figure 110: Settings for event-triggered recording
2. Under
Recording Quality
, select the recording quality (
High
,
Medium
, or
Low
).
Note:
For information about the data rates represented by the standard quality levels and about selecting
custom recording quality settings, see
Note:
The percentage of available recording space that is allocated to the camera is indicated in the screen. (In
the illustration above, 24% is allocated to the camera.) This value is set in the Advanced Settings. For
additional information, see
3. If the recorder is event-triggered, select the triggers that will cause the recording to start:
VMD:
If VMD is enabled for the camera (see
VMD events to trigger event recording, select
VMD
.


