


LKS-CD17SR / CD19SR User Manual
27
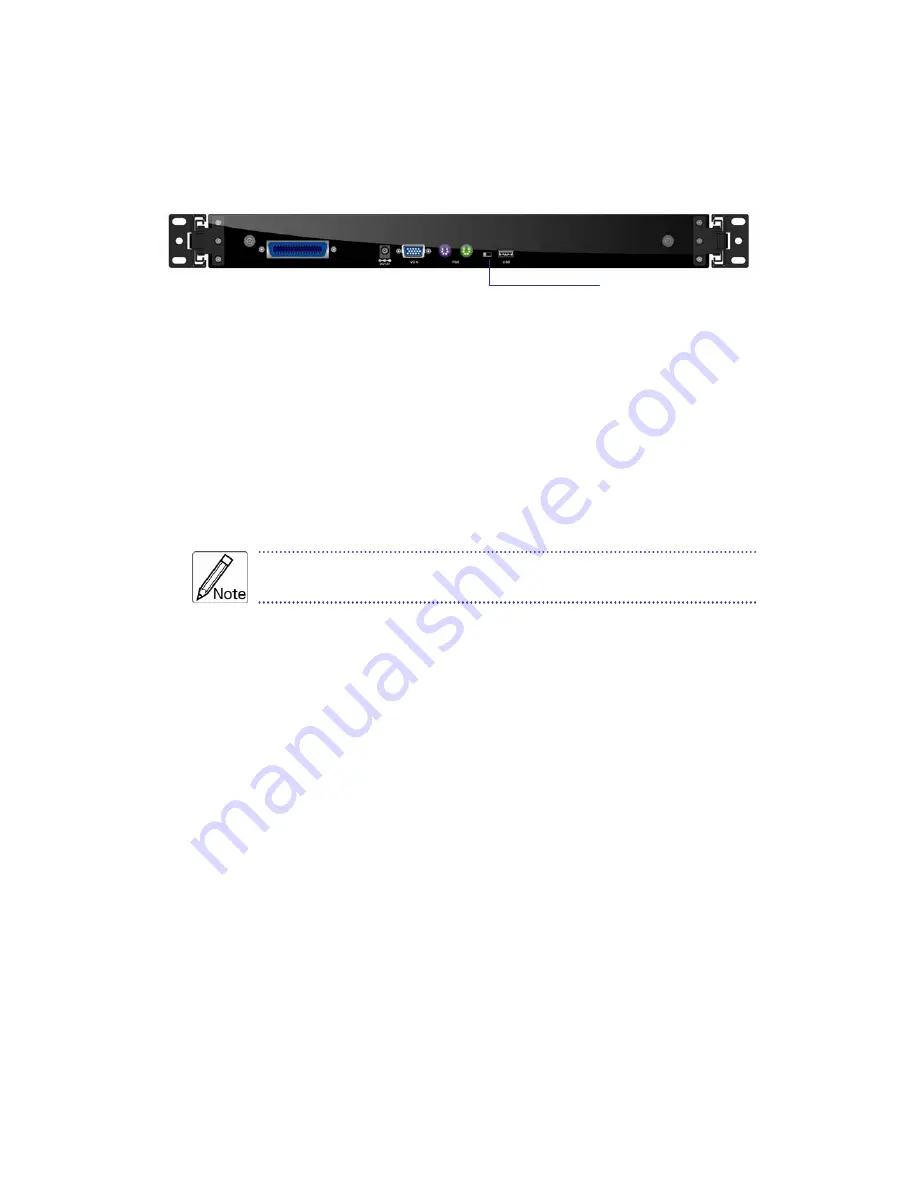
3.3.2 Connecting the Console
To connect an LCD console to a computer, perform the following steps
Figure 3-1. The rear view of LCD console
1. Turn off your computer.
2. Connect the video (VGA) connector of the KVM cable to the video card connector
on the rear panel of your computer.
3. Identify and connect the PS/2 mouse and PS/2 keyboard connector to the correct
PS/2 ports on the rear panel of your computer. Or you can use USB interface to
connect your computer. (Use PS/2-USB switch to select your interface. The
switch has to be on PS/2 side when you use PS/2 interface connector.)
Please don't plug PS/2 and USB cables at the same time
4. Connect the AC to DC power adapter to the power inlet on the console and then to
a power outlet.
3.3 Turning on the Console
Make sure all cables and the AC to DC power adapter are connected properly. Be
sure to tighten all connector screws. Grab the front handle. Pull the console all the
way out then lift the panel up. This will disengage the momentary on/off switch and
the unit should power on. The LED on the left or underneath of the panel will be green
light.
3.4 Testing the Console
To test that the console is working properly, perform the following steps:
1. Power up the console, and then turn on your computer.
2. Make sure the video image is centered within the screen area. Use the OSD
controls to adjust the image (see note below) or press the Auto button on the left
or underneath of the panel.
PS/2-USB switch


