3
as electromagnetic systems or AM/FM radios
. One end of the remote console cable is
plugged into the 16-way header on the rear of the Standard Console (or Interface &
Handsfree Box of Handset Based Console) and the strain relief/environmental grommet
located in place within the moulding. The other end plugs into either of the “D-type”
Interface sockets on the rear of the transceiver.
If the transceiver is running V9, or earlier, software, do not connect or disconnect the
console(s) while the transceiver is powered. V10, and later, software supports “hot
swapping”.
If a connector is unused, fit the dust cover provided.
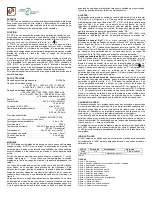
Power/Audio Connector Wiring Colour Code
Wire Colour Description
Wire Colour Description
Red
Positive conn12 V Orange
Programmable input 1
Black
Negative connection GND Yellow
Programmable input 2
Blue
Ignition Sense
Light green Programmable input 3
Grey
Loudspeaker
Pink
Programmable output
Unused cables may be cut to 2 cm and insulated (e.g. with heat shrink sleeving).
WARNING
The transceiver will be damaged if either of the loudspeaker conductors (grey twin
conductor cable) is connected to ground. If the loudspeaker output is to be
connected to other audio systems, an audio isolation transformer must be used.
DC Supply Connection
The power cable plugs into the rear of the transceiver utilising a 15 way D-type connection.
The cable also provides an ancillary connection point for function such as loudspeaker and
other special I/O functions.
1 With the transceiver end of the power connector resting in its intended final position,
route the wires to the vehicle battery; threading the cable through the bulkheads if
required (include the blue wire where ignition switching is not required, see 4 below).
2 The positive power line must include a fuse as close as possible to the power
source. The negative power line must be connected close to the battery-to-vehicle-
body connexion (not directly to the battery) and must not include a fuse.
3 It is recommended that the power cable runs are kept as short as possible.
4 The blue wire provides an ignition sensing input. If ignition switching is required, trim
the wire to length so that it can be wired, via a fuse, to the ignition switch, using the
splicing connector provided. Otherwise this wire must be connected, via a fuse, to
the permanent positive supply. A fuse must always be fitted close to where the wire
is connected.
5 Check the installation and fit the blade fuses. Fuse rating:- Positive supply 10 A,
Ignition sense 1 A (Automotive 19 mm blade type - Littelfuse ATO
®
).
Antenna Installation
For best all round performance of the product, the antenna should be fitted on the centre of
the vehicle roof. Alternative positions, such as wing mounting, will give degraded
performance. The coaxial feeder should be secured along its length to eliminate the
possibility of damage by sharp edges or moving parts.
Antenna Installation – GPS (optional)
If a GPS receiver is fitted at time of manufacture, a GPS antenna socket will be fitted.
Please note that the SRG3900 transceiver tracks GLONASS and GPS satellites
simultaneously. See customer support bulletin CUS-14-2045.
The antenna unit connects to a SMC connector on the rear of the transceiver and should,
ideally, be mounted on the highest point of the vehicle (i.e., roof) with an uninterrupted view
of the sky, and as far from the TETRA antenna as possible. For mounting, follow
manufacturer’s installation instructions. It is recommended to fit the GPS antenna
connector before connecting the Remote Control Cable.
An active antenna is recommended, the supply of which is on the centre pin, 5 V nominal,
40 mA maximum. This supply feed is short circuit protected.
Standard & Colour Console Installation
Mounting Options
Mounting the Standard or Colour Console on the Dash
The console is mounted into the desired position utilising the Console Pivot Mount Kit.
This consists of two main parts:
The dash mount bracket onto which the support bracket is attached.
An adjustable support bracket onto which the console is fixed.
The dash mount bracket should be fixed to a suitable surface, using the three screws
provided. Ensure orientation is correct for the viewing situation (i.e., tilt up or tilt down) and
access is considered to the RS232 data connector, if required.
Ensure that the microphone(s) are connected and cables laid in the cable exits on the rear
of the console (see illustration on P4). Fit the bungs provided into any unused cable exits.
Fix the support bracket to the rear of console using screws provided (tightening torque =
0.8 Nm). Avoid trapping wires with the bracket during assembly.
The support bracket then slots into the mounting bracket and is held by a single, fixed
sprung screw.
The viewing angle of the console can be adjusted by loosening the release knob until the tilt
mechanism is free enough to move, a ratchet action provides incremental positioning. The
knob should then be re-tightened fixing the console in place.
Fixing Hole Positions for Console Pivot Mounting Kit
(all dimensions mm)
The console profile includes small clearance allowance; additional allowances should be
made for cables depending on installation configuration.
Mounting the Standard Console using a DIN Slot
See mounting options diagram. Fit DIN Fascia kit onto DIN slot using screws provided.
Fit a self-locking nut to the end of each of the two screws that secure the DIN fascia kit, so
that if the fascia is subsequently removed, the two grip plates are prevented from fully
detaching from the securing screws.
Either the rear panel kit or the pivot mount kit may be fitted with the DIN fascia (the dash
mount bracket supplied with the pivot mount kit is then not required).
Cable Routing
Ensure that cables are connected and laid in the cable channels on the rear of the
console (See illustration on P4). Fit the bungs provided into any unused channels.
Fit either the Rear Panel Kit or the Pivot Mount Kit to the Console and then fit this
assembly to the DIN Fascia Kit. Fix either the support bracket, or the console rear
panel, to the rear of the console using the screws provided. Avoid trapping wires
during assembly.
Mounting the Colour Console using a DIN Slot
See mounting options diagram. Fit the DIN cage into the slot. Fit bungs provided into all
console cable channels. Feed cables through the DIN cage and DIN mount kit. Using the
screws provided: secure the DIN adapter to the console, fit the bungs provided into any
unused channels in the DIN adapter, fit the cable access cover using the screws provided
and push the assembly into the DIN cage. Avoid trapping wires during assembly.
Standard Handset or Fist Mic. accessories can be fitted to the rear of the colour
console, just like the standard console. New VAC based Speaker RSM or Speaker
Handsets should be connected to the Colour Console’s front accessory connector.
Mounting the Colour Console using a DIN Slot to achieve IP55 sealing
To mount the Colour Console so that it is sealed against front water ingress to IP55 when
mounted in DIN slot, follow the instructions in the separate document
Mounting the Colour
Console into a DIN Slot to achieve IP55 sealing
(SPR-DOC-03974-01).
Handset Based Console Installation
The handset based console is supplied with a magnetic mounting bracket and interface
box. The bracket can be mounted separately or on the box using the screws provided.
Note: the interface box is not sealed – avoid positions with risk of water or dust entry.
Connect the transceiver to the 16-way header in the interface box with a remote console
cable.. Ensure that the strain relief bung is seated at the cable entry in the box front with
flat face down. Refer also to “Cables” section at the top of this page.
(Refer to “Remote Microphone and Switches Installation” on P4 if this option is supplied.)
Press the inner wires of the Remote Console Cable into the clips on the PCB. Screw the
box halves together securely, taking care not to trap any wires.
Plug the handset based console into the interface box through the retaining clip and fold the
clip back over the plug body.
Place the handset in the mounting bracket with the display facing the user.
Additional mounting kits available separately:
300-00629 Car Cradle Fixing Kit: a knuckle joint which provides vertical tilt adjustment.
4-Hole AMPS Mounting Kit 1: additional brackets providing versatile mounting options.
IMPORTANT
The handset based console bracket and colour console AMPS adaptor kit are
compatible with AMPS standard mounting kits. If these are to be used, the installer
should check that the chosen kit is sufficiently rugged to suit the user’s operating
environment.
Dash mounted standard or colour console with
fixed rear panel kit or pivot mount kit
1. Pivot mount kit support bracket 4. DIN fascia kit
7. DIN cage
2. Dash mount bracket
5. DIN release tool
8. AMPS adaptor kit
3. Rear panel kit (fixed)
6. DIN mount kit
9. AMPS bracket (example)
DIN mounted
colour console
3
6
8
7
1
2
4
9
5
DIN mounted standard console with
fixed rear panel kit or pivot mount kit
AMPS mounted
colour console


