background image


6X Multispectral Sensor Reflectance Panel User Guide  

www.sentera.com 

Page 9 of 13 

Updated August 13, 2020 

844.SENTERA 


 © 2020 Sentera, LLC. All rights reserved. 


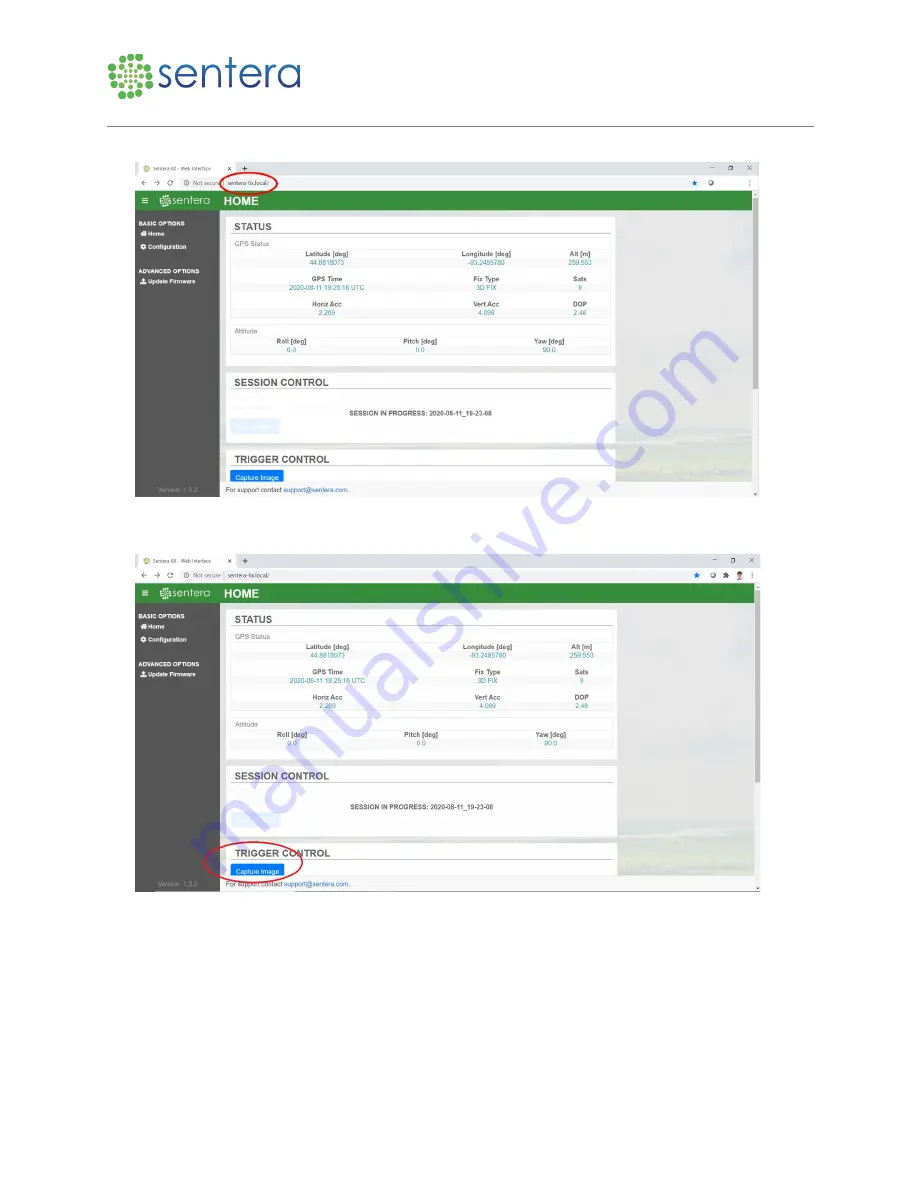
Figure 5: Enter URL 

2.


To ensure the camera is ready to go, click Capture Image, as shown in Figure 6. 


Figure 6: Capture Image Button 

3.


In File Explorer, navigate to \\sentera-6x.local\ and find the current session folder. Check to make 

sure the single image you captured is present, as shown in Figure 7. 

Содержание 6X

Страница 1: ...6X Multispectral Sensor Reflectance Panel User Guide Engineered in Minneapolis MN USA August 13 2020 Version 1 0 ...

Страница 2: ...t Products and Services Disclaimer This software and documentation may provide access to or information on content products and services from third parties Sentera is not responsible for and expressly disclaim all warranties of any kind with respect to third party content products and services Sentera will not be responsible for any loss costs or damages incurred due to your access to or use of th...

Страница 3: ...dated August 13 2020 844 SENTERA 2020 Sentera LLC All rights reserved Contents 1 Introduction 4 2 Reflectance Panel Overview 4 3 Capture Reflectance Panel Imagery 4 3 1 Connect to Laptop 4 3 2 Capture an Image 8 3 3 Capture Reflectance Panel Images 10 4 Support 13 5 Revision History 13 ...

Страница 4: ...used to convert imagery to reflectance values under different lighting conditions The process of converting imagery into reflectance values allows for time series comparisons of imagery because it normalizes the data for different lighting conditions Note Reflectance panel images should be captured pre flight but if you forget the images can be captured post flight also 3 Capture Reflectance Panel...

Страница 5: ...e 5 of 13 Updated August 13 2020 844 SENTERA 2020 Sentera LLC All rights reserved Figure 1 Attach Camera and ILS Sensor 2 Wait for the 6X and ILS sensor LED lights to turn green indicating a session has started and the sensor is ready to capture images as shown in Figure 2 ...

Страница 6: ...eflectance Panel User Guide www sentera com Page 6 of 13 Updated August 13 2020 844 SENTERA 2020 Sentera LLC All rights reserved Figure 2 Lights Turn Green 3 Plug the ethernet cable and adapter into the 6X as shown in Figure 3 ...

Страница 7: ...e Panel User Guide www sentera com Page 7 of 13 Updated August 13 2020 844 SENTERA 2020 Sentera LLC All rights reserved Figure 3 Ethernet Cable and Adapter 4 Plug the other end of the ethernet cable into your laptop as shown in Figure 4 ...

Страница 8: ... 2020 Sentera LLC All rights reserved Figure 4 Plug Ethernet into Laptop 3 2 Capture an Image To capture an image 1 Open a web browser on the laptop and navigate to the 6X Configuration page http sentera 6x local as shown in Figure 5 If that doesn t work try refreshing the page or try navigating to http 192 168 42 1 ...

Страница 9: ...Sentera LLC All rights reserved Figure 5 Enter URL 2 To ensure the camera is ready to go click Capture Image as shown in Figure 6 Figure 6 Capture Image Button 3 In File Explorer navigate to sentera 6x local and find the current session folder Check to make sure the single image you captured is present as shown in Figure 7 ...

Страница 10: ...e 7 Captured Image Location 4 Perform a compass calibration or other adjustments as necessary before recording reflectance panel images 3 3 Capture Reflectance Panel Images To record reflectance panel images 1 In a clear area open the reflectance panel only holding it by the edges and place it on a flat surface or the ground near the drone as shown in Figure 8 ...

Страница 11: ... www sentera com Page 11 of 13 Updated August 13 2020 844 SENTERA 2020 Sentera LLC All rights reserved Figure 8 Reflectance Panel 2 At the bottom of the browser page click Capture Reflectance Panel as shown in Figure 9 Figure 9 Capture Reflectance Panel ...

Страница 12: ...sed to in front or behind you when capturing the reflectance panel images 4 Quickly unplug the adapter end of the ethernet cable from the drone s sensor and lift the drone waist high and centered over the reflectance panel Ensure that your shadow does not cover the panel as shown in Figure 10 Figure 10 Hold Drone Above Panel 5 Watch the LED lights on the camera They will begin blinking green then ...

Страница 13: ...drone back on the ground at the launch location 9 Pack away the reflectance panel being sure to only handle it by the edges Note You may not need to repeat this process every time you power cycle the drone or do a new flight however for ease of use doing so will make sure the reflectance panel images are in the same folder as the flight data which makes it easier to share 10 Once the reflectance p...

Отзывы: