INSTALLATION REGULATIONS
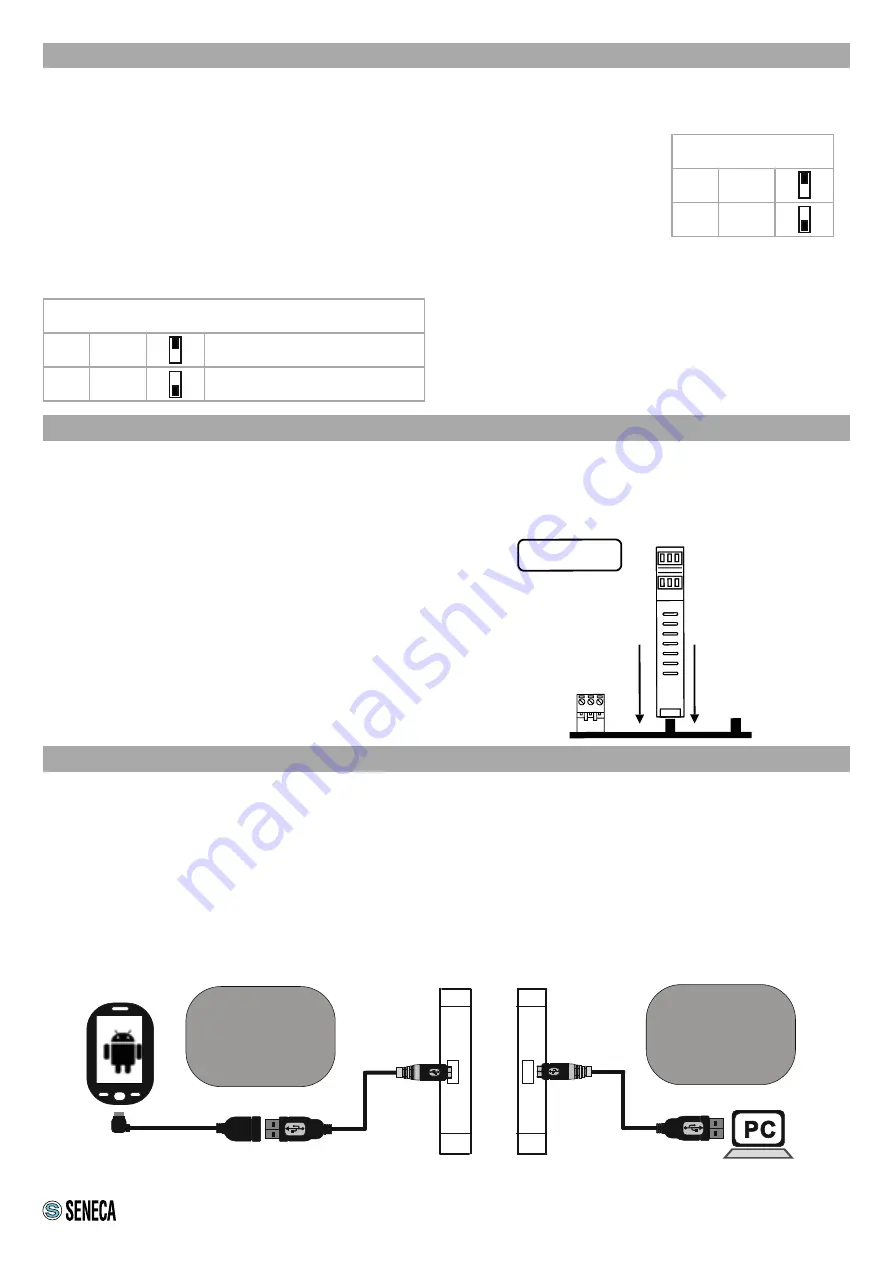
The module has been designed for vertical installation on a DIN 46277 rail. For optimal operation and long life,
adequate ventilation must be provided. Avoid positioning ducting or other objects that obstruct the ventilation slots.
Avoid mounting modules over heat-generating equipment. Installation in the bottom part of the electrical panel is
recommended.
Guida DIN
MODULO
Inserimento nella
guida DIN
Insertion in the DIN rail
As shown in figure:
1. Insert the IDC10 rear connector of the module on a
free slot of the DIN rail (the insertion is univocal since
the connectors are polarized).
2. To secure the module to the DIN rail, tighten the two
hooks on the sides of the IDC10 rear connector.
USB PORT
CU MICROO TG
-A
CU
MICROB
-A-
CU
MICROB
-A-
Configurazione
tramite APP
Android
Configurazione
tramite
software PC
The module is designed to exchange data according to the modes defined by the MODBUS protocol. It has a micro
USB connector on the front panel and can be configured using applications and/or software programs.
The USB serial port uses the following communication parameters:
115200,8,N,1
The USB communication port responds exactly like the serial ports, with the exception of the communication
parameters.
For more information, visit www.seneca.it/products/z-key-wifi
Check that the device in question is included in the list of products supported by the Easy Setup APP in the store.
4/8
SW2
1
ON
RS232 ACTIVATION
0
OFF
RS485 ACTIVATION
SETTING THE DIP-SWITCHES
RS232/RS485 SETTING:
RS232 or RS485 configuration on terminals 10-11-12 (serial port 2)
SETTINGS OF FACTORY PARAMETERS
This procedure returns the IP to the factory one (192.168.90.101) and the Web Server/
FTP server access credentials to user: admin and password: admin.
1. Turn the Z- KEY WIFI module off and set all eight SW1 DIP-switches ON.
2. Turn on the Z-KEY WIFI module and wait 10 seconds.
3. Turn the Z- KEY WIFI module off and set all eight SW1 DIP-switches OFF.
KEY
1
ON
0
OFF
-
-
Insertion in the
DIN rail
MODULE
DIN rail
Android APP
configuration
PC software
configuration
Содержание Z-KEY-WIFI
Страница 8: ......


