


Hoverprobe Refurbishment
5
3.
Hoverprobe Refurbishment instructions
4
1
3
6
5
7
8
9
10
11
12
13
14
16
19
17
18
20
22
21
23
34
24
15
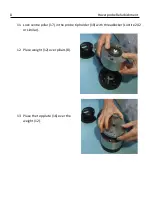
Countersinkholes up
Centralise on weight.
Press holder over bea ring top
in groove. Keep holder as fl at
as possibl e.
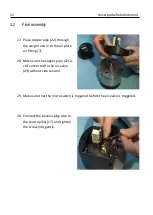
1.
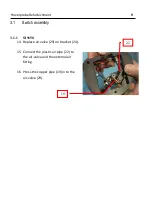
Disassemble the Hoverprobe down to the hoverplate (1).
In the process, cut the wires to the micro-switch just above the switch and
unscrew the old switch from the top plate (only necessary if Hoverprobe is of
old type SI9550)
2.
Place a new O ring (4) and
a new gasket (3) in place
on the new hoverplate (1).