background image

 INSTRUCTION MANUAL CODE  80385  REV 0   July/2019         


    (It can be modified without notice)           Page:  6

J

.P.  SELECTA s.a.u. 


Autovía A-2 Km 585.1 Abrera  08630  (Barcelona) España 

Tel (34) 93 770 08 77  Fax (34) 93 770 23 62

 e-mail: [email protected] -  http://www.jpselecta.es

MANTENIMIENTO

Antes de quitar las tapas laterales, desconectar el equipo de la 

red eléctrica.

La placa de control sólo debe ser manipulada por personal de 

mantenimiento debidamente autorizado.

LIMPIEZA

:

Para la limpieza de las diferentes piezas de los equipos, recomendamos 

los siguientes productos:

Limpieza del acero inoxidable: Alcohol.

Limpieza de carátulas y plásticos: Alcohol con algodón o con un paño 

no abrasivo.

GARANTÍA

Este  producto  tiene  una  garantía  de  un  año.  La  garantía  no  cubre 

los daños causados por un uso indebido o por causas ajenas a J.P. 

SELECTA, s.a.u.

Cualquier manipulación  del aparato por personal no autorizado por J.P. 

SELECTA, s.a.u. anula automáticamente los beneficios de la garantía.

PUESTA EN MARCHA

:

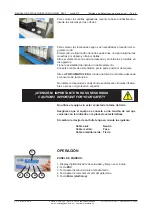
1. Aflojar los portavarillas y deslizar las varillas hasta la parte superior.

2. Colocar los vasos de precipitados.

3. Ajustar las varillas a la altura deseada.

4. Conectar el aparato a la red.

5. Accionar el interruptor general (

POWER

).

6. Para configurar los parámetros de velocidad, pulse la tecla (5) y 

seleccione la velocidad con las teclas (3) y (4). Esta se mostrará en 

el display digital (1).

7. Para configurar los parámetros de tiempo, pulse la tecla (5) y se

-

leccione la velocidad con las teclas (3) y (4). Esta se mostrará en el 

display digital (1).

8. Para poner en marcha, pulsar la tecla 

Start/Stop

 (5). La agitación 

finalizará al volver a pulsar la tecla 

Start/Stop

 (5) o cuando finalice 

el tiempo establecido.

9. Si procede, conectar la iluminación mediante el interruptor de luz 

(

LIGHT

)

Содержание 3000820

Страница 1: ...93 770 23 62 e mail selecta jpselecta es http www jpselecta es MANUAL DE INSTRUCCIONES CODIGO 80385 REV 0 Julio 2019 Sujetas a modificaciones sin previo aviso Pag 1 FLOCUMATIC 4 PLAZAS SAMPLES LED 300...

Страница 2: ...3 770 23 62 e mail selecta jpselecta es http www jpselecta es INDICE INFORMACI N GENERAL 3 LISTA DE EMBALAJE 3 ACCESORIOS 4 ESPECIFICACI N T CNICA 4 DESCRIPCI N DEL EQUIPO 4 INSTALACI N 4 OPERACI N 5...

Страница 3: ...isponibles a todos los usuarios de este 4 Cualquier duda puede ser aclarada contactando con el servicio t cnico de J P SELECTA s a u 5 ATENCI N NO SE ADMITIR NINGUNA M QUINA PARA RE PARAR QUE NO EST D...

Страница 4: ...s agitadoras con forma de pala fija son f cilmente intercam biables y regulables en altura INSTALACI N Instale el FLOCUMATIC LED sobre una superficie plana horizontal y estable Nivele el FLOCUMATIC LE...

Страница 5: ...ille los 4 tornillos en los agujeros Tiene la posibilidad de instalar un doble elemento Conecte el cable de alimentaci n por la parte posterior del equipo Sit e el FLOCUMATIC LED cerca de una toma de...

Страница 6: ...so indebido o por causas ajenas a J P SELECTA s a u Cualquier manipulaci n del aparato por personal no autorizado por J P SELECTA s a u anula autom ticamente los beneficios de la garant a PUESTA EN MA...

Страница 7: ...Abrera 08630 Barcelona Espa a Tel 34 93 770 08 77 Fax 34 93 770 23 62 e mail selecta jpselecta es http www jpselecta es MANUAL DE INSTRUCCIONES CODIGO 80385 REV 0 Julio 2019 Sujetas a modificaciones...

Страница 8: ...always be attached to the equipment and it must be available for all users 4 If you have any doubts or enquiries please contact your supplier or J P Selecta s technical service 5 IMPORTANT J P SELECTA...

Страница 9: ...ing to the characteristics plate indications Code No samples Speed regulation r p m Overall dimensions cm Total consump tion W Illumination power W Weight Kg Height Length Width 3000820 4 15 200 52 70...

Страница 10: ...ation proceed as follows a To adjust the height loosen the lateral screws slide the element to the desired height and tighten the screws again b To change the lighting angle loosen the lateral screws...

Страница 11: ...be shown on the digital display 1 8 To start the machine press the Start Stop key 5 Stirring will finish when pressing the Start Stop key 5 again or when finishing the set time 9 If necessary please...

Страница 12: ...80385 REV 0 July 2019 It can be modified without notice Page 12 J P SELECTA s a u Autov a A 2 Km 585 1 Abrera 08630 Barcelona Espa a Tel 34 93 770 08 77 Fax 34 93 770 23 62 e mail selecta jpselecta e...

Отзывы: