5
Installation
Before placing the printer in your chosen location, consider the following guidelines:
This printer should be placed on a normal table, printer stand or desk. Be sure that the surface
is level, to avoid an uneven load on the carriage as it operates.
Do not install the printer where it may be subjected to unsuitable conditions such as:
·Where there is excessive dust.
·Where it may be splattered with oil or metallic dust.
·Where it may be exposed to direct sunlight.
·Where it may be accidentally splashed with water.
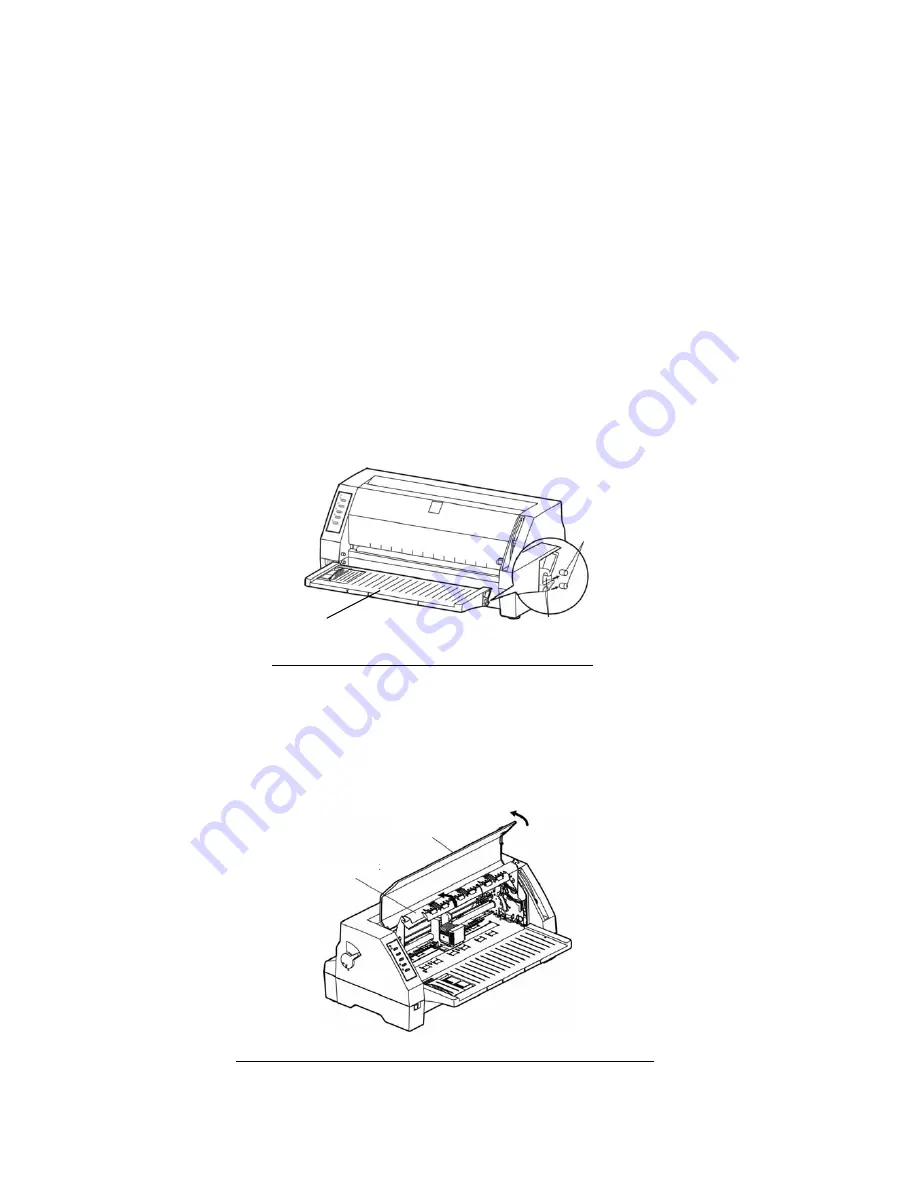
Installing the Front Table Extension Tray
Simply attach it to the front of printer by locating the support lugs in the slots at the
edge of the printer front feed.
Figure 2-4 Installing the front table extension tray
Installing and Replacing the Ribbon Cassette
1
Make sure the printer is turned OFF and disconnect the power cable.
2 Open the printer window cover by holding the side of the window cover as
shown in Figure 2-5.
Figure 2-5 Opening the window cover and the Sub friction roller
.
Window cover
Sub friction roller
Support lugs
Slots
Front table extension tray
Содержание FB 390
Страница 1: ...SEIKO Precision FB 390 Dot Matrix Flatbed Printer USER MANUAL ...
Страница 41: ......
Страница 42: ......
Страница 43: ......
Страница 44: ......
Страница 45: ......
Страница 46: ......
Страница 47: ......
Страница 48: ......
Страница 50: ...Company name SEIKO PRECISION Europe GmbH Address Hermann Buck Weg 9 D 22309 Hamburg Germany ...


