Seiki SE43FO01UK Скачать руководство пользователя страница 29

 27

Sleep Timer

Select a period of time after which the TV automatically 

switches to standby mode: Off/ 10/ 20/ 30/ 60/ 90/120 

/180/240 min.

Alternative:

 You may press the 

SLEEP

 button repeatedly 

to select the number of minutes directly. 

OSD Timer

This feature shows how long the On Screen Display will 

last. Choosing OSD Timer among off / 10 / 20 / 30 / 60 

seconds. 

Auto Standby

The unit will automatically switch to standby mode Off/3/4/5 

hours after the last time the remote control was used. If you 

want to operate the TV for a long period of time, turn off the 

auto standby function.

Time zone

This feature can only be used if Auto Sync is set to On. Use 

to select the desired time zone the TV is being used in.
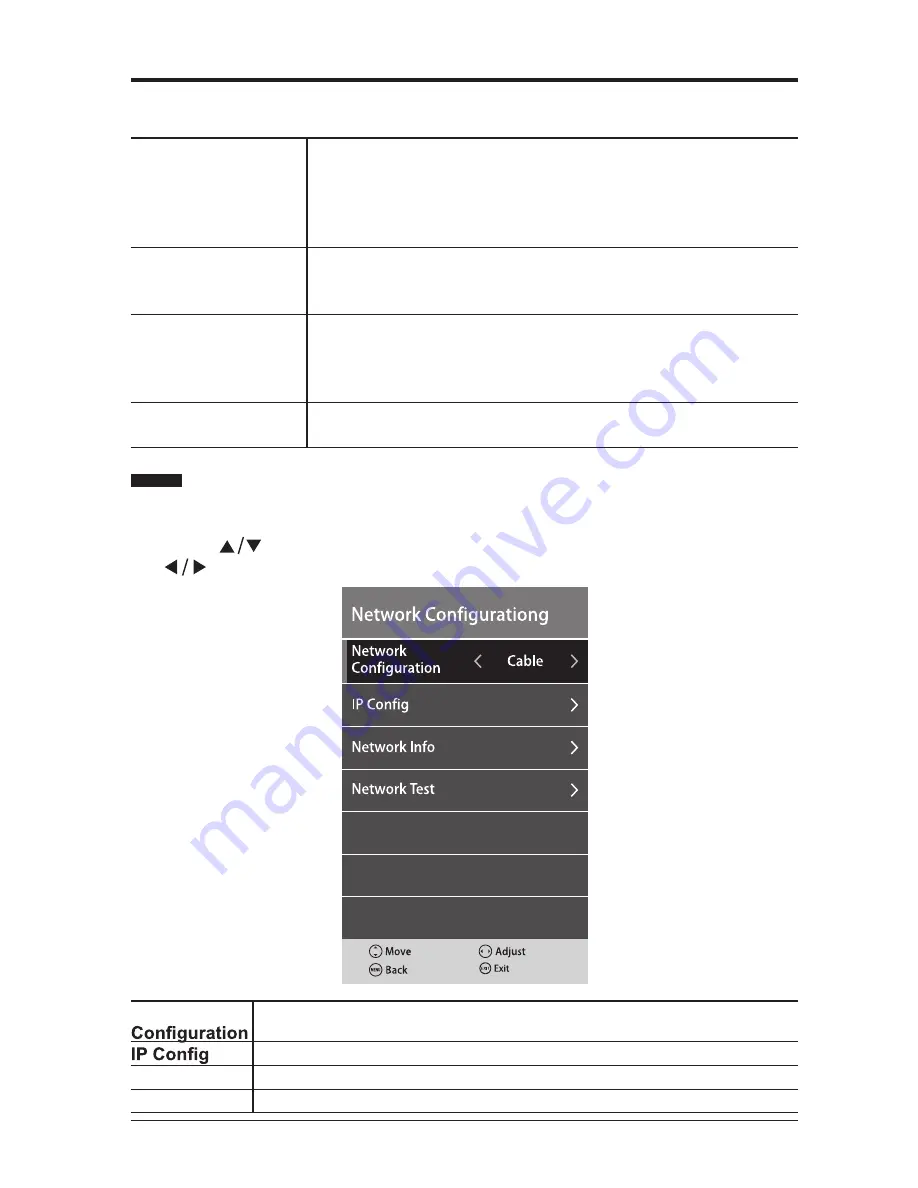
  Network

  Press 

MENU

 button to display the main menu and select 

NETWORK

. Then 

press 

OK

 to enter. 

  Press 


s

s

e

r

p


n

e

h

t


d

n

a


s

n

o

it

p

o


k

r

o

w

t

e

n


g

n

i

w

o

ll

o

f


e

h

t

 t

c

e

l

e

s


o

t


s

n

o

tt

u

b


 buttons to adjust each option’s setting.


Network 

this is preset to cable and cannot be changed.
select either Auto or manual setup mode. 

Network Info

to view all the relevant information concerning your network setup.

Network test

to check if your network is working.

CUSTOMIZING TV SETTINGS

Содержание SE43FO01UK

Страница 1: ...颜色 单色印刷 尺寸 140x210mm 材质 封面100g双胶纸 内页80g双胶纸 装订方式 骑马钉 印刷要求 Remarks Size 140x210mm Colour single color printing Material Cover 100 g offset paper Inside pages 80 g offset paper centre stitched ...

Страница 2: ...En USER MANUAL Read the User Manual carefully before using the TV and keep it for further reference SE43FO02UK ...

Страница 3: ...ecorded Programme 15 Picture 17 Sound 18 Channel 19 Lock 25 Time 26 Network 27 Setting 28 Entertainment 29 MultiMedia 29 Viewing Movies 30 Listening to Music 31 Viewing Photos 32 Files 33 Using the Features 34 Electronic Programme Guide EPG DTV mode 34 Viewing Teletext DTV mode 35 Time Shift Function DTV mode 36 Recording DTV Programmes DTV mode 38 Programme Timer DTV mode 39 Digital Reception 41 ...

Страница 4: ...er or sold with the apparatus When a cart is used use caution when moving the cart apparatus combination to avoid injury from tip over Unplug this apparatus during lightning storms or when unused for long periods of time Refer all servicing to qualified service personnel Servicing is required when the apparatus has been damaged in any way such as power supply cord or plug is damaged liquid has bee...

Страница 5: ...quid is spilled onto the set if the TV set accidentally exposed to water or moisture if anything accidentally penetrates the ventilation slots or if the TV set does not work normally Do not remove the safety covers There are no user serviceable parts inside Trying to service the only service this apparatus To avoid a battery leakage remove batteries from the remote control when the remote is not u...

Страница 6: ...4 Remote Control with Batteries TV Set PREPARATION What is Included User Manual User Manual Quick Start Guide Quick Start Guide MINI YPBPR cable MINI AV cable Base Stand Six Screws Stable Bracket ...

Страница 7: ...erent input signal sources 3 MENU Display the OSD on screen display menu 4 CH Press to select a channel 5 VOL Press to adjust the volume 6 POWER Indicator Illuminate blue when the TV is turned on Illuminate red when the TV is in standby mode 7 IR Infrared Receiver Receive IR signals from the remote control ...

Страница 8: ...socket with the RF coaxial cable 7 MINI YPBPR Connect to AV devices with component Y Pb Pr video and audio output sockets COMPONENT VIDEO share with AUDIO IN L R subscribe to 8 CI Slot Used to insert a CI card A CI card allows you to view all the channels that you subscribe to 9 MINI AV Connect to the composite VIDEO and AUDIO L R output sockets on external video devices 10 USB Port Connect to a U...

Страница 9: ...Lay the TV face down on a flat cushioned surface to avoid damaging or scratching 2 Untighten the 6 pcs screws holding the stand assembly and remove them 3 Attach the wall mount bracket to the TV using the mounting holes on the back of the TV Mount this TV according to the instructions included in the wall mount bracket 3 Remove 2 pcs ST3x12 screw from TV and fix the stable bracket to the TV using ...

Страница 10: ... DTV modes TIMESHIFT Press to turn the timeshift function on and off DTV mode 16 Press to skip to the beginning of the previous chapter or track USB DTV modes TTX Turn on and off the teletext function ATV DTV Modes 17 Press to skip to the beginning of the next chapter or track USB DTV modes HOLD Press to freeze a multi page Teletext passage on screen DTV AV SCART modes 18 Press to fast rewind USB ...

Страница 11: ...age or when you are not using the device for a long time To control the device using the remote control point the remote control at the device and then press the button with the required function The maximum range of the remote control is about 5 meters with a deviation of up to 30 from the perpendicular direction to the reception sensor of the remote control on the front side of the device The fa...

Страница 12: ...10 CONNECTING EXTERNAL DEVICES ...

Страница 13: ...tructions Connect the TV s mains cable into a wall socket and turn the power on if required In standby mode press the button on the main unit or on the remote control to turn the TV on The red LED indicator will turn blue The first time you turn your TV on it will go straight to the Welcome screen Press the EXIT button to go to the No Signal screen After pressing the OK button you will go to the F...

Страница 14: ...uttons to select between Home Mode or Store Mode If you select to change to store mode a warning screen will appear asking if you want to leave home mode If you do press the button to continue Note Store Mode should only be used if the TV is to be used as a display in a shop Once you have completed all of the preliminary settings use to select Auto Tuning to begin channel tuning Note You can skip ...

Страница 15: ...13 GENERAL OPERATION The Primary Region menu will now be displayed press the OK to confirm After pressing the OK button you will have completed the first time setup and your TV will be ready to use ...

Страница 16: ...unit or on the remote control to display the Input Source list Use the buttons to select the desired input source and press OK button to confirm Note Not all sources will be displayed when the menu is open You will need to use the buttons to scroll through the list to view all of the sources Selecting Input Source GENERAL OPERATION ...

Страница 17: ... message will pop up Use the buttons to select either Yes or No and press the OK button to confirm To open the MultiMedia menu whilst using the TV press the MENU button on the main unit or on the remote control Use the buttons to select the MultiMedia menu and press the OK button to confirm Use the buttons to select MOVIE and press OK button to enter Use the buttons to select _MSTPVR file then pre...

Страница 18: ... functions then press the OK when you have highlighted the one you require See over the page for a full list of the function bars list of functions CUSTOMIZING TV SETTINGS Play Press to play the programme Previous Press to watch the previous programme in the playlist Next Press to watch the next programme in the play list Pause Press to pause the programme Stop Press to play back of the programme ...

Страница 19: ...isplay a full list of recorded videos you can watch Info Shows information about the current programme you are watching Press the EXIT button to return to the previous menus Picture Press the MENU button on the main unit or on the remote control to display the main menu Use to navigate and select PICTURE and press OK to enter Press buttons to select the following picture options and then use butto...

Страница 20: ...p Choose between Standard Warm Cool The colour temp changes the amount of blue and red in your picture Aspect Ratio Choose to view the TV picture in various formats Choose from Auto 4 3 16 9 Zoom 1 Zoom 2 Subtitle Noise Reduction Choose between On or Off Noise reduction reduces the amount of picture noise speckles and lines etc of any connected device Sound Press the MENU button on the main unit o...

Страница 21: ...udio Description when it is sent along with the main audio from the broadcaster Use the buttons to choose between On or Off Set to Off You will receive normal broadcast sound from the TV s speakers Set to On You will receive the additional Audio Description sound channel if available AD Volume Use the to set the volume of the audio description Channel Press the MENU button on the main unit or on t...

Страница 22: ...ning submenu and press the OK button to enter Select the tuning type using the buttons you can choose between DTV ATV DTV Analogue TV Country is preset as UK and France Germany Italy Portugal Spain for optional CUSTOMIZING TV SETTINGS ...

Страница 23: ...ess the button to select Analogue Manual Tuning and press OK to enter Then use to select and adjust the desired option NOTE If the number about to save is the same as a channel that is already being used the manually adjusted channel will replace the existing channel Storage To 1 Select the storage location of the channel using the buttons System Select system among I DK L BG Current CH 1 Select t...

Страница 24: ... displayed on the screen The menu will close and the tuned channel will be shown on your TV screen Channel Edit Press MENU button to enter CHANNEL and then press OK to enter Use buttons to select Channel Edit and then press OK to enter Delete Use RED button to delete the programme from the EPG menu Move Use YELLOW button to move the channel to the desired position Skip Use BLUE button to skip the ...

Страница 25: ...le information Use the button to select CI Information from the menu then press the OK button to enter Press the buttons to select the items and press the OK button to confirm Press the EXIT button to close the menu The common interface allows the use of a Common Access Module to enable you to unscramble pay to view services These services are provided by other service providers than free to view ...

Страница 26: ... the mains Recorded List Use the button to select Recorded List from the menu and press the OK button to enter You can now see a full list of all of the programmes recorded on your USB drive You can interact with the list using the coloured buttons on the remote control NOTE If no USB device fitted to the TV a warning message No USB Detected will pop up Schedule List Use the button to select Sched...

Страница 27: ...ewing a DTV channel Lock Press MENU button to display the main menu and select LOCK Press OK button to enter Use the 0 9 buttons to input 4 digit password to enter the LOCK menu NOTE the default password is 0000 Press buttons to select the following lock options and then press buttons to adjust each option s setting System Lock Select to turn On or Off system lock Set Password Use 0 9 buttons to i...

Страница 28: ...e Clock can be enabled Use the buttons to navigate through the Clock menu and adjust settings Year Month Day Clock Off Time Automatically turn the TV off at a specified time and on Use the buttons to choose between Off Once Everyday Mon Fri Mon Sat Sat Sun Sun and set the hour and minutes On Time On Time use the buttons to choose between Off Once Everyday Mon Fri Mon Sat Sat Sun Sun Time Input Sou...

Страница 29: ...perate the TV for a long period of time turn off the auto standby function Time zone This feature can only be used if Auto Sync is set to On Use to select the desired time zone the TV is being used in Network Press MENU button to display the main menu and select NETWORK Then press OK to enter Press s s e r p n e h t d n a s n o i t p o k r o w t e n g n i w o l l o f e h t t c e l e s o t s n o t ...

Страница 30: ...e language The default subtitle language is set as English Hearing Impaired Allows you to set hearing impaired function On Off Blue Screen Allows the blue background to turn On Off during weak or no signal conditions PVR File System Allows you to select your preferences in the PVR File System Select Disk Allows to select the USB drive you wish to check Timeshift Size Allows you to select the amoun...

Страница 31: ...p to 15 CEC enabled devices that are connected through HDMI directly from one remote control Note CEC also allows for individual CEC enabled devices to command and control each other without your intervention MultiMedia Always switch the TV off before attaching a USB storage device to your TV Connect the USB storage device to one of the USB ports on your TV Press the button on the remote control o...

Страница 32: ...a press tubuttons to select Movies and then use OK button to enter 2 Then use buttons to navigate in the movie folder and then select the video file to enter Note when navigating in video file a thumbnail screen will appear 3 Press OK button or to view the desired video in full screen 4 Press the OK button or the DISPLAY button to display the function bar Press the buttons to select the function P...

Страница 33: ...the music folder and then select the audio file to enter Note when navigating in audio file a thumbnail screen will appear 3 Press OK or to enjoy the music in full screen 4 Press the OK button or the DISPLAY button to display the function bar Press the buttons to select the function Play Prev Next Pause Stop FB FF Repeat Playlist Info ENTERTAINMENT ...

Страница 34: ...en select the picture file to enter Note when navigating in picture file a thumbnail screen will appear 3 Press OK or to view the picture in full screen 4 Press the OK button or the DISPLAY button to display the function bar Press the buttons to select the function Play Prev Next Pause Stop Rotate Rotate Enlarge Shrink Move Repeat Music Off Playlist Info ENTERTAINMENT ...

Страница 35: ...o navigate in the files folder When you find the music or photo file you want to view and press the OK button to enter You will now be taken automatically to the photo or music browser 3 See the instructions for using the music and photo browsers on pages 31 and 32 in these instructions for more information ENTERTAINMENT ...

Страница 36: ...ok through all of the programmes available over the next 7 days by pressing the button to enter the programmes listings Use the buttons to scroll through the programmes a brief description will be shown in the window near the top of the window At the bottom of the window there are additional feature buttons you can use RED button Record Press this button to record programmes to a USB drive attache...

Страница 37: ...ation on the Teletext page and use buttons to select the programme you want to view in Home page How to use Fast Text At the bottom of the Teletext page there is a row of subject headings coloured in Red Green Yellow and Blue To access these pages simply press the correspondingly coloured button on the remote control SHORTCUTS in red press Red button to display the shortcuts and use to select the ...

Страница 38: ...programme you are watching The Time Shift symbol will be displayed on screen showing that Time Shift is working When you wish to resume watching the programme press the button on the remote control to show the PVR Time Shift progress bar Use the buttons to select the button on the progress bar then press the OK button to start watching the programme will be displayed on screen showing you are watc...

Страница 39: ...om using the 0 to 9 buttons on the remote control Backward Select to move the recording backwards in 10 sections of the recording Forward Select to move the recording forwards in 10 sections of the recording Shows the amount of playback time the recording has remaining Shows the amount of memory remaining on your USB drive Using the remote control with Time Shift You can use the buttons on the rem...

Страница 40: ...If you want to view the recording progress bar again press the button on the remote control When the programme has finished and you want to stop the recording simply press the button Note The recording will stop automatically once the USB drive is full IMPORTANT If you want to switch off your TV during recording press the power button on the remote control A dialogue box will appear on the screen ...

Страница 41: ...n the remote control to open the Electronic Programme Guide menu Use the buttons to select the programme you want to record then press the RED button to open the Record menu Use the buttons to change the settings in the menu if you need to Channel Use the buttons to select the channel you want to record Start Time Use the buttons to select either Minute Hour Month Date Use the buttons to adjust th...

Страница 42: ...owing all of your scheduled recordings You can use the colour buttons on the the remote control to change organise and delete items in the schedule list Press the EXIT button to close the menus Note When the preset time is reached the TV will start recording automatically If the recording starts when the TV is in standby mode the LED indicator on the front of the TV will flash blue USING THE FEATU...

Страница 43: ... UK models 170 862 MHz for EU models Transmission standard DVB T MPEG 2 Demodulation COFDM with 2K 8K FFT mode FEC all DVB modes Video MP ML PAL 4 3 16 9 Audio MPEG Layer I II 32 44 148kHz We apologise for any inconvenience caused by any minor inconsistencies in these instructions which may occur as a result of product improvements and development DIGITAL RECEPTION SUPPORTED FILE FORMATS ...

Страница 44: ...e power supply maybe interrupted Check if the sleep timer is set Check whether the Auto Standby is activated The video function does not work No picture No Sound Check whether the TV is switched on Try another channel The problem may be caused by the broadcaster Picture appears slowly after switching on This is normal the image is muted during the TV startup process Please contact your service cen...

Страница 45: ...djust clock phase or H V position Screen colour is unstable or show a single colour Check the signal cable Reinstall the PC video card Maintenance Early malfunction can be prevented Careful and regular cleaning can extend the amount of time you will have with your new TV Be sure to turn the power off and unplug the power cord before you begin any cleaning Do not use your TV in areas that are too h...

Страница 46: ...ese symbols should not be disposed of as general household waste If you want to dispose of the product or battery please consider the collection systems or facilities for appropriate recycling Notice The sign Pb below the symbol for batteries indicates that this battery contains lead Information for Users on Disposal of old Equipment and Batteries European Union only contains a small amount of mer...

Страница 47: ...ed to SEIKI or an authorized customer service provider in order to obtain the requested service Exclusions and Limitations This Warranty covers manufacturing defects in materials and workmanship encountered in the normal non commercial use of the Product and does not cover a damage or failure caused by or attributable to abuse misuse failure to follow instructions improper installation or maintena...

Страница 48: ...ngfang Global UK Co Ltd All rights reserved Printed in China WWW SEIKI COM Service Hotline 0 845 658 8290 IMPORTER ADDRESS UNIT 1 KENFIG INDUSTRIAL ESTATE PORT TALBOT SA13 2PE UNITED KINGDOM COMPANY NO 07230773 ...

Отзывы: