Rostock MAX v2 Assembly Guide
Repeat this task for the Y and Z axes. Make sure that while you're working with the belts that
the lower belt doesn't slip off the GT2 drive gear! You're better off catching and correcting it now than
having to take things apart to fix it later!
When you're done installing all three belts, trim the “bottom” belt end to about 1” outside the
clamp. This will give you enough to grab of you chose to tweak the belt tension at that point instead of
on the top idlers.
Adjusting the Belt Tension
The mounting for the top idler pulleys is designed to allow you to increase the tension on the
belts if necessary. Setting proper belt tension is more magic than science at this point, but the
following instructions will get you at a pretty good default tension.
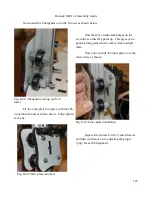
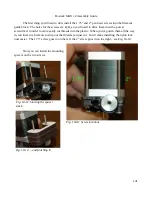
Insert a P1 screwdriver diagonally through the tower, under the idler bearing as shown below.
You want it positioned such that when you lift up on the handle, it will press against the bearing from
below and lift it.
133
Fig. 9-14: Screwdriver position.
Содержание Rostock MAX v2
Страница 25: ...Rostock MAX v2 Assembly Guide Melamine Parts Sheet 1 25 ...
Страница 26: ...Rostock MAX v2 Assembly Guide Melamine Parts Sheet 2 Melamine Parts Sheet 3 26 ...
Страница 27: ...Rostock MAX v2 Assembly Guide Melamine Parts Sheet 4 27 ...
Страница 171: ...Rostock MAX v2 Assembly Guide 171 Fig 14 8 Spool holder support installed ...


