


WARNING! Ensure that you have read, understood and apply Section 1 safety instructions.
IMPORTANT!
The use of extension leads to connect these compressors to the mains is not recommended as the resulting voltage
drop reduces motor, and therefore pump performance which may cause damage to your compressor.
NOTE:
Take care when selecting tools for use with the compressor. Air tool manufacturers normally express the volume of air required to
operate a tool in cubic feet per minute (cfm). This refers to free air delivered by the compressor (‘air out’) which varies according to the
pressure setting.
DO NOT
confuse this with the compressor displacement which is the air taken in by the compressor (‘air in’). ‘Air out’
is always less than ‘air in’ due to losses within the compressor.
5.1.
STARTING THE COMPRESSOR (SAC42055B.V2 & SAC52775B.V2)
5.1.1 Check that the on/oFF switch (fig.3.1) is oFF in the "o" position.
5.1.2 Plug mains lead into mains supply and start the compressor by moving the pressure switch to the on ‘I’ position.
Check the direction
of rotation (see arrow on belt cage) to confirm correct wiring of 3-phase plug.
5.1.3 When starting the compressor for the first time, leave it running with no air tools connected to the air outlet. Make sure that pressure in
the tank rises and that the compressor stops automatically when the maximum pressure value allowed - written on the plate and
shown on the gauge is achieved. The compressor will now operate automatically.
The pressure switch stops the motor when the maximum tank pressure is reached and restarts it when the pressure falls below the
minimum threshold - approx. 2bar (29psi) less than the maximum pressure.
5.1.4 Stop the compressor by moving the pressure switch (fig.3.1) to the "o" position. The compressed air inside the compressor
head will flow out, making the restart easier and preventing the motor from being damaged.
DO NOT,
other than in an emergency
,
stop the compressor by switching off the mains power, or by pulling the plug out, as the
pressure relief will not then operate and motor damage may result upon restart.
When the compressor runs correctly and is stopped correctly there will be:
(a) a whistle of compressed air when the motor stops.
(b) a protracted whistle (about 20-25 seconds) when the compressor starts with no pressure in the tank.
5.2.
STARTING THE COMPRESSOR
(
SAC62710B.V2)
5.2.1
Turn the pressure switch (fig.3.1) to the "I" position. Turn the Isolation Switch
(fig.4)
to the "I" position, power on is signalled by the
indicator light. Press the "on" button (fig.4) to start the compressor.
Check the direction of rotation (see arrow on belt cage) to
confirm correct wiring of 3-phase plug.
.
5.2.2
Stop the compressor by turning the Isolation Switch
(fig.4)
to the "0" position. The compressed air inside the compressor head
will flow out, making the restart easier and preventing the motor from being damaged.
DO NOT
other than in an emergency
,
stop the compressor by switching off the mains power as the pressure relief will not then
operate and motor damage may result upon restart.
NOTE:
a) If the motor does not cut in and out, but runs continuously when using an air appliance, the capacity of the compressor may be too
small for the equipment or tool.
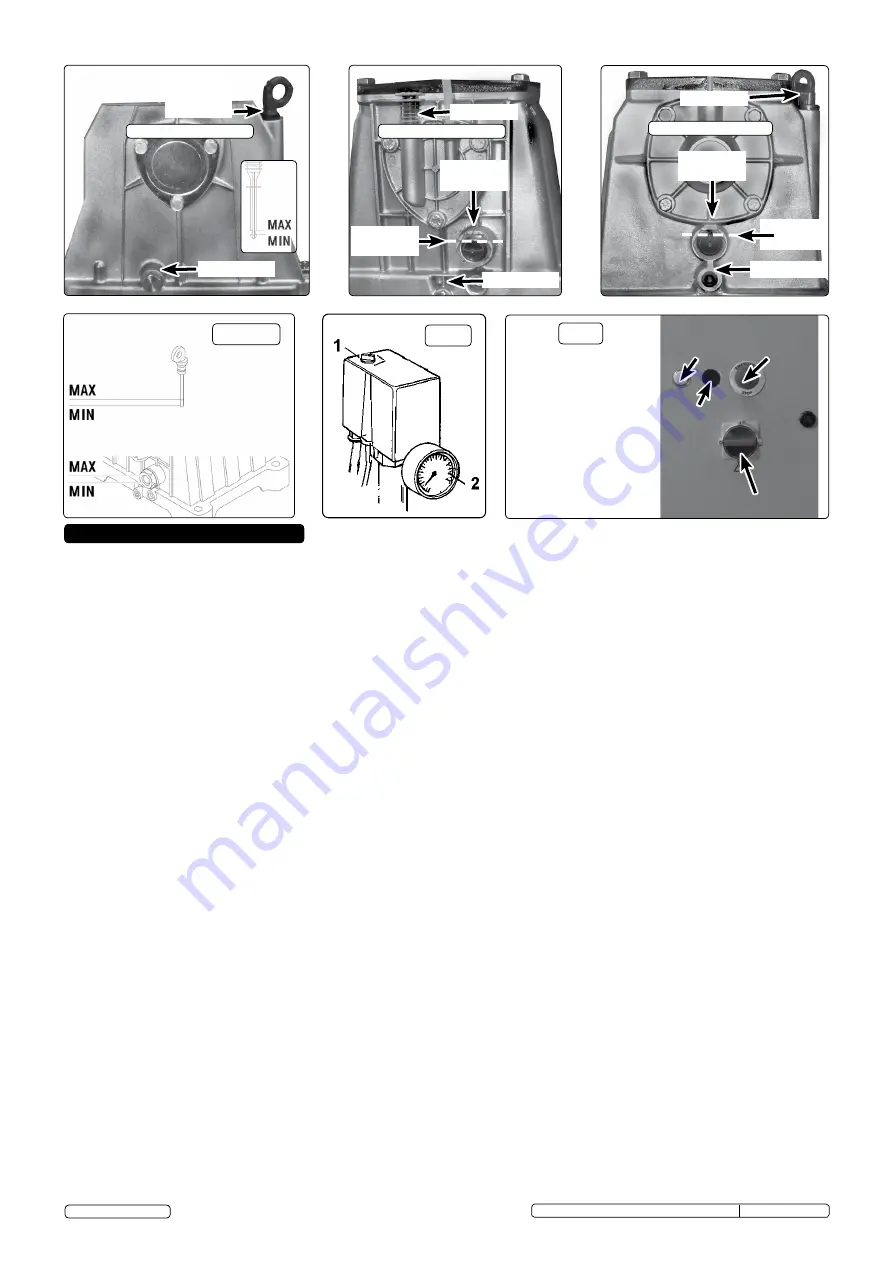
b) The gauge (fig.3.2) indicates the pressure inside the main tank,
NOT
the pressure supplied to the air equipment. Should the
pressure in the main tank exceed the pre-set switch maximum, a safety valve will activate.
WARNING!
for this reason dO NOT tamper with, or adjust, the switch or safety valve.
fig.3
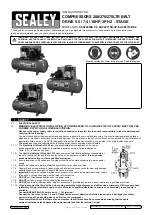
SAC52755B.V2 fig.2
oIl FIllER
dRAIn PluG
oIl lEVEl
WIndoW
CoRRECT
lEVEl
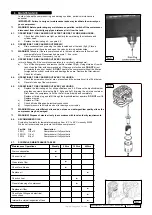
SAC42055B.V2 fig.2
oIl FIllER
PluS
dIPSTICK
dRAIn PluG
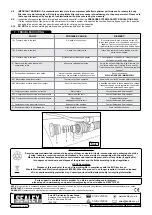
SAC62710B.V2 fig.2
oIl lEVEl
WIndoW
CoRRECT
lEVEl
oIl FIllER
dRAIn PluG
Isolation switch
Emergency
Stop
Power
light
on
Button
fig.4
SAC62710B.V2
Control Box
fig.2.a
5. OPERATION
SAC42055B.V2, SAC52775B.V2, SAC62710B.V2 Issue: 1 - 16/12/16
Original Language Version
© Jack Sealey limited


