Manual revision 017
Appendix III:
PDIM Disassembly/Reassembly
SBE 33
50
Appendix III: PDIM Electronics
Disassembly/Reassembly
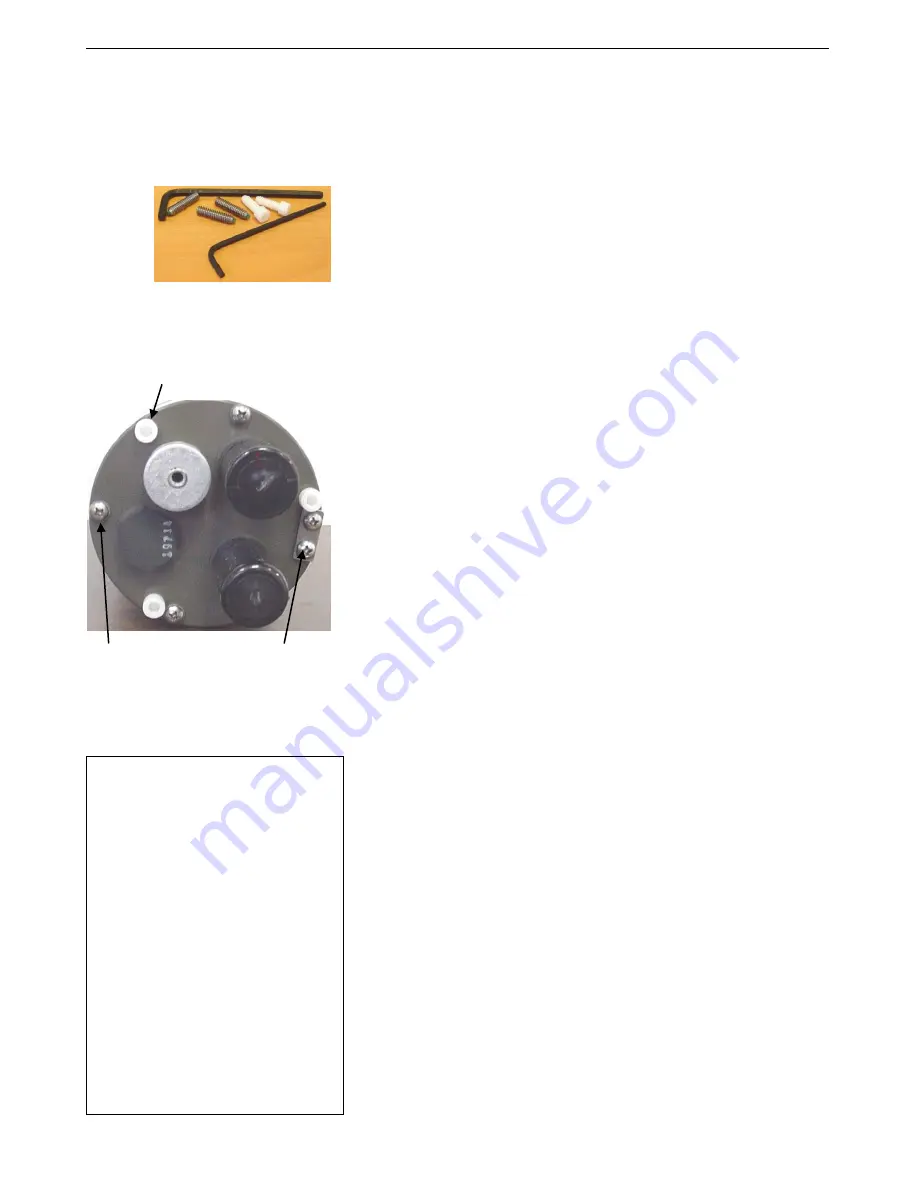
Sea-Bird provides a jackscrew kit with the PDIM, to assist in removal of the
connector end cap. The kit contains:
2 Allen wrenches
3 jackscrews
2 spare plastic socket hex-head screws
Disassembly
Remove the connector end cap and attached electronics PCB assembly
as follows:
1.
Wipe the outside of the end cap and housing dry, being careful to remove
any water at the seam between them.
2.
Remove the four Phillips-head screws securing the end cap to the housing.
3.
Remove the three plastic hex head screws from the end cap using the
larger Allen wrench. Insert the three jackscrews in these three holes in the
end cap. When you begin to feel resistance, use the smaller Allen wrench
to continue turning the screws. Turn each screw 1/2 turn at a time. As you
turn the jackscrews, the end cap will push away from the housing. When
the end cap is loosened, pull it and the PCB assembly out of the housing.
4.
Remove any water from the O-ring mating surfaces inside the housing
with a lint-free cloth or tissue.
5.
Disconnect the Molex connector connecting the PCB assembly to
the PDIM.
6.
Remove the jackscrews from the end cap.
Reassembly
1.
Remove any water from the O-ring and mating surfaces with a lint-free
cloth or tissue. Inspect the O-ring and mating surfaces for dirt, nicks, and
cuts. Clean or replace as necessary. Apply a light coat of O-ring lubricant
(Parker Super O Lube) to O-ring and mating surfaces.
2.
Reconnect the Molex connector to the PCB assembly.
3.
Carefully fit the PCB assembly into the housing, aligning the holes in the
end cap and housing.
4.
Reinstall the 4 Phillips-head screws to secure the end cap to the housing.
5.
Reinstall the 3 plastic hex head screws in the end cap.
Note:
Before delivery, a desiccant package is
inserted in the housing and the
electronics chamber is filled with dry
Argon gas. These measures help
prevent condensation. To ensure
proper functioning:
1.
Install a new desiccant bag each
time you open the electronics
chamber. If a new bag is not
available, see
Application Note 71:
Desiccant Use and Regeneration
(drying)
.
2.
If possible, dry gas backfill each
time you open the housing. If you
cannot, wait at least 24 hours
before redeploying, to allow the
desiccant to remove any moisture
from the housing.
Note that opening the battery
compartment does not affect
desiccation of the electronics.
This Phillips-head screw
does not connect to
housing - do not remove
Remove
4 Phillips-head
screws
Remove plastic hex head screws and
install jackscrews in their place
Jackscrew
kit


